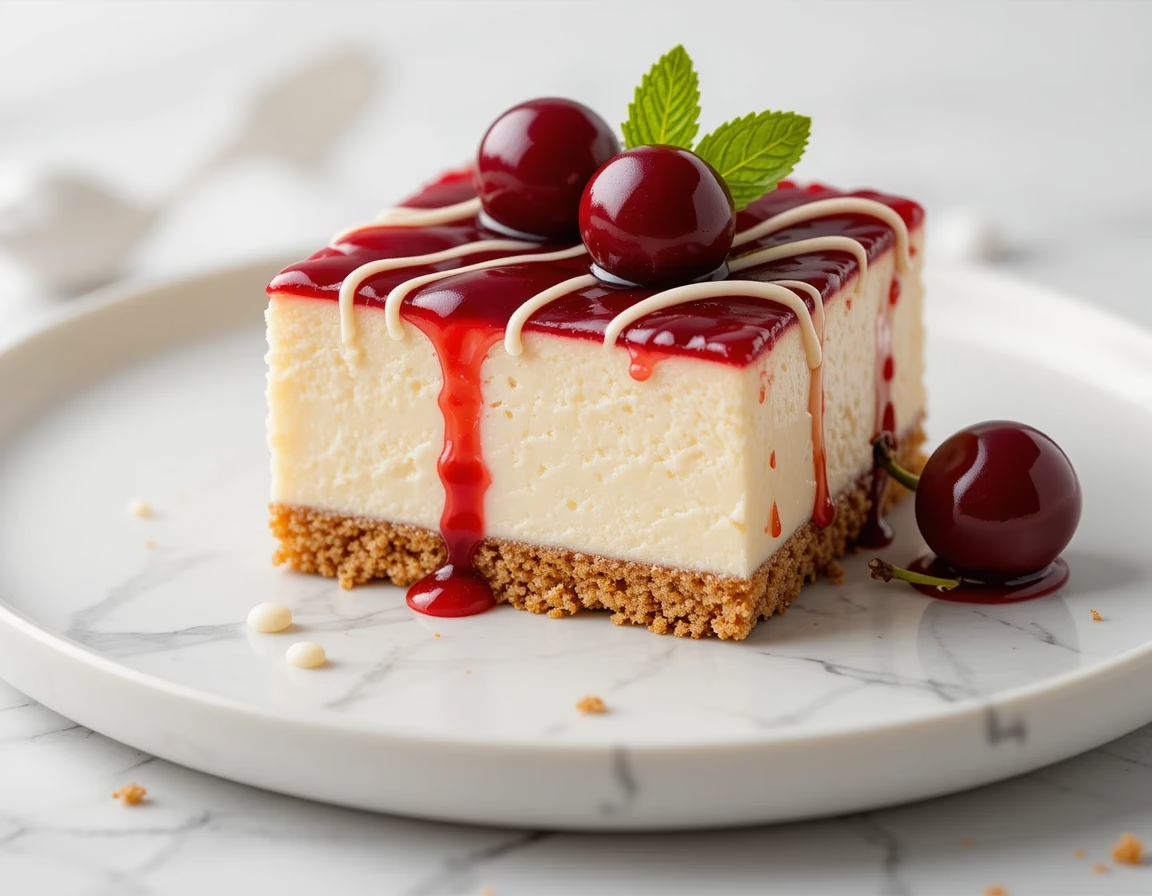
Irresistible No-Bake Cherry Cheesecake Bars
If you’re searching for a dessert that perfectly combines ease, elegance, and indulgence, look no further than No-Bake Cherry Cheesecake Bars. These delightful bars offer the classic flavors of rich cheesecake and sweet cherries, all layered on a buttery graham cracker crust—without ever needing to turn on your oven. In today’s fast-paced world, having a go-to dessert like No-Bake Cherry Cheesecake Bars is an absolute lifesaver, especially for busy home bakers, last-minute party planners, or anyone avoiding the heat of summertime baking.
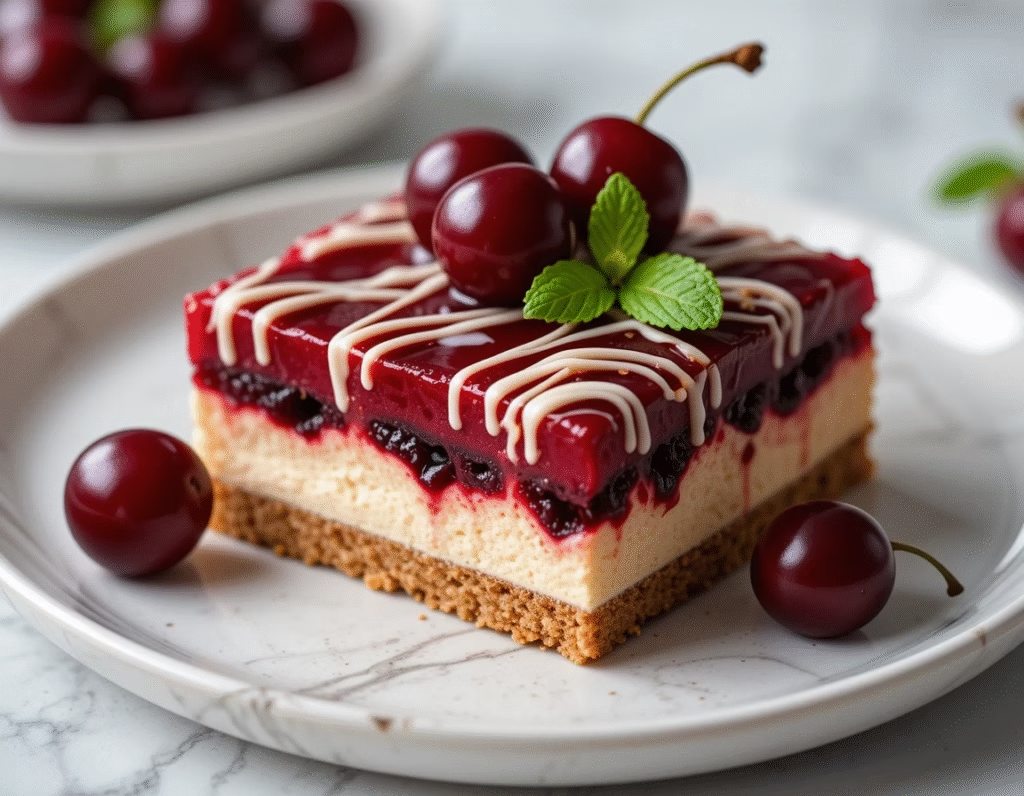
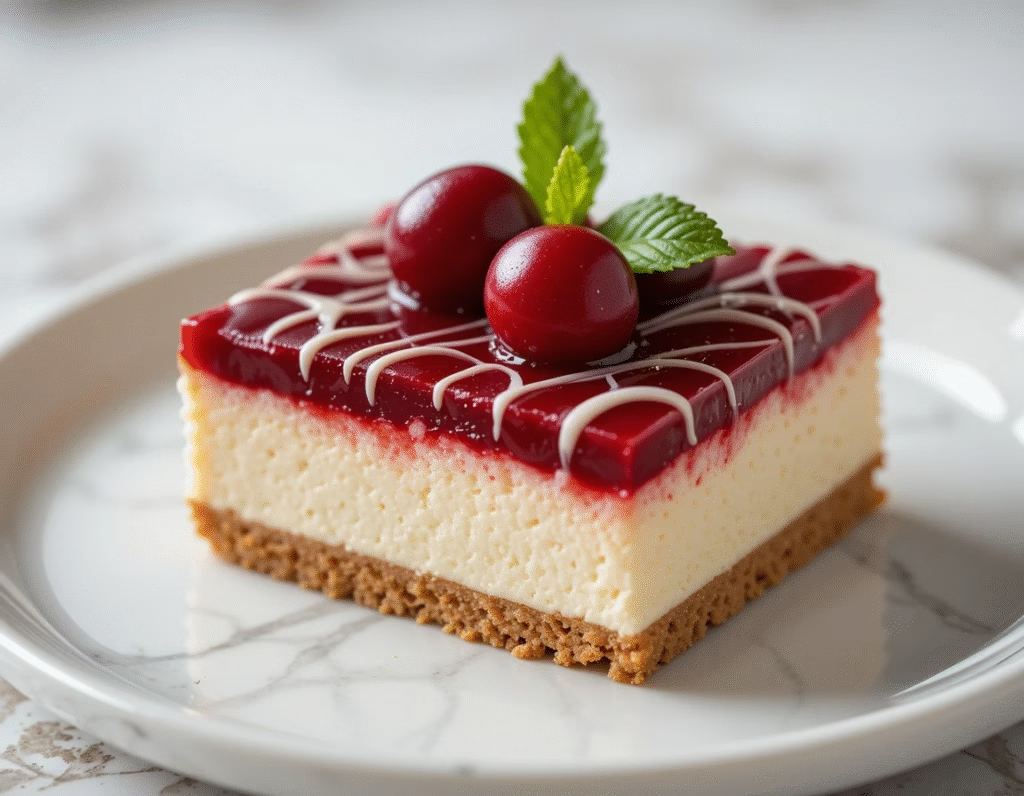
What sets No-Bake Cherry Cheesecake Bars apart is their irresistible blend of creamy, tangy, and sweet flavors. The cool, velvety cheesecake filling melts in your mouth, perfectly complemented by the juicy brightness of cherry topping. The buttery graham cracker base provides a satisfying crunch and acts as the perfect foundation for all the luscious layers. These bars are not just delicious—they’re visually stunning too, making them a showstopper for holiday gatherings, birthdays, potlucks, or even just a casual weekend treat.
One of the best things about No-Bake Cherry Cheesecake Bars is how incredibly simple they are to make. With minimal ingredients and basic steps, even novice bakers can achieve a professional-looking result. Plus, since they’re chilled rather than baked, there’s no worrying about cracked tops or overbaking—common challenges with traditional cheesecake. Whether you’re entertaining guests or indulging in a midnight snack, No-Bake Cherry Cheesecake Bars are sure to satisfy every craving with minimal effort.
These bars also cater to a variety of dietary needs and preferences. You can easily make No-Bake Cherry Cheesecake Bars gluten-free by using gluten-free graham crackers or make them slightly lighter with low-fat cream cheese and whipped topping. Their versatility doesn’t stop at ingredients either; you can top them with fresh cherries, homemade cherry sauce, or a high-quality store-bought cherry pie filling, depending on your time and taste.
In this blog post, we’ll explore everything you need to know about crafting the perfect No-Bake Cherry Cheesecake Bars. From a detailed list of what you’ll need, to step-by-step instructions, and expert tips to ensure success every time, this guide has it all. Whether it’s your first time making No-Bake Cherry Cheesecake Bars or you’re a longtime fan, you’re about to fall in love with this foolproof dessert all over again.
What You’ll Need
Creating the ultimate batch of No-Bake Cherry Cheesecake Bars starts with gathering the right ingredients and tools. The simplicity of this recipe is part of its charm, and with just a few pantry staples and some refrigerator time, you’ll be rewarded with a dessert that looks and tastes gourmet. Every layer of these No-Bake Cherry Cheesecake Bars plays a vital role—from the crunchy graham cracker crust to the creamy filling and vibrant cherry topping.
Here’s a complete breakdown of what you’ll need to make the best No-Bake Cherry Cheesecake Bars at home:
Ingredients:
For the crust:
- 2 cups graham cracker crumbs (use gluten-free if needed)
- ½ cup unsalted butter, melted
- 2 tablespoons granulated sugar
For the cheesecake filling:
- 16 oz (2 blocks) cream cheese, softened
- 1 cup powdered sugar
- 1 teaspoon pure vanilla extract
- 1½ cups whipped topping (like Cool Whip)
For the cherry topping:
- 1 can (21 oz) cherry pie filling (or homemade cherry compote if preferred)
These core ingredients are easy to find at any grocery store and come together quickly to form the magic of No-Bake Cherry Cheesecake Bars. If you’d like to take the flavor up a notch, consider adding a splash of lemon juice to the filling to brighten it up or a pinch of cinnamon to the crust for a hint of spice.
Tools You’ll Need:
- 9×9-inch baking dish (or 8×8 for thicker bars)
- Mixing bowls
- Electric hand mixer or stand mixer
- Spatula
- Measuring cups and spoons
- Parchment paper (optional, for easier removal)
When preparing No-Bake Cherry Cheesecake Bars, the quality of ingredients matters. Make sure to use full-fat cream cheese for the creamiest texture. The whipped topping gives the filling its light, airy feel and blends beautifully with the cream cheese to create a smooth, luscious bite.
Another important note: make sure your cream cheese is at room temperature before mixing. Cold cream cheese can lead to a lumpy filling, which detracts from the smooth finish that makes No-Bake Cherry Cheesecake Bars so appealing.
Now that you have everything ready, it’s time to move on to assembling your No-Bake Cherry Cheesecake Bars. With the ingredients in place and your tools ready, you’re all set to create a stunning no-bake dessert that will earn rave reviews.
How to Make (Include Full Measurements)
Making No-Bake Cherry Cheesecake Bars is as easy as it is rewarding. This fuss-free recipe doesn’t require an oven, water bath, or complicated steps. In fact, it’s a perfect option for beginners or anyone looking for a reliable, crowd-pleasing dessert. Each component of these No-Bake Cherry Cheesecake Bars—the buttery crust, creamy filling, and glossy cherry topping—comes together quickly, giving you a beautiful treat with minimal effort.
Below, you’ll find the complete list of ingredients and the step-by-step instructions to help you craft the ultimate batch of No-Bake Cherry Cheesecake Bars at home.
Ingredients:
For the crust:
- 2 cups graham cracker crumbs (about 16 full sheets, crushed)
- ½ cup unsalted butter, melted
- 2 tablespoons granulated sugar
For the filling:
- 16 oz cream cheese (2 blocks), softened to room temperature
- 1 cup powdered sugar
- 1 teaspoon pure vanilla extract
- 1½ cups whipped topping (like Cool Whip)
For the topping:
- 1 can (21 oz) cherry pie filling
Step-by-Step Instructions:
1. Prepare the crust:
Start by combining the graham cracker crumbs, melted butter, and granulated sugar in a medium mixing bowl. Stir until all the crumbs are moistened and the mixture resembles wet sand.
Press the crust mixture firmly into the bottom of a parchment-lined 9×9-inch square baking dish. Use the back of a spoon or the bottom of a measuring cup to compress the crust into an even layer. This step is essential for ensuring that your No-Bake Cherry Cheesecake Bars have a firm and structured base. Place the pan in the fridge while preparing the filling.
2. Make the cheesecake layer:
In a large bowl, beat the softened cream cheese with an electric hand mixer or stand mixer until completely smooth and creamy—this may take 2-3 minutes. Add the powdered sugar and vanilla extract, beating again until well combined.
Next, gently fold in the whipped topping using a spatula until everything is fully incorporated. The filling should be light, airy, and lump-free. This fluffy cream cheese mixture is the heart of your No-Bake Cherry Cheesecake Bars, offering that signature smooth bite in every square.
Remove the pan with the chilled crust from the fridge. Spread the cheesecake filling evenly over the crust, using a spatula to smooth the surface. Try to make the layer as even as possible for a polished finish.
3. Add the cherry topping:
Spoon the cherry pie filling evenly over the cheesecake layer, gently spreading it with a spatula. Make sure to cover every inch—after all, the cherry topping is what gives No-Bake Cherry Cheesecake Bars their juicy, eye-catching appeal.
4. Chill to set:
Cover the pan with plastic wrap or foil and refrigerate for at least 4 hours, or overnight for best results. Chilling allows the layers to set firmly so your No-Bake Cherry Cheesecake Bars can be cleanly sliced and beautifully served.
When ready to serve, lift the dessert out of the pan using the parchment paper edges (if used) and cut into bars. Clean your knife between cuts for the neatest presentation.
New to cake baking? Start with our beginner-friendly Fresh Raspberry Vanilla Mousse.
Serving and Storage Tips
One of the best things about No-Bake Cherry Cheesecake Bars is how easy they are to serve and store. Whether you’re making them for a family gathering, a potluck party, or as a weekly sweet indulgence, these bars are not only delicious but incredibly convenient. Knowing how to properly cut, serve, and store your No-Bake Cherry Cheesecake Bars ensures the best texture and taste every time you enjoy them.
Serving Tips:
When it comes to serving No-Bake Cherry Cheesecake Bars, presentation is everything. After chilling, use a sharp knife to slice the dessert into 9 large bars or 16 smaller squares for bite-sized portions. For cleaner slices, dip your knife into warm water and wipe it dry between each cut. This helps maintain the integrity of the layers—especially the creamy filling and glossy cherry topping.
No-Bake Cherry Cheesecake Bars are best served chilled straight from the fridge. They’re ideal for warm-weather events since their cool, refreshing texture makes them a crowd favorite on hot days. Serve them on a dessert platter garnished with a dollop of whipped cream or a sprinkle of lemon zest for added visual appeal.
For fancier occasions, consider using mini dessert cups or glass jars to layer individual portions of No-Bake Cherry Cheesecake Bars. It’s the same great flavor with an elegant twist—perfect for bridal showers, baby showers, or dinner parties.
Storage Tips:
These bars store beautifully, making them a perfect make-ahead dessert. To store No-Bake Cherry Cheesecake Bars, cover them tightly with plastic wrap or transfer them to an airtight container. Keep them in the refrigerator, where they will stay fresh for up to 5 days.
If you plan to make No-Bake Cherry Cheesecake Bars in advance, it’s best to wait to add the cherry topping until a few hours before serving. This prevents the topping from bleeding too much into the cheesecake layer, preserving the visual contrast and texture.
Freezing is also an option. To freeze No-Bake Cherry Cheesecake Bars, slice them into individual portions, wrap each bar tightly in plastic wrap, then place in a freezer-safe bag or container. They can be stored in the freezer for up to 2 months. Thaw overnight in the refrigerator before serving for best results.
These storage and serving strategies not only extend the life of your dessert but also maintain the creamy texture and sweet cherry flavor that make No-Bake Cherry Cheesecake Bars so irresistible. Having a chilled tray of these treats on hand means you’re always just moments away from a delicious, fuss-free dessert experience.
Mistakes to Avoid
Even though No-Bake Cherry Cheesecake Bars are known for their ease and simplicity, a few common missteps can affect the final texture, structure, and overall taste. Whether you’re new to making no-bake desserts or you’ve made these bars before, understanding what not to do will help you achieve the perfect results every single time.
1. Using Cold Cream Cheese
One of the most common mistakes when making No-Bake Cherry Cheesecake Bars is starting with cold cream cheese. Cold cream cheese doesn’t blend well and can leave lumps in the filling, creating an unpleasant texture. Always allow your cream cheese to come to room temperature before mixing. It should feel soft to the touch and easily yield under pressure.
2. Skipping the Chill Time
Impatience can ruin No-Bake Cherry Cheesecake Bars. These bars rely on chill time to set properly. Cutting them too soon will cause the filling to ooze and collapse. For best results, refrigerate the bars for at least 4 hours, but preferably overnight. This ensures clean cuts and firm layers.
3. Not Compacting the Crust
When pressing your graham cracker mixture into the pan, it’s important to press it down firmly. A loose crust will fall apart when cutting or serving your No-Bake Cherry Cheesecake Bars. Use a measuring cup or glass with a flat bottom to compact it evenly and firmly into the pan.
4. Overmixing the Whipped Topping
While it’s important to fully incorporate the whipped topping into the cream cheese mixture, overmixing can deflate it and cause the filling to lose its airy texture. Fold it in gently to maintain the light and fluffy consistency that defines No-Bake Cherry Cheesecake Bars.
5. Using Low-Quality Cherry Topping
The cherry topping is one of the stars of No-Bake Cherry Cheesecake Bars, so don’t skimp on quality. A bland or overly syrupy topping can throw off the flavor balance. Look for a brand with whole cherries and a bright, vibrant color—or make your own from scratch for maximum impact.
6. Not Using Parchment Paper or Lining the Pan
Failing to line your baking dish can make removing the bars a nightmare. Always use parchment paper with an overhang on two sides to lift your No-Bake Cherry Cheesecake Bars out cleanly. This small step makes cutting and presentation much easier.
Avoiding these mistakes will help ensure that your No-Bake Cherry Cheesecake Bars are creamy, cohesive, and irresistibly good every single time you make them.
Tips and Tricks
Mastering the art of No-Bake Cherry Cheesecake Bars comes down to understanding the subtle nuances that take your dessert from good to exceptional. While the recipe is relatively simple, a few strategic tips and tricks can make a huge difference in the outcome. Whether you’re a beginner or an experienced dessert enthusiast, these expert-level suggestions will help you perfect your No-Bake Cherry Cheesecake Bars every single time.
1. Room Temperature Ingredients Are Key
To ensure your No-Bake Cherry Cheesecake Bars come out silky smooth, it’s essential to use room temperature ingredients. Cold cream cheese can clump and resist blending, while cold whipped topping won’t fold evenly. Letting everything sit out for 30–45 minutes before starting will lead to a flawless, lump-free filling.
2. Add a Pinch of Salt
A pinch of salt might sound odd in a sweet treat like No-Bake Cherry Cheesecake Bars, but it enhances the richness of the cream cheese and balances the sweetness of the cherry topping. Salt is a flavor enhancer, and even a small amount can transform your bars from flat to flavor-packed.
3. Customize the Crust
Traditional graham cracker crust is a classic, but you can experiment to give your No-Bake Cherry Cheesecake Bars a twist. Try vanilla wafers, chocolate graham crackers, or even crushed shortbread cookies for a different flavor profile that still complements the cherry cheesecake filling.
4. Make It Ahead
Because No-Bake Cherry Cheesecake Bars require several hours to chill, they’re the perfect make-ahead dessert. Prepare them the day before a party or gathering so you’re not stressed about dessert on the day of the event. Plus, they taste even better after the flavors have had time to meld.
5. Cut with a Hot Knife
For clean, professional-looking slices of No-Bake Cherry Cheesecake Bars, dip your knife in hot water and wipe it dry before each cut. This minimizes drag and helps you achieve sharp edges without smudging the cherry topping or smearing the creamy filling.
6. Use Stabilized Whipped Cream (Optional)
If you’re not using store-bought whipped topping, consider stabilizing homemade whipped cream with a bit of gelatin or cornstarch. This ensures your No-Bake Cherry Cheesecake Bars keep their shape longer, especially if they’ll be sitting out at room temperature for a while.
7. Add Zest or Extracts for Flavor Boosts
Want to elevate your No-Bake Cherry Cheesecake Bars with subtle complexity? A dash of almond extract, a hint of lemon zest, or even vanilla bean paste can give your bars a sophisticated edge without overwhelming the cherry and cream cheese flavors.
These tricks may be small, but when combined, they elevate your No-Bake Cherry Cheesecake Bars into a standout dessert that will impress every guest and family member lucky enough to get a slice.

Suggestions
Creating No-Bake Cherry Cheesecake Bars offers more than just a classic treat—it opens a world of creative possibilities. These bars are a perfect canvas for experimenting with flavors, presentations, and seasonal touches. Whether you’re serving them for a holiday gathering, family cookout, or quiet weekend at home, these suggestions will help you personalize your No-Bake Cherry Cheesecake Bars in delightful ways.
1. Switch Up the Fruit Topping
While cherries are the star in traditional No-Bake Cherry Cheesecake Bars, that doesn’t mean you’re limited to just one option. Swap the cherry topping with blueberry, raspberry, strawberry, or even a mixed berry blend. You can use canned fruit topping for convenience or go the extra step and make your own fresh fruit compote. Each version offers a new twist while maintaining the creamy richness that makes No-Bake Cherry Cheesecake Bars so irresistible.
2. Try a Chocolate Drizzle
For an extra decadent finish, add a chocolate drizzle over your No-Bake Cherry Cheesecake Bars. Dark chocolate balances the sweetness of the cherries and cream cheese, while white chocolate can add a sophisticated flair. Melt the chocolate, drizzle it with a spoon or piping bag, and chill until set. The combination of cherry, cheesecake, and chocolate is a match made in dessert heaven.
3. Create Mini Versions
If you’re hosting a party or potluck, consider making individual No-Bake Cherry Cheesecake Bars in mini cupcake liners or ramekins. They’re adorable, easy to serve, and eliminate the need to cut slices. Guests love bite-sized treats, and it gives you the opportunity to offer a variety of toppings or garnishes.
4. Serve in Jars
Another fun presentation for No-Bake Cherry Cheesecake Bars is to layer the crust, filling, and topping in mason jars. These are great for picnics or gifts, and they’re just as delicious as the traditional version. Plus, jars make portion control easier and add a rustic, trendy look.
5. Add a Crunchy Layer
Incorporate crushed nuts or chocolate chips into the graham cracker crust or sprinkle them between the filling and cherry layer. The added crunch gives your No-Bake Cherry Cheesecake Bars texture and interest without taking away from the creamy and fruity harmony of the dish.
6. Make It a Holiday Dessert
With the right garnish, No-Bake Cherry Cheesecake Bars can be dressed up for any holiday. Add crushed peppermint candies for Christmas, pastel sprinkles for Easter, or edible flowers for spring events. A simple change in decoration gives these bars versatility for every season and celebration.
7. Pair With Beverages
Pair your No-Bake Cherry Cheesecake Bars with complementary drinks like iced tea, coffee, or a chilled fruit punch. For brunches, try serving them with a light sparkling apple cider or flavored lemonade to elevate the overall experience.
No matter how you choose to customize them, No-Bake Cherry Cheesecake Bars remain a versatile and crowd-pleasing dessert. Their simplicity is their strength, and with a little imagination, you can make each batch feel completely fresh and new.
FAQ
Here are answers to the most common questions people have about making No-Bake Cherry Cheesecake Bars. Whether you’re a beginner or a seasoned baker, this section will help troubleshoot, explain, and enhance your understanding of this beloved dessert.
1. Can I Use Homemade Cherry Topping?
Absolutely. While store-bought cherry pie filling is convenient, making your own topping can give your No-Bake Cherry Cheesecake Bars a fresher, more vibrant flavor. Just combine pitted cherries, sugar, cornstarch, lemon juice, and water in a saucepan and cook until thickened. Cool before adding to the bars.
2. Do I Have to Use Graham Crackers?
No, graham crackers are just one option. You can use crushed digestive biscuits, shortbread cookies, vanilla wafers, or even a gluten-free alternative. The key is to maintain the crust’s stability to support your No-Bake Cherry Cheesecake Bars.
3. Can I Make These Bars Ahead of Time?
Yes! No-Bake Cherry Cheesecake Bars are perfect for making in advance. In fact, they benefit from an overnight chill to fully set. Just keep them covered in the fridge and wait to add the topping until just before serving if you want to keep it especially vibrant.
4. How Long Do These Bars Last?
Properly stored in the refrigerator in an airtight container, No-Bake Cherry Cheesecake Bars last 4–5 days. However, the crust may start to soften over time, so they’re best enjoyed within the first couple of days after preparation.
5. Can I Freeze Them?
You can freeze No-Bake Cherry Cheesecake Bars, but it’s best to freeze them without the cherry topping. Wrap them tightly and store for up to one month. When ready to serve, thaw in the fridge overnight and then add the cherry topping before slicing and serving.
6. Can I Use Whipped Cream Instead of Whipped Topping?
Yes, homemade whipped cream can be used in place of whipped topping in your No-Bake Cherry Cheesecake Bars, but be sure to stabilize it with a bit of gelatin or cornstarch to prevent deflating. Stabilized whipped cream maintains its structure and creates a similar texture.
7. What’s the Best Way to Slice These Bars Neatly?
To get clean slices of your No-Bake Cherry Cheesecake Bars, use a sharp knife dipped in hot water and wiped clean between cuts. This method keeps the layers intact and prevents the topping from smearing across the bars.
Conclusion
No-Bake Cherry Cheesecake Bars are more than just a dessert—they’re a no-fuss solution to satisfy your sweet cravings with elegance and ease. From the buttery graham cracker crust to the luscious, creamy cheesecake center and vibrant cherry topping, these bars deliver the perfect balance of textures and flavors. Whether you’re a busy parent needing a quick treat, a beginner in the kitchen, or simply someone who adores a classic cherry dessert, No-Bake Cherry Cheesecake Bars deserve a permanent place in your recipe box.
The beauty of No-Bake Cherry Cheesecake Bars lies not only in their simplicity but in their versatility. You can make them ahead, serve them at room temperature or chilled, and dress them up or down depending on the occasion. They work equally well for potlucks, summer barbecues, family dinners, or even as a holiday favorite. Plus, they require no oven, which is a huge bonus during warmer months when turning on the oven is the last thing you want to do.
Throughout this guide, we’ve walked you through the essential tools, full ingredient list with exact measurements, step-by-step directions, and storage strategies for making the perfect No-Bake Cherry Cheesecake Bars. We’ve also explored common pitfalls, creative suggestions for customization, and expert-level tips and tricks to elevate your dessert-making game. Whether you’re keeping things traditional or putting your own spin on it with seasonal fruit, flavor layers, or festive decorations, your No-Bake Cherry Cheesecake Bars will always stand out.
Remember, the key to truly excellent No-Bake Cherry Cheesecake Bars is patience—allowing enough time for the bars to set in the fridge ensures the layers stay distinct and the flavor melds beautifully. Using quality ingredients, measuring carefully, and following the order of steps all contribute to that signature smoothness and crunch we love in each bite.
If you’re looking for a reliable go-to dessert that never disappoints and always impresses, look no further than No-Bake Cherry Cheesecake Bars. They check all the boxes: simple, satisfying, adaptable, and visually stunning. Once you’ve made them a few times, you’ll find yourself returning to this recipe whenever the occasion calls for something sweet, nostalgic, and completely delightful.
Thank you for following along on this delicious journey! Now it’s your turn—grab your mixing bowl, whip up a batch of No-Bake Cherry Cheesecake Bars, and enjoy the sweet rewards. Don’t forget to share with friends and family—they won’t believe you didn’t bake a thing!