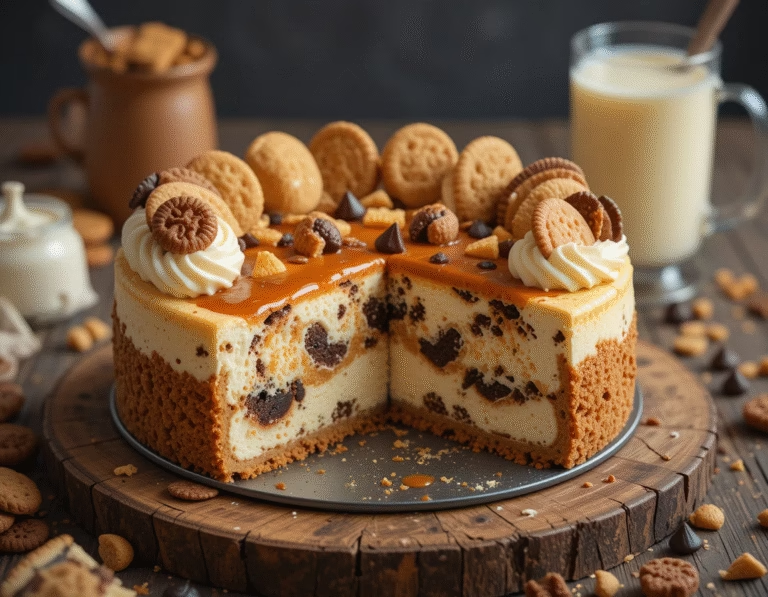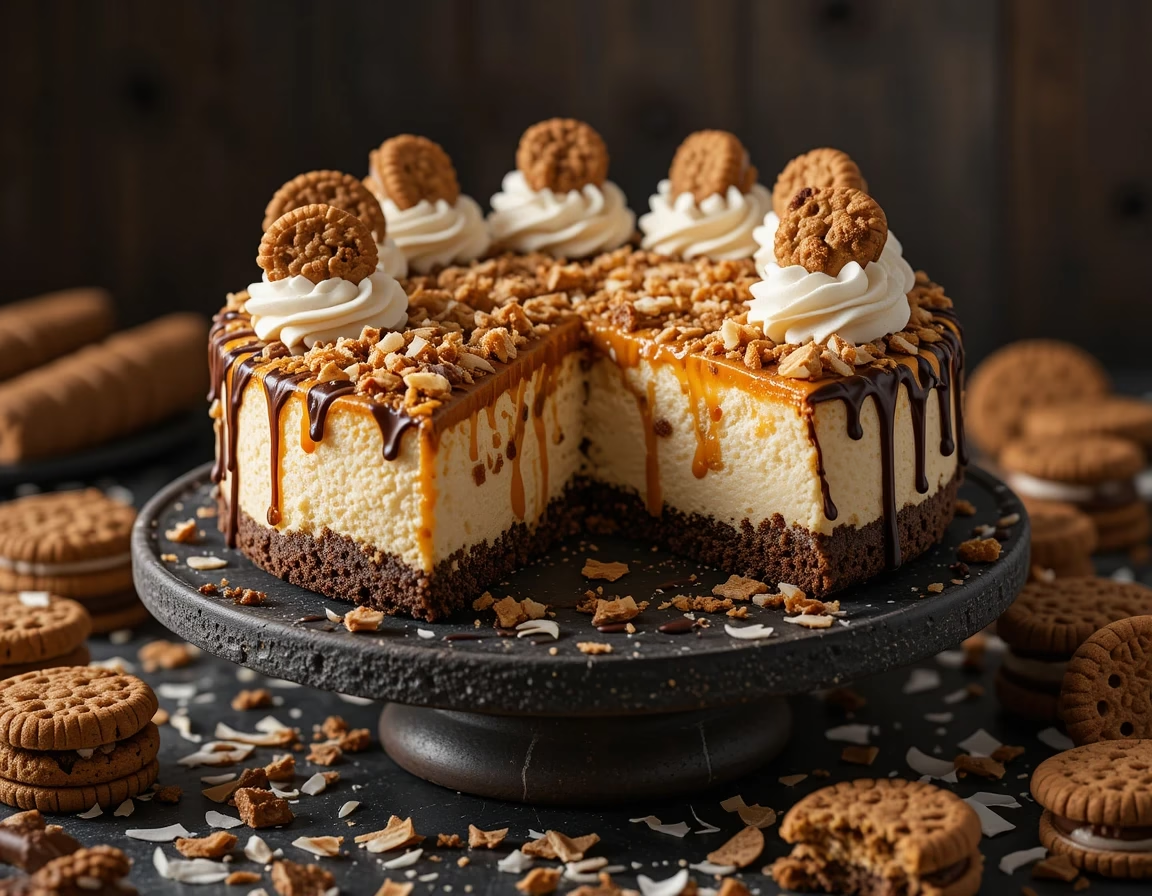
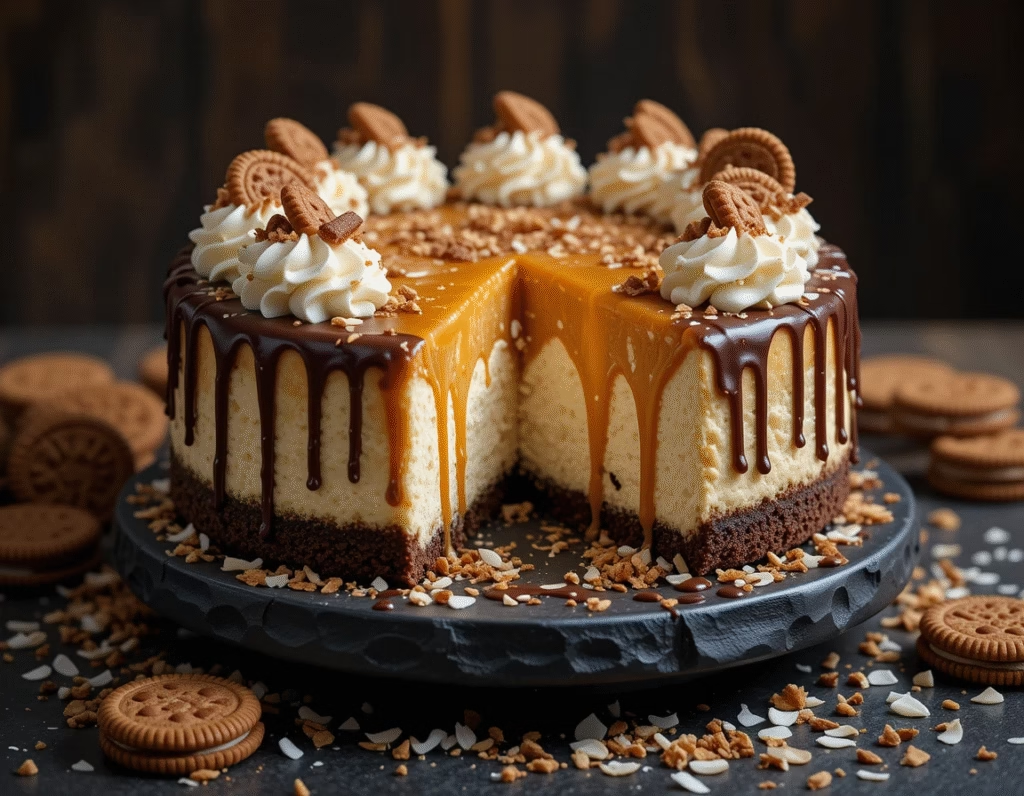
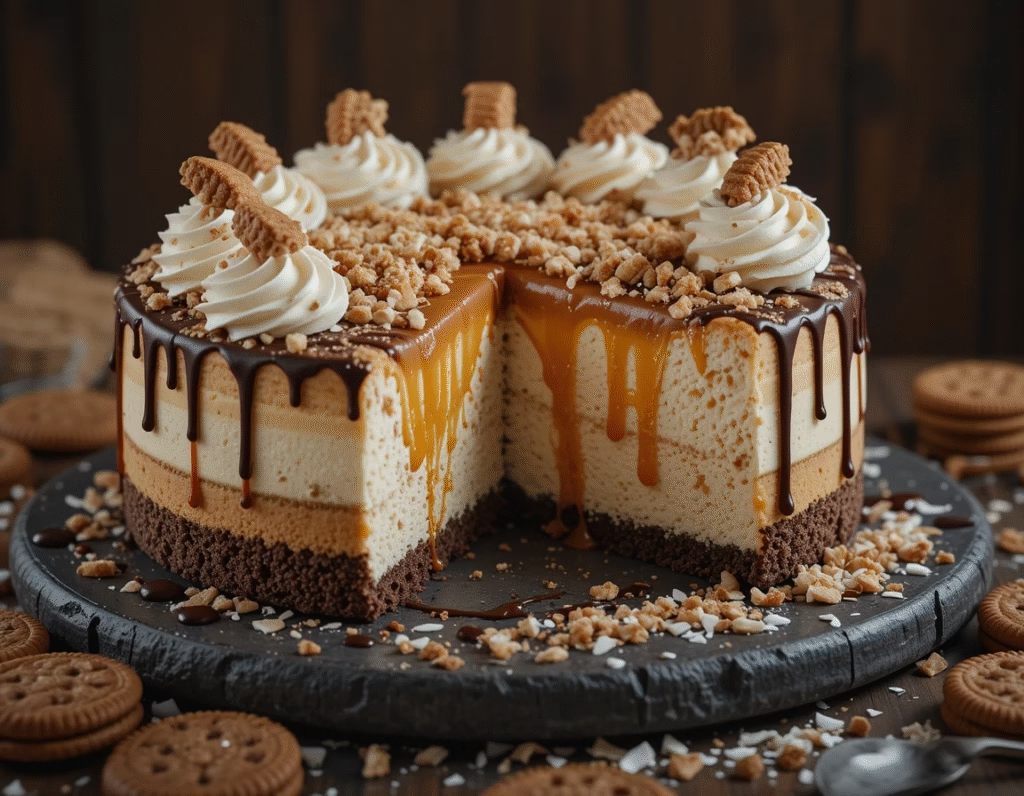
Irresistible Samoa Cheesecake
If you’re a dessert lover who dreams of the perfect marriage between cheesecake and a classic Girl Scout cookie, look no further than Samoa Cheesecake. This rich, indulgent treat is everything you’d expect from a gourmet dessert and more. Inspired by the beloved Samoa cookie, this cheesecake is layered with all the essential elements—creamy cheesecake filling, gooey caramel, toasted coconut, and a decadent drizzle of chocolate. Samoa Cheesecake doesn’t just borrow its name from a cookie—it elevates the experience into something truly unforgettable.
What makes Samoa Cheesecake stand out from other cheesecakes is its irresistible combination of textures and flavors. The creamy, dense cheesecake base is balanced perfectly by the crunch of the cookie crust, the chewiness of the toasted coconut, and the silky ribbons of caramel and chocolate. Every bite of Samoa Cheesecake delivers an explosion of satisfaction, making it the ultimate dessert for parties, birthdays, holidays, or even just because you’re in the mood for something indulgent.
In recent years, Samoa Cheesecake has become a rising star on dessert tables across America. Whether it’s gracing a Thanksgiving buffet, stealing the spotlight at a bake sale, or serving as the centerpiece at a family dinner, this cheesecake is guaranteed to impress. The best part is that you don’t need to be a professional baker to master Samoa Cheesecake. With the right ingredients, a little patience, and a step-by-step guide, you can create a show-stopping dessert that tastes like it came straight from a high-end bakery.
There’s also a certain nostalgia built into every slice of Samoa Cheesecake. For many, it calls back memories of childhood, selling or buying boxes of Girl Scout cookies, eagerly peeling open that familiar packaging to savor the caramel-coconut-chocolate magic of a Samoa. This cheesecake takes all those feelings and flavors and amplifies them into a creamy, crave-worthy dessert.
In this comprehensive guide, we’ll show you exactly how to make Samoa Cheesecake from scratch, with easy-to-follow instructions, ingredient tips, storage recommendations, and variations to try. If you’ve ever wished your favorite cookie could be turned into a cheesecake, your dessert dreams are about to come true—because Samoa Cheesecake is here to satisfy them in the most delicious way possible.
What You’ll Need
Making Samoa Cheesecake at home doesn’t require complicated tools or rare ingredients, but there are a few essentials that will help ensure your cheesecake turns out smooth, flavorful, and absolutely stunning. From the rich cream cheese base to the gooey caramel and coconut topping, every ingredient in Samoa Cheesecake plays an important role in crafting that perfect bite.
Here’s a full breakdown of what you’ll need to create your Samoa Cheesecake:
🧁 Crust:
- 1 and 1/2 cups graham cracker crumbs (or crushed chocolate cookies for a richer base)
- 1/4 cup granulated sugar
- 1/2 cup unsalted butter, melted
This crust serves as the foundation for your Samoa Cheesecake, and you can customize it with crushed coconut cookies or even gluten-free alternatives if needed.
🧀 Cheesecake Filling:
- 3 packages (8 oz each) full-fat cream cheese, softened
- 1 cup granulated sugar
- 1 teaspoon pure vanilla extract
- 3 large eggs
- 1/2 cup sour cream
- 1/4 cup heavy cream
This filling makes the heart of the Samoa Cheesecake. The combination of cream cheese and sour cream gives it a velvety smoothness, while vanilla adds a sweet depth of flavor.
🍯 Topping:
- 1 and 1/2 cups sweetened shredded coconut, toasted
- 1/2 cup soft caramels, melted with 2 tablespoons milk or cream
- 1/2 cup semisweet chocolate chips, melted
For that signature Samoa Cheesecake topping, the toasted coconut and melted caramel create the cookie-inspired flavor. Be sure to toast the coconut for a nuttier, richer taste—it makes a big difference!
🧰 Tools:
- 9-inch springform pan
- Mixing bowls
- Hand or stand mixer
- Spatula
- Baking sheet (for coconut)
- Aluminum foil (for water bath, optional)
Having the right tools on hand makes the process of baking Samoa Cheesecake much smoother. A springform pan is crucial for easy removal, while a mixer ensures your filling is lump-free.
Every component in this recipe contributes to the unforgettable taste of Samoa Cheesecake. The crust offers a crisp base, the filling is indulgent and creamy, and the topping adds a toasted, gooey, chocolatey crown to finish it off. Once you gather these ingredients and tools, you’re ready to dive into the magic of creating Samoa Cheesecake right from your own kitchen.
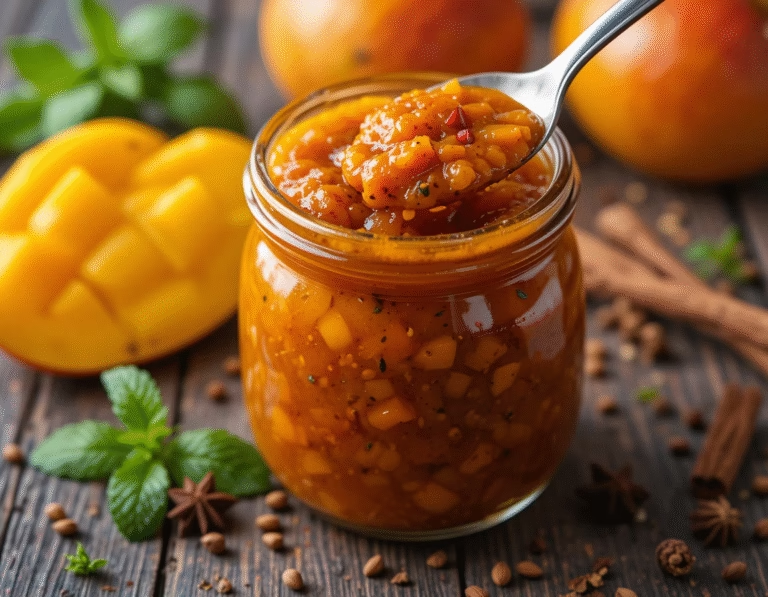
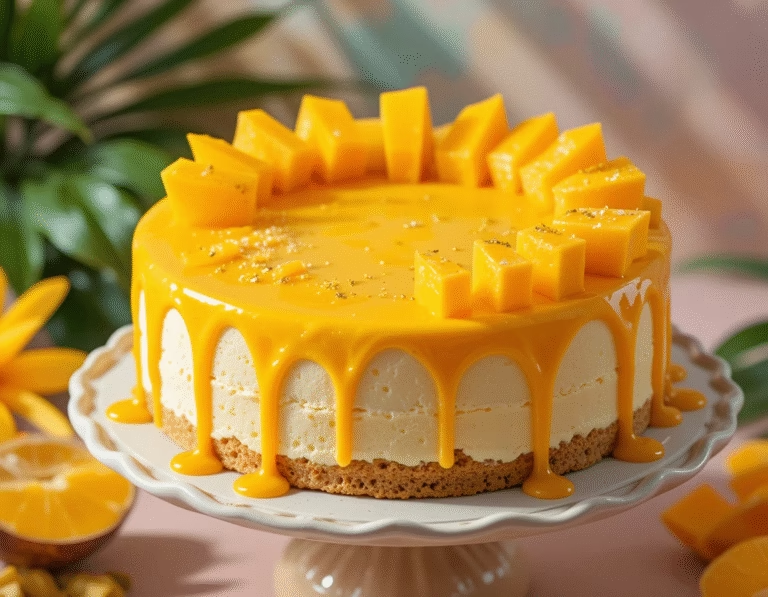
How to Make Mango Chutney (Include Full Measurements)
Making mango chutney from scratch is a simple, satisfying process that fills your kitchen with warm, sweet, and tangy aromas. The key to a well-balanced mango chutney lies in simmering the right blend of fruit, spices, and acidity. With just one large pot and a few basic ingredients, you’ll create a batch of mango chutney that’s rich in flavor and versatile enough for dozens of meals.
Full Measurements for One Standard Batch:
- 4 cups mango, peeled and diced (about 3 large ripe mangoes)
- 1 medium onion, finely chopped
- 2 cloves garlic, minced
- 1 tablespoon grated fresh ginger
- 1 jalapeño, seeded and chopped (optional for heat)
- ½ cup apple cider vinegar
- ½ cup light brown sugar
- 2 tablespoons raisins or golden raisins
- 1 teaspoon mustard seeds
- ½ teaspoon ground cumin
- ½ teaspoon ground coriander
- ¼ teaspoon ground cinnamon (optional)
- Salt and black pepper, to taste
Step-by-Step Instructions:
- Prep the mangoes: Start by peeling and dicing your mangoes. You want chunks that are bite-sized but not too small—about ½-inch cubes work well. Firm, ripe mangoes are best because they hold their shape as your mango chutney simmers.
- Heat the pan: In a large saucepan over medium heat, add a small drizzle of neutral oil. Toss in the mustard seeds and allow them to pop for 30 seconds. This step adds deep flavor and texture to your mango chutney base.
- Sauté aromatics: Add the chopped onion, garlic, ginger, and jalapeño (if using). Sauté for 3-5 minutes until the onion becomes translucent and fragrant. The aroma at this stage will be the backbone of your flavorful mango chutney.
- Add mango and spices: Stir in the diced mango, cumin, coriander, and cinnamon. Let it cook for 2-3 minutes to infuse the fruit with spice. You’re layering flavor now to give your mango chutney that signature depth.
- Pour in vinegar and sugar: Add the apple cider vinegar, brown sugar, and raisins. Bring everything to a boil, then immediately reduce the heat to a gentle simmer. The mango chutney should gently bubble as it thickens.
- Simmer and reduce: Let the mango chutney simmer uncovered for 35–45 minutes, stirring occasionally. As the liquid reduces and mango softens, the mixture thickens into a jam-like consistency. Taste and adjust salt and pepper.
- Cool and store: Once your mango chutney reaches a rich, sticky texture with visible chunks of mango, remove from heat. Let cool slightly before transferring to sterilized jars. Store in the fridge once completely cooled.
By the end of the process, your kitchen will smell like sweet tropical sunshine, and your jars of mango chutney will be ready to transform ordinary meals into gourmet dishes. Homemade mango chutney keeps for weeks in the fridge and can also be canned using proper water-bath methods for long-term storage.

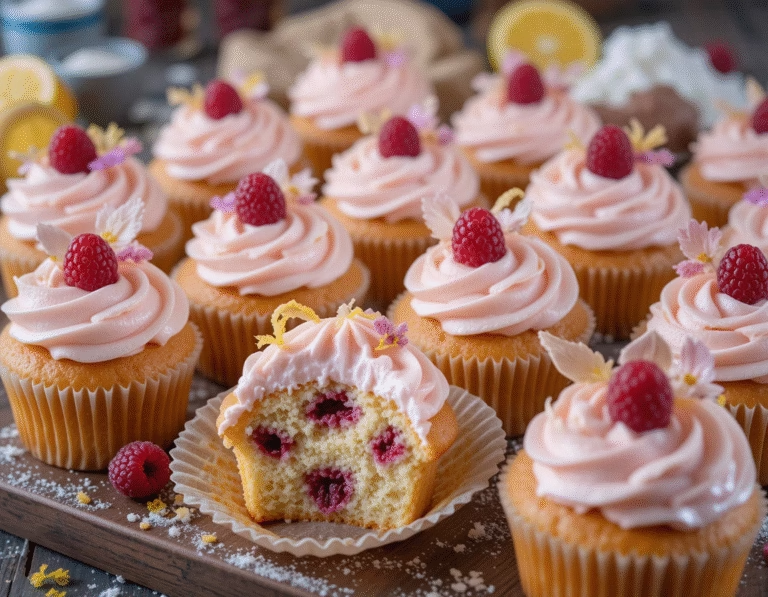
Turn this into a cupcake version using our Raspberry Lemon Cupcakes.
Serving and Storage Tips
Once you’ve crafted a perfect batch of homemade mango chutney, the next step is knowing how to serve it, pair it, and store it. Fortunately, mango chutney is a multitasker in the kitchen—delicious served warm, room temp, or cold, and it shines in both savory and sweet applications.
How to Serve Mango Chutney
- As a dip: Scoop a generous dollop of mango chutney alongside samosas, spring rolls, or tortilla chips for a zesty contrast to crispy textures.
- On cheese boards: The sweetness of mango chutney pairs beautifully with sharp cheddar, creamy brie, or tangy goat cheese. A spoonful next to nuts and crackers adds color and flavor.
- With grilled meats: Use mango chutney as a topping for grilled chicken, turkey burgers, or roasted tofu. Its fruitiness balances smoky charred flavors perfectly.
- In sandwiches and wraps: Add a layer of mango chutney to turkey sandwiches, veggie wraps, or even quesadillas. It brings unexpected tang and moisture.
- Over rice or grains: Stir mango chutney into basmati rice or quinoa for an instant flavor boost—great for vegetarian meal prep.
- As a glaze: Mix mango chutney with a splash of orange juice and brush it on baked chicken or roasted carrots in the last few minutes of cooking for a sticky-sweet glaze.
- With eggs: Spoon mango chutney over scrambled eggs, frittatas, or omelets for a breakfast with tropical flair.
Let your creativity shine—mango chutney is as flexible as it is flavorful.
Storage Guidelines
- Refrigeration: Store homemade mango chutney in airtight glass jars in the refrigerator. It will keep for up to 3–4 weeks, thanks to the vinegar and sugar, which act as natural preservatives.
- Freezing: If you’ve made a large batch, you can freeze mango chutney in freezer-safe containers. Leave a bit of headspace, as it will expand slightly. It stays fresh for up to 3 months. Thaw overnight in the fridge before using.
- Canning (optional): For long-term storage, you can use proper water-bath canning techniques. Sterilize jars and lids, fill with hot mango chutney, and process in boiling water for the time appropriate to your altitude and jar size.
- Batch portioning: Divide your mango chutney into smaller jars to use one at a time and avoid frequent opening and exposure to air.
Remember to always use a clean spoon when serving mango chutney from the jar. This helps avoid contamination and preserves freshness. Label jars with the date so you can track freshness easily.
Whether you’re planning a dinner party or simply want to elevate Tuesday’s lunch, having mango chutney in your fridge or pantry gives you a quick, flavorful option.
Mistakes to Avoid
Creating the perfect Samoa Cheesecake at home requires attention to detail, and even experienced bakers can run into a few common pitfalls. Whether you’re attempting Samoa Cheesecake for the first time or you’re a seasoned home baker looking to refine your process, avoiding these typical mistakes will ensure a creamy, decadent, and beautifully layered dessert every time.
One of the biggest mistakes when preparing Samoa Cheesecake is rushing the crust. A buttery, crisp crust is essential to contrast the rich filling of the Samoa Cheesecake, and this can’t be achieved if your crust is underbaked or uneven. Make sure to firmly press your crust into the pan and bake it until golden brown before adding your filling. Skipping this step can lead to a soggy or crumbly base that detracts from the overall texture of the Samoa Cheesecake.
Another common error is not allowing the cream cheese to reach room temperature before mixing. Cold cream cheese leads to a lumpy batter and inconsistent texture throughout your Samoa Cheesecake. Softened cream cheese ensures a smooth, uniform filling that bakes evenly, resulting in a melt-in-your-mouth texture that defines a great Samoa Cheesecake.
Overmixing the batter is also a problem to watch out for. While it’s important to blend the ingredients thoroughly, overbeating incorporates excess air into the batter, causing your Samoa Cheesecake to rise and then crack as it cools. Use low to medium speed and stop mixing once all ingredients are just combined for the best results.
Another major issue is improper cooling. If your Samoa Cheesecake cools too quickly, it can lead to large cracks across the top or a dense, rubbery texture. Allow your Samoa Cheesecake to cool slowly in the oven with the door slightly ajar, and then move it to the refrigerator to set completely. Patience is key here, as rushing the process can undo all your hard work.
Don’t forget about toppings! Some people make the mistake of adding the caramel and coconut topping before the cheesecake is fully set, leading to a gooey mess. Always wait until the Samoa Cheesecake is completely chilled and firm before garnishing.
Lastly, not lining your springform pan can make it hard to remove the Samoa Cheesecake cleanly. Grease and line the bottom with parchment for an easy lift. If you skip this, your crust may stick or break apart when serving.
Avoiding these mistakes guarantees that your Samoa Cheesecake will turn out as stunning and delicious as any bakery-quality dessert. Attention to these small but impactful details makes all the difference.
Tips and Tricks
To elevate your Samoa Cheesecake to a bakery-style masterpiece, a few extra tips and tricks can go a long way. These handy suggestions will help streamline your preparation process, enhance flavor, and deliver that signature Samoa Cheesecake experience with every slice.
Start with premium ingredients. A rich, full-fat cream cheese is non-negotiable in achieving the signature smooth texture of a true Samoa Cheesecake. Using high-quality coconut flakes and real caramel—not artificial syrups—will add depth and richness to your topping. For the chocolate drizzle, opt for semi-sweet or dark chocolate to balance the sweetness of the caramel and coconut, ensuring your Samoa Cheesecake is indulgent, not overly sweet.
One smart trick is to toast your coconut flakes before sprinkling them over your Samoa Cheesecake. Toasting brings out the nutty flavor of coconut and adds a subtle crunch. Simply spread them on a baking sheet and toast in the oven at 350°F for about 5–7 minutes, watching closely to avoid burning.
For a thicker, more stable crust, use a mix of crushed shortbread cookies and graham crackers instead of just one or the other. This hybrid crust provides the best of both worlds—sweet, buttery, and crisp—while complementing the Samoa flavors beautifully.
To prevent your Samoa Cheesecake from cracking during baking, always use a water bath. Wrap the bottom of your springform pan in foil to prevent leaks, then place it in a larger roasting pan filled with hot water. This technique regulates temperature and adds moisture to the oven, helping your Samoa Cheesecake bake evenly.
For a flavor boost, add a splash of pure coconut extract to the cheesecake batter. This will enhance the tropical notes and tie together the coconut topping with the creamy interior.
When cutting your Samoa Cheesecake, dip your knife in hot water and wipe it clean between slices. This keeps your cuts smooth and prevents the sticky toppings from dragging across the surface. You can also chill the knife slightly to make cleaner cuts through the dense layers of crust, filling, and toppings.
Lastly, consider individual serving sizes for parties. You can bake the Samoa Cheesecake in muffin tins lined with cupcake wrappers for personal-sized treats. These are not only cute and convenient but also bake and chill faster—great for last-minute events or gifts.
With these expert tips and tricks, your Samoa Cheesecake will impress every time, from its flawless presentation to its indulgent taste.
Suggestions
When it comes to making Samoa Cheesecake, creativity can transform an already indulgent dessert into something truly unforgettable. Whether you want to customize the flavor, presentation, or occasion, there are endless ways to personalize Samoa Cheesecake and impress every guest. Here are some imaginative and practical suggestions to elevate your Samoa Cheesecake experience.
Start by experimenting with crust variations. While the traditional graham cracker crust works beautifully, consider swapping it out for crushed chocolate cookies or shortbread to echo the cookie inspiration behind the Samoa Cheesecake. A chocolate cookie crust enhances the cocoa element and balances the sweetness of the coconut caramel topping, making for a richer dessert.
You can also play with the filling. Add swirls of caramel or chocolate directly into the cheesecake batter before baking for a marbled effect. If you’re a fan of coconut, mix shredded toasted coconut into the batter itself to make the Samoa Cheesecake even more decadent and coconut-forward.
Another popular twist is to convert the Samoa Cheesecake into a no-bake version for warm weather months. By using gelatin or whipped cream to stabilize the batter, you can avoid the oven altogether. Just be sure to give it adequate time to chill and set properly before serving.
Samoa Cheesecake can also be adapted into mini versions using muffin tins or silicone molds. These individual servings are perfect for events like baby showers, birthdays, or office parties. You can also layer the ingredients in jars for a stylish and portable Samoa Cheesecake parfait—great for gifts or outdoor picnics.
Consider topping your Samoa Cheesecake with even more flair. A sprinkle of sea salt over the caramel can add a gourmet touch and balance out the sweetness. A drizzle of white chocolate can also contrast the dark chocolate stripes, creating a more layered and dynamic presentation.
For holiday variations, try incorporating seasonal flavors. Add a hint of cinnamon or nutmeg to the crust for a fall-themed Samoa Cheesecake. Around Christmas, garnish the top with crushed peppermint candies for a festive touch.
Don’t forget about dietary preferences. You can make a gluten-free Samoa Cheesecake using gluten-free cookies or oats for the crust, and swap the cream cheese with a dairy-free alternative to accommodate lactose intolerance.
Finally, consider pairing your Samoa Cheesecake with beverages that enhance its flavors. A warm chai tea, coconut milk latte, or decaf espresso complements the rich caramel and coconut beautifully.
These suggestions allow you to tailor the Samoa Cheesecake to suit any palate or occasion. With a few thoughtful tweaks, your Samoa Cheesecake will always stand out as the showstopper it deserves to be.
FAQ
Q: Can I make Samoa Cheesecake ahead of time?
A: Absolutely! In fact, Samoa Cheesecake is best made a day ahead to allow it time to chill and set properly. You can prepare it up to 48 hours in advance and store it covered in the refrigerator until serving. This makes it an ideal dessert for parties, holidays, or any occasion where time is limited.
Q: How do I store leftover Samoa Cheesecake?
A: Leftover Samoa Cheesecake should be kept in an airtight container in the fridge and will stay fresh for up to 5 days. For longer storage, you can freeze individual slices wrapped in plastic wrap and foil. When ready to eat, simply thaw in the refrigerator overnight.
Q: Can I make a gluten-free Samoa Cheesecake?
A: Yes! Substitute the graham cracker crust with a gluten-free alternative, such as crushed gluten-free cookies or a mixture of gluten-free oats and butter. Just ensure all other ingredients are certified gluten-free to prevent cross-contamination.
Q: What’s the best way to avoid cracks in my Samoa Cheesecake?
A: To avoid cracks, bake your Samoa Cheesecake in a water bath and let it cool slowly in the oven with the door ajar. Also, avoid overmixing the batter, and never open the oven door during baking. These steps help maintain even temperature and structure.
Q: Can I use store-bought caramel and chocolate sauce?
A: Definitely. Store-bought sauces are a convenient way to save time without sacrificing taste. However, if you want to elevate the flavor of your Samoa Cheesecake, homemade caramel and chocolate ganache are well worth the effort.
Q: Is it necessary to toast the coconut for the topping?
A: While not strictly necessary, toasting the coconut adds a beautiful golden color and enhances its nutty flavor, making your Samoa Cheesecake even more delicious. It also adds a slight crunch that contrasts perfectly with the creamy filling.
Q: Can I use a different pan instead of a springform?
A: A springform pan is preferred for Samoa Cheesecake because it allows for easy removal without damaging the crust. However, you can use a regular cake pan lined with parchment, though removing the cheesecake may be more delicate.
Q: Can I reduce the sugar?
A: You can reduce the sugar slightly in the cheesecake filling, but keep in mind that the topping is sweet due to caramel and coconut. Reducing sugar may affect texture and flavor balance, so test carefully when modifying the recipe.
The Samoa Cheesecake is a versatile and forgiving dessert, making it perfect for both beginners and experienced bakers.
Conclusion
Samoa Cheesecake is more than just a dessert—it’s a celebration of rich, indulgent flavors inspired by one of America’s favorite cookies. With its luscious layers of creamy cheesecake, golden caramel, toasted coconut, and bold chocolate drizzle, the Samoa Cheesecake delivers a gourmet experience in every bite. Whether you’re making it for a holiday gathering, a birthday celebration, or just a cozy weekend treat, this decadent cheesecake is guaranteed to be the centerpiece of any dessert table.
One of the most wonderful aspects of the Samoa Cheesecake is its versatility. You can prepare it in various ways—baked or no-bake, in mini versions, as a parfait, or even adapted to suit dietary restrictions like gluten-free or dairy-free needs. This flexibility means the Samoa Cheesecake can be enjoyed by nearly everyone, regardless of preferences or food sensitivities.
Throughout this guide, we’ve explored not only how to make the Samoa Cheesecake from scratch but also how to serve it, store it, troubleshoot common issues, and even elevate it with expert-level tips and tricks. These comprehensive instructions ensure that your Samoa Cheesecake turns out perfectly every time, even if you’re making it for the very first time.
Remember, quality ingredients and patience go a long way. Toasting the coconut, chilling the cheesecake thoroughly, and choosing a flavorful crust are small steps that yield big results in terms of taste and texture. And don’t be afraid to make it your own! Whether you’re swirling in extra caramel or decorating with artistic flair, your Samoa Cheesecake is an expression of creativity as much as it is of culinary skill.
The popularity of Samoa Cheesecake lies not only in its nostalgic charm—reminiscent of the iconic Girl Scout Samoa cookies—but also in its ability to deliver satisfying texture and flavor contrast. Every forkful combines smooth, creamy filling with crunchy coconut, buttery crust, and sweet yet slightly bitter chocolate. It’s a harmony that’s hard to beat.
If you haven’t already, bookmark this Samoa Cheesecake recipe and return to it often. It’s a dessert worth repeating, a crowd-pleaser every single time, and a fabulous choice for any occasion where only the best will do. So gather your ingredients, preheat that oven, and get ready to fall in love with Samoa Cheesecake all over again.