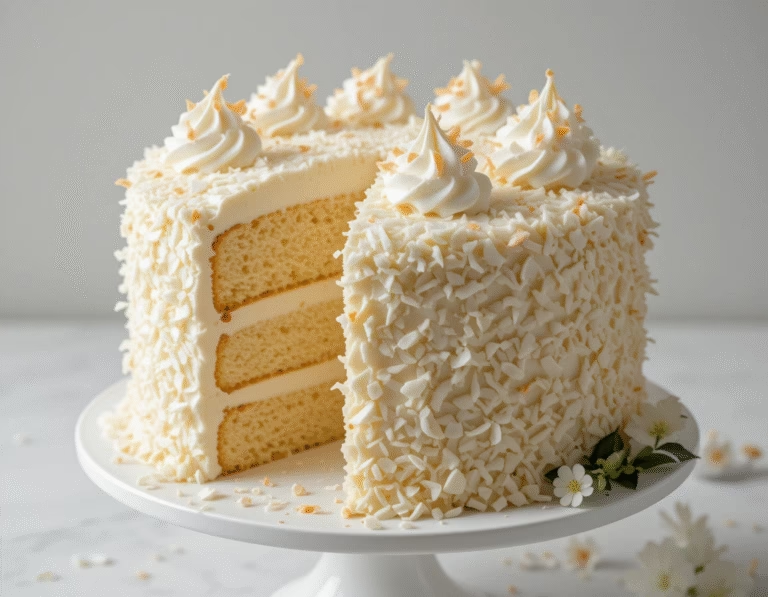
Perfect Classic Vanilla Layer Cake Recipe
There’s something timeless and universally beloved about a Classic Vanilla Layer Cake. Whether it’s served at birthdays, anniversaries, holidays, or just because, this cake represents everything that’s comforting about home baking. Its simplicity, versatility, and delicate balance of buttery sweetness make it the ultimate crowd-pleaser. When made properly, a Classic Vanilla Layer Cake delivers light, tender layers infused with pure vanilla flavor and stacked with rich, creamy frosting that melts in your mouth.
This Classic Vanilla Layer Cake recipe is more than just another cake—it’s a foundation for celebration. The flavor is subtle yet rich, elegant yet nostalgic. It can be dressed up with fresh berries, edible flowers, or a drizzle of glaze, but it’s just as satisfying on its own. That’s the beauty of a Classic Vanilla Layer Cake—it’s incredibly adaptable while still standing strong as a timeless dessert staple.
Whether you’re a novice baker looking to master the essentials or a seasoned pro seeking the perfect base for layered confections, this Classic Vanilla Layer Cake will become your go-to recipe. It’s built from scratch using straightforward ingredients that you probably already have in your pantry. The process is approachable and rewarding, giving you a sense of pride with every perfectly risen, golden sponge layer.
This blog post will guide you through every detail you need to make your Classic Vanilla Layer Cake a success—from the must-have tools and ingredients to baking techniques, storage ideas, common mistakes, and clever tips to elevate your creation. You’ll also learn how to tweak the recipe to suit special diets, pair it with complementary flavors, and store leftovers without losing freshness or texture.
Baking a Classic Vanilla Layer Cake is about more than just making dessert—it’s about creating a centerpiece that brings people together. So whether you’re baking for a birthday, a potluck, or a cozy weekend treat, you’ll love how this cake delivers every time.
Get ready to fall in love with the rich vanilla aroma, the fluffy crumb, and the melt-in-your-mouth frosting. Once you bake this Classic Vanilla Layer Cake, it’s sure to become a beloved staple in your home baking repertoire.
What You’ll Need
Before diving into the baking process, it’s important to gather everything you’ll need to create your Classic Vanilla Layer Cake. The success of any cake recipe lies in the quality of its ingredients and the precision of its preparation. This cake is built from simple pantry staples, but don’t underestimate the impact of fresh, high-quality items—especially when vanilla is the star of the show.
Here’s a detailed breakdown of the ingredients and tools you’ll need to make your Classic Vanilla Layer Cake turn out light, flavorful, and beautiful.
Ingredients for the Cake Layers:
- 2½ cups all-purpose flour (spooned and leveled)
- 2½ teaspoons baking powder
- ½ teaspoon baking soda
- ½ teaspoon salt
- 1 cup unsalted butter (softened to room temperature)
- 1¾ cups granulated sugar
- 4 large eggs
- 1 tablespoon pure vanilla extract
- 1 cup whole milk
- ½ cup sour cream
These ingredients form the perfect foundation for the Classic Vanilla Layer Cake. The combination of butter and sour cream yields an incredibly moist crumb, while the vanilla extract gives the cake its signature aroma and depth. The milk ensures a smooth batter that bakes up soft and tender.
Ingredients for the Vanilla Buttercream Frosting:
- 1 cup unsalted butter (softened)
- 3½ to 4 cups powdered sugar (sifted for smooth texture)
- 2 teaspoons pure vanilla extract
- 2–3 tablespoons heavy cream or milk
- Pinch of salt (to balance sweetness)
This frosting is light, creamy, and easy to work with, making it ideal for stacking and decorating your Classic Vanilla Layer Cake. It spreads beautifully and holds its shape well whether you’re piping borders or smoothing over layers.
Recommended Tools:
- Two 8-inch or 9-inch round cake pans
- Parchment paper (for lining pans)
- Electric hand mixer or stand mixer
- Large mixing bowls
- Cooling rack
- Offset spatula (for frosting)
- Cake leveler or serrated knife (for even layers)
- Cake turntable (optional but helpful for decorating)
With everything prepped and ready, you’re now set to begin the baking process. The next section will walk you through step-by-step instructions to create a fluffy, moist, and beautiful Classic Vanilla Layer Cake from scratch.
How to Make (Include Full Measurements)
Making a Classic Vanilla Layer Cake from scratch might sound intimidating, but once you follow the process step by step, you’ll see just how approachable—and enjoyable—it can be. The recipe relies on common ingredients, precise technique, and a little patience to achieve a fluffy, moist, and flavor-packed vanilla cake that everyone will rave about. Let’s walk through the full instructions to help you bake your very own stunning Classic Vanilla Layer Cake.
Step 1: Prepare Your Baking Pans
Start by preheating your oven to 350°F (175°C). Grease two 8-inch or 9-inch round cake pans with butter or non-stick spray. Line the bottoms with parchment paper and lightly dust the sides with flour to prevent sticking. This step ensures your Classic Vanilla Layer Cake releases easily and keeps its perfect shape.
Step 2: Mix the Dry Ingredients
In a medium bowl, whisk together:
- 2½ cups all-purpose flour
- 2½ teaspoons baking powder
- ½ teaspoon baking soda
- ½ teaspoon salt
Set the bowl aside. This combination ensures your Classic Vanilla Layer Cake rises evenly and maintains its light texture.
Step 3: Cream Butter and Sugar
In a large mixing bowl, use a stand mixer or hand mixer to beat:
- 1 cup unsalted butter (softened)
- 1¾ cups granulated sugar
Beat on medium speed for 3–4 minutes, or until the mixture is pale, fluffy, and creamy. This step is key to giving your Classic Vanilla Layer Cake a tender crumb and lovely rise.
Step 4: Add Eggs and Vanilla
Add the eggs one at a time, mixing well between each addition:
- 4 large eggs
Then stir in:
- 1 tablespoon pure vanilla extract
This enhances the rich flavor in your Classic Vanilla Layer Cake, making it the vanilla-forward showstopper it should be.
Step 5: Combine Wet and Dry Ingredients
To the butter mixture, add the dry ingredients in three parts, alternating with the wet ingredients:
- 1 cup whole milk
- ½ cup sour cream
Begin and end with the dry ingredients. Mix just until combined—don’t overbeat. This process keeps your Classic Vanilla Layer Cake delicate and moist without becoming dense.
Step 6: Bake the Cake
Divide the batter evenly between the two prepared pans. Smooth the tops with a spatula.
Bake for 30–35 minutes, or until a toothpick inserted into the center comes out clean.
Let the cakes cool in the pans for 10 minutes, then carefully remove them and allow them to cool completely on a wire rack.
Step 7: Prepare the Vanilla Buttercream
In a clean bowl, beat:
- 1 cup unsalted butter (softened)
Gradually add:
- 3½ to 4 cups powdered sugar (sifted)
Add:
- 2 teaspoons vanilla extract
- 2–3 tablespoons heavy cream or milk
- Pinch of salt
Beat until light, smooth, and spreadable.
Step 8: Assemble the Cake
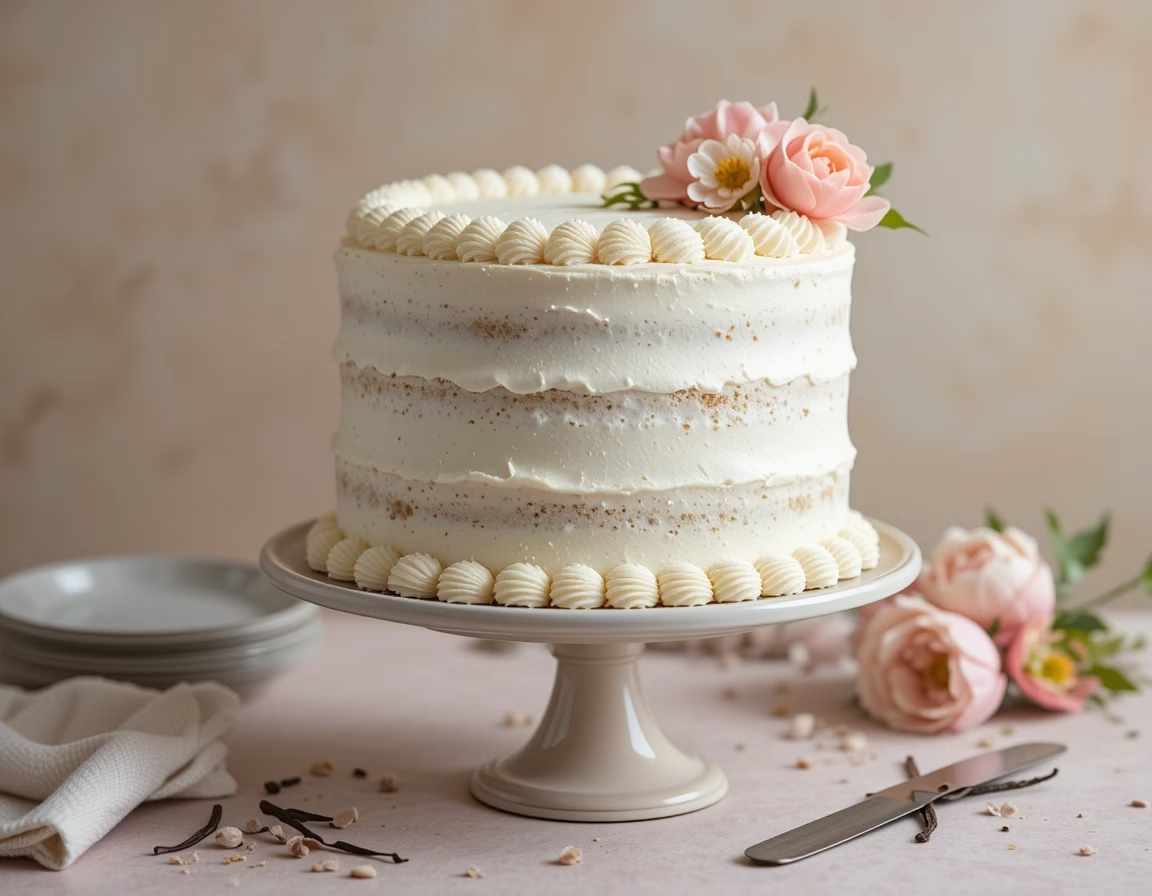
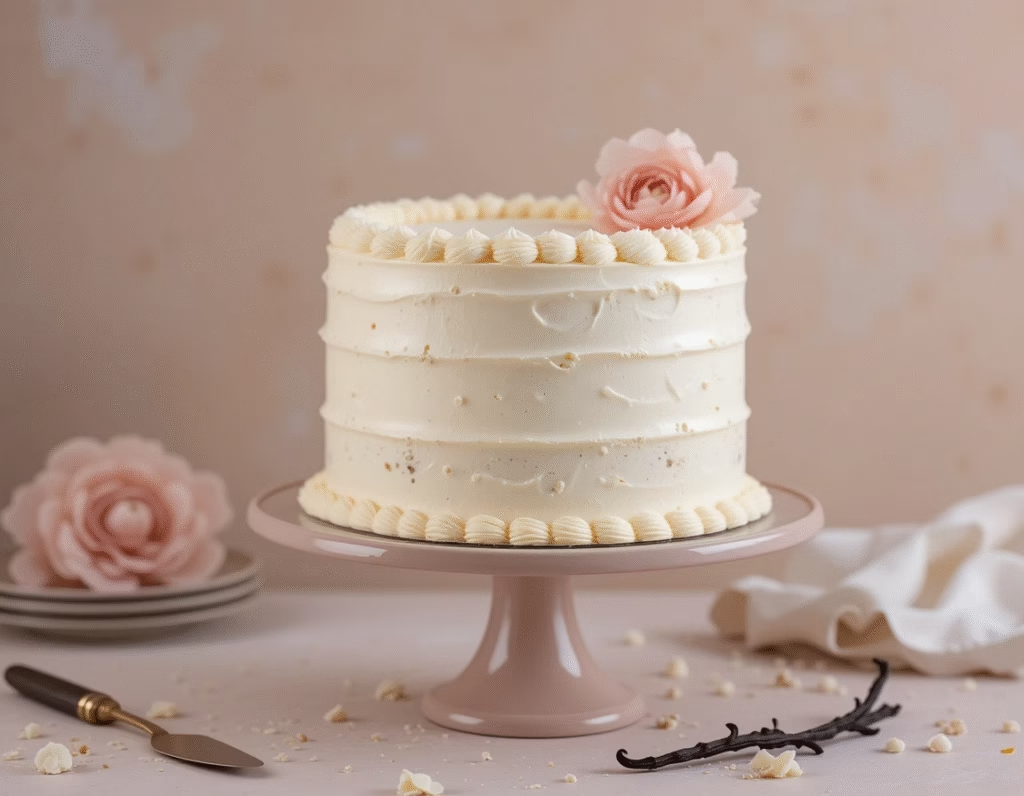
Once the layers are cool, level them if needed. Place the first layer on a cake stand, spread a thick layer of frosting, then top with the second layer. Frost the top and sides of your Classic Vanilla Layer Cake as desired.
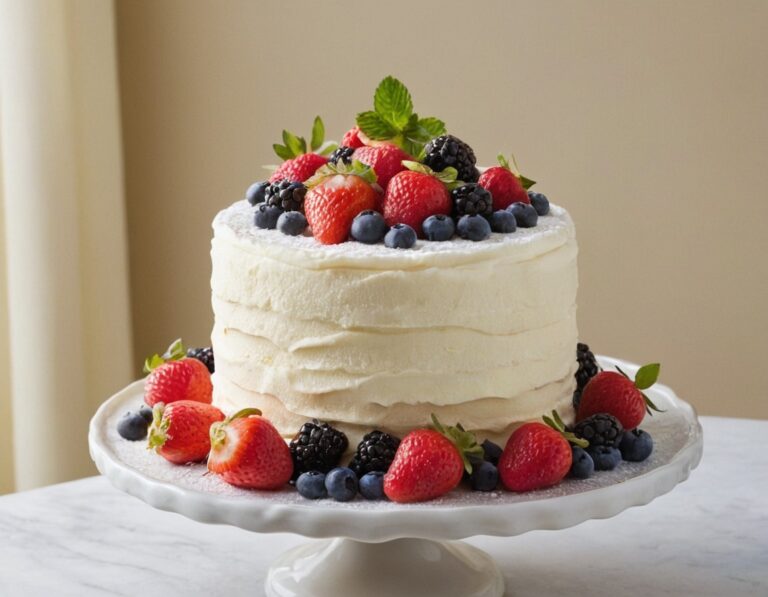
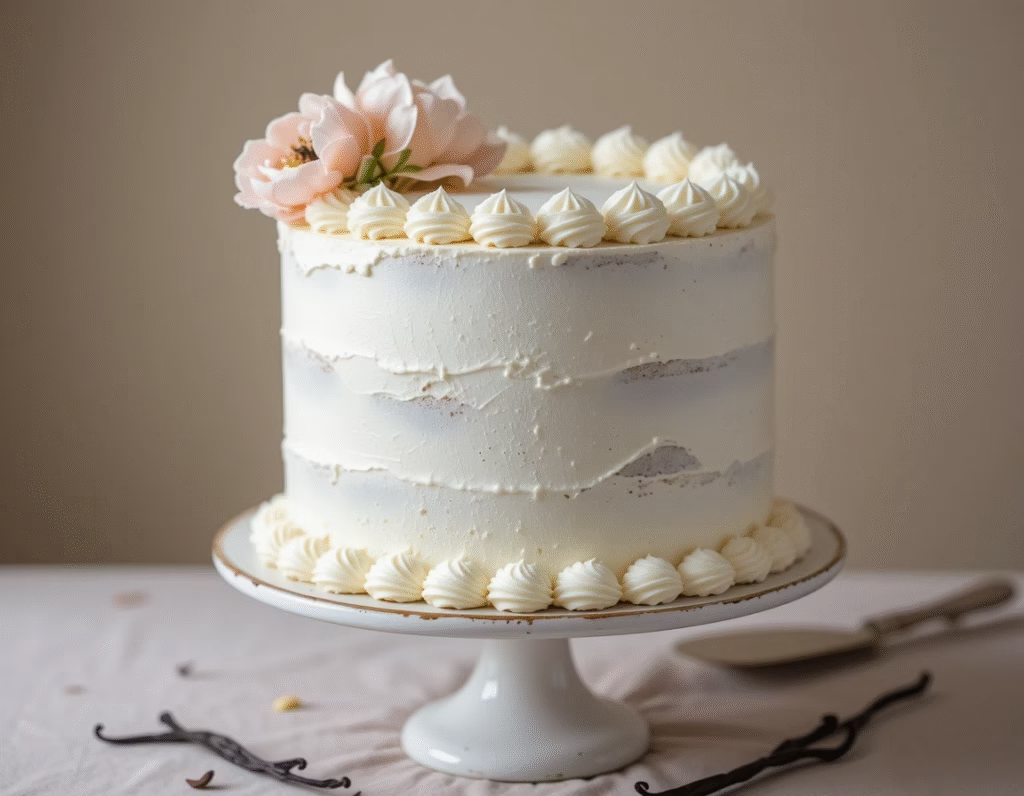
Decorate simply or with sprinkles, fresh fruit, or piping—it’s your masterpiece.
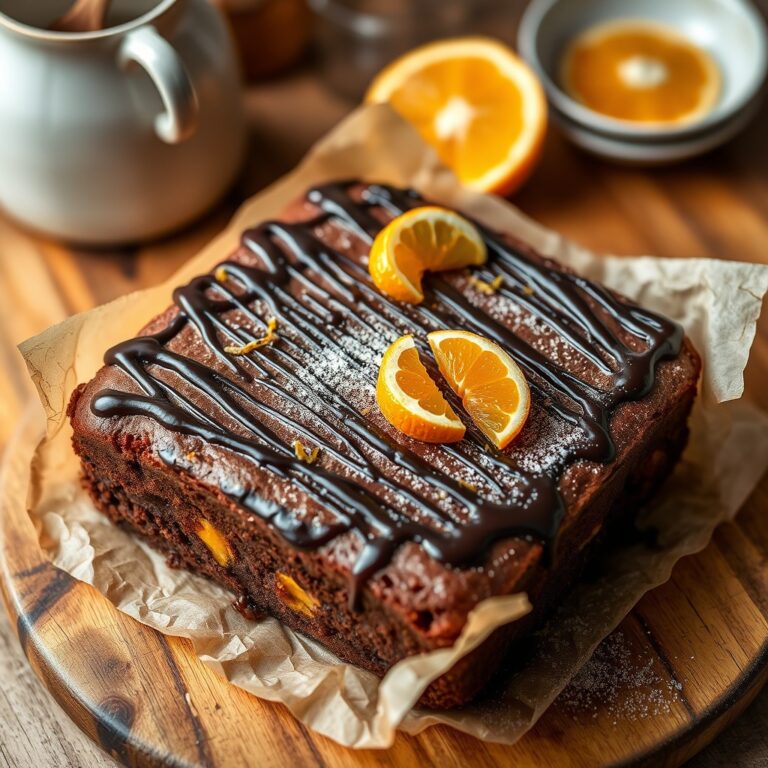
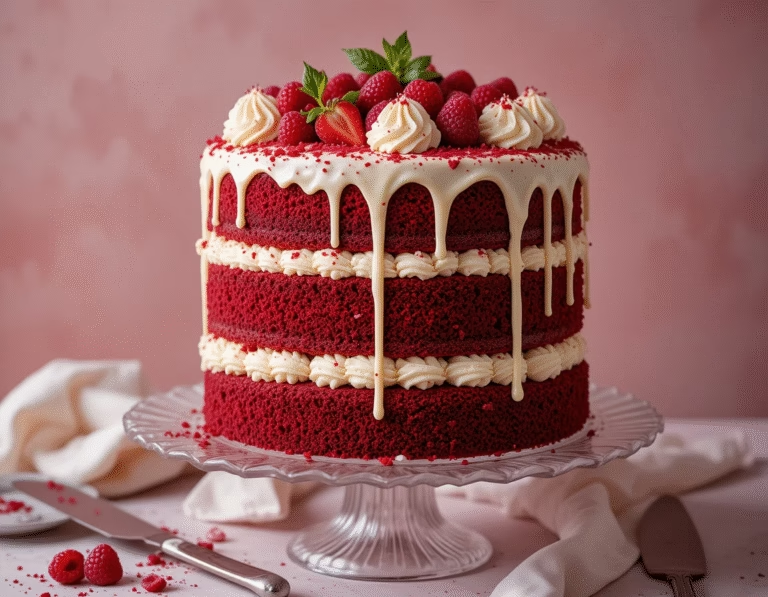
Love working with chocolate? Try our Cherry Chocolate Cake.
Serving and Storage Tips
Once your Classic Vanilla Layer Cake is fully assembled and frosted, it’s time to serve and enjoy! But to ensure every slice is as fresh and flavorful as the first, there are a few key serving and storage tips to keep in mind. Whether you’re prepping in advance, storing leftovers, or making this cake a day before an event, here’s how to keep your Classic Vanilla Layer Cake looking and tasting its best.
How to Serve Classic Vanilla Layer Cake
To serve your Classic Vanilla Layer Cake, use a sharp serrated knife or cake slicer for clean cuts. Wipe the blade between slices to keep them neat and prevent smearing the frosting. The cake can be served as is or with toppings such as:
- A scoop of vanilla or fruit sorbet
- Fresh berries or sliced fruit
- A drizzle of non-dairy caramel sauce or honey
- Light whipped topping for an airy finish
For extra indulgence, pair a slice of Classic Vanilla Layer Cake with a cold glass of milk, hot tea, or decaf coffee. If serving for a special event, edible flowers, cake toppers, or chocolate curls make beautiful, photo-worthy additions.
Let the cake sit at room temperature for about 15–20 minutes before serving. This allows the butter in the cake and frosting to soften, making each bite more flavorful and the texture more tender.
How to Store Classic Vanilla Layer Cake
Room Temperature:
If your Classic Vanilla Layer Cake will be eaten within 1–2 days and doesn’t contain perishable fillings, you can store it at room temperature. Place it in a cake container or cover loosely with plastic wrap to prevent it from drying out.
Refrigerator:
For longer storage (up to 5 days), refrigerate the cake. Make sure it’s well-covered in an airtight container or cake dome. Before serving refrigerated cake, let it come to room temperature for about 30 minutes for the best flavor and softness.
Freezer:
Yes, you can freeze a fully assembled Classic Vanilla Layer Cake or freeze the layers individually before frosting. Wrap each layer tightly in plastic wrap and then in foil. Store in a freezer-safe container for up to 2 months. To thaw, transfer to the refrigerator overnight, then bring to room temperature before frosting or serving.
Pro Tip:
Cut leftover Classic Vanilla Layer Cake into slices and wrap each individually. Freeze for single-serve portions you can enjoy anytime.
Mistakes to Avoid
Baking a Classic Vanilla Layer Cake might seem straightforward, but there are several common pitfalls that can affect the final texture, flavor, and appearance. Avoiding these mistakes will ensure your cake comes out perfectly fluffy, moist, and beautifully layered every time.
Using Cold Ingredients
One of the biggest mistakes when making a Classic Vanilla Layer Cake is starting with cold ingredients. Butter, eggs, milk, and sour cream should all be at room temperature before mixing. Cold ingredients do not combine smoothly, which can lead to a lumpy batter and uneven baking. Allow ingredients to sit out for at least 30 minutes before starting.
Overmixing the Batter
Overmixing the cake batter is another common error. While it’s important to mix until ingredients are combined, beating too much develops gluten in the flour, resulting in a dense and tough Classic Vanilla Layer Cake. Mix just until the dry ingredients disappear and the batter is smooth.
Not Measuring Ingredients Accurately
Accurate measurements are crucial, especially for flour. Too much flour can dry out your cake, while too little affects the structure. Use a kitchen scale or the spoon-and-level method to measure flour precisely. Also, check your baking powder and baking soda for freshness, as expired leavening agents can cause flat or dense layers.
Skipping the Cake Leveling Step
Uneven cake layers make stacking and frosting challenging and can lead to a lopsided Classic Vanilla Layer Cake. Use a serrated knife or cake leveler to trim domed tops and create flat, even layers. This step is essential for professional-looking results.
Not Preheating the Oven or Opening the Door Too Often
An oven that isn’t fully preheated causes uneven baking and poor rise. Always preheat to the correct temperature before placing your cake inside. Avoid opening the oven door repeatedly during baking, as temperature fluctuations can cause your cake to collapse or crack.
Frosting Warm Cake Layers
Frosting or stacking your Classic Vanilla Layer Cake before the layers are completely cool can cause the frosting to melt and slide, ruining the appearance and texture. Allow layers to cool thoroughly on a wire rack before assembling.
By avoiding these mistakes, you’ll set yourself up for success with your Classic Vanilla Layer Cake, achieving the ideal crumb, flavor, and presentation that impresses every time.
Tips and Tricks
Elevate your Classic Vanilla Layer Cake with these expert tips and tricks that will help you bake like a pro and customize the cake to your taste and occasion.
Use High-Quality Vanilla Extract
Since vanilla is the star flavor, choose a pure, high-quality vanilla extract. Avoid imitation vanilla, which can taste artificial. For an even richer flavor, you can use vanilla bean paste or scrape fresh vanilla seeds into your batter.
Sift Your Dry Ingredients
Sifting flour, baking powder, baking soda, and salt aerates the mixture and removes lumps. This simple step helps achieve the lightest, fluffiest texture in your Classic Vanilla Layer Cake.
Room Temperature Ingredients Are Key
Reiterating the importance of room temperature ingredients: this allows butter to cream properly with sugar and creates a smooth batter that bakes evenly.
Don’t Rush Cooling
Patience is essential—cool your cake layers completely before frosting. You can speed this up by placing them in the fridge for 20–30 minutes after cooling at room temperature.
Add a Simple Syrup for Moisture
If you want an extra moist Classic Vanilla Layer Cake, brush each layer lightly with simple syrup (equal parts sugar and water boiled and cooled). You can even flavor the syrup with vanilla or almond extract.
Customize Your Frosting
While classic vanilla buttercream is the standard, you can experiment with cream cheese frosting, whipped cream, or flavored frostings like lemon or almond. This flexibility lets you tailor the cake to your event.
Decorate Creatively
Use fresh fruit, edible flowers, sprinkles, or chocolate curls to make your Classic Vanilla Layer Cake visually stunning. For a minimalist look, smooth the frosting perfectly with an offset spatula and add a simple cake topper.
Bake Ahead
A Classic Vanilla Layer Cake can be baked a day or two in advance and stored well-wrapped in the fridge. This saves time and lets the flavors mature beautifully.
Suggestions
The Classic Vanilla Layer Cake is the perfect canvas for your creativity, making it an ideal choice whether you want to keep things traditional or experiment with exciting flavors and presentations. Here are some thoughtful suggestions to elevate your baking experience and tailor the cake to your personal tastes and occasions.
Flavor Variations
While the traditional vanilla flavor is timeless, you can easily incorporate additional flavors into your Classic Vanilla Layer Cake batter or frosting. Adding lemon zest or a splash of almond extract to the batter introduces a fresh twist that pairs beautifully with vanilla. For a more decadent version, fold cocoa powder into one of the layers to create a marbled effect or transform it into a vanilla-chocolate duo.
Filling Ideas
Layer cakes offer endless possibilities for fillings between the cake layers. Consider spreading raspberry jam, fresh fruit preserves, or lemon curd for a burst of fruity contrast. Whipped cream or mascarpone can add luxurious creaminess. You might also add crushed toasted nuts or a thin layer of chocolate ganache for texture and depth.
Frosting Alternatives
The standard vanilla buttercream is delicious, but your Classic Vanilla Layer Cake can shine just as well with different frostings. Cream cheese frosting provides a tangy counterpoint, while whipped cream frosting offers a lighter finish. For a healthier approach, try Greek yogurt frosting sweetened with honey and vanilla.
Decoration Ideas
Decoration can transform your Classic Vanilla Layer Cake from a simple dessert to a centerpiece. Use edible flowers or fresh berries for a natural, elegant look. Piping borders or rosettes with buttercream adds classic charm, while sprinkles or colored sugar crystals create a festive vibe. You can also top the cake with a dusting of powdered sugar for a minimalist, sophisticated finish.
Serving Occasions
The versatility of the Classic Vanilla Layer Cake makes it suitable for a range of occasions—from birthdays and weddings to casual afternoon tea or holiday gatherings. It can be made in advance and stored, making it convenient for entertaining. Mini versions or cupcakes based on this recipe are great for parties or portion control.
By playing with flavors, fillings, frostings, and decorations, you can make your Classic Vanilla Layer Cake uniquely yours while keeping its classic charm intact.

FAQ
Here are answers to some frequently asked questions about baking and enjoying your Classic Vanilla Layer Cake, designed to help you troubleshoot and customize your baking journey.
Can I make the cake gluten-free?
Absolutely! Substitute the all-purpose flour with a gluten-free baking blend, making sure it contains xanthan gum for structure. The texture might be slightly different but still delicious. Be sure to check that your baking powder is gluten-free as well.
How do I store leftover cake?
Store your Classic Vanilla Layer Cake covered in an airtight container at room temperature for up to two days. For longer storage, refrigerate it for up to five days or freeze slices wrapped tightly in plastic wrap for up to two months.
Can I freeze the cake layers?
Yes, you can bake the layers ahead of time and freeze them. Wrap them well in plastic wrap and foil to prevent freezer burn. When ready to use, thaw in the refrigerator overnight before assembling and frosting.
What if I don’t have sour cream?
You can substitute sour cream with an equal amount of Greek yogurt or buttermilk. These alternatives keep your Classic Vanilla Layer Cake moist and tender without compromising flavor.
How do I prevent my cake from drying out?
Avoid overbaking by checking your cake a few minutes before the recommended baking time. Use an oven thermometer to ensure accurate temperature. Wrapping layers tightly and storing the cake properly also helps maintain moisture.
Can I make this cake dairy-free?
Yes! Use dairy-free butter substitutes and plant-based milk like almond or oat milk. For the frosting, try vegan butter and powdered sugar or coconut cream-based frosting for a delicious dairy-free option.
What’s the best way to get even cake layers?
Use a kitchen scale to divide the batter evenly between pans. Level the tops with a spatula before baking. After baking, use a serrated knife or cake leveler to trim any domed tops for flat, uniform layers.
Conclusion
The Classic Vanilla Layer Cake remains a beloved staple in baking because it perfectly balances simplicity, elegance, and deliciousness. Its timeless flavor, tender crumb, and creamy frosting make it a go-to dessert for countless occasions, from birthdays and weddings to casual family gatherings and afternoon treats. After exploring this recipe in detail—from the ingredients and step-by-step instructions to storage tips, common pitfalls, and creative variations—you’re fully prepared to create your own flawless Classic Vanilla Layer Cake at home.
One of the best things about this cake is its versatility. The foundation of a Classic Vanilla Layer Cake allows you to customize flavors, fillings, and decorations to suit your personal style and event needs. Whether you stick to the pure vanilla essence or add your own unique twist, this cake adapts beautifully and never fails to impress.
Baking a Classic Vanilla Layer Cake from scratch may feel like a rewarding challenge, but it’s an entirely achievable project with the right guidance and patience. As you’ve seen, the key steps—such as using room temperature ingredients, measuring carefully, and cooling layers before frosting—make all the difference in achieving that perfect, light, and moist texture that defines this cake.
Moreover, the Classic Vanilla Layer Cake can be made ahead of time and stored properly without sacrificing quality. This flexibility makes it especially handy for busy home bakers and those planning special events. With a little advance preparation, you can serve a stunning cake that tastes fresh and looks bakery-worthy.
Finally, the joy of baking and sharing a Classic Vanilla Layer Cake goes beyond the recipe itself. It’s about creating moments of celebration and connection with family and friends. There’s a warmth and satisfaction in slicing into a homemade cake that fills your kitchen with the inviting scent of vanilla and butter, and seeing smiles around the table.
With this comprehensive guide, you now have everything you need to bake a delicious, crowd-pleasing Classic Vanilla Layer Cake. So gather your ingredients, preheat that oven, and prepare to enjoy one of baking’s most classic and delightful treats.