Easy Creamy Key Lime Cheesecake
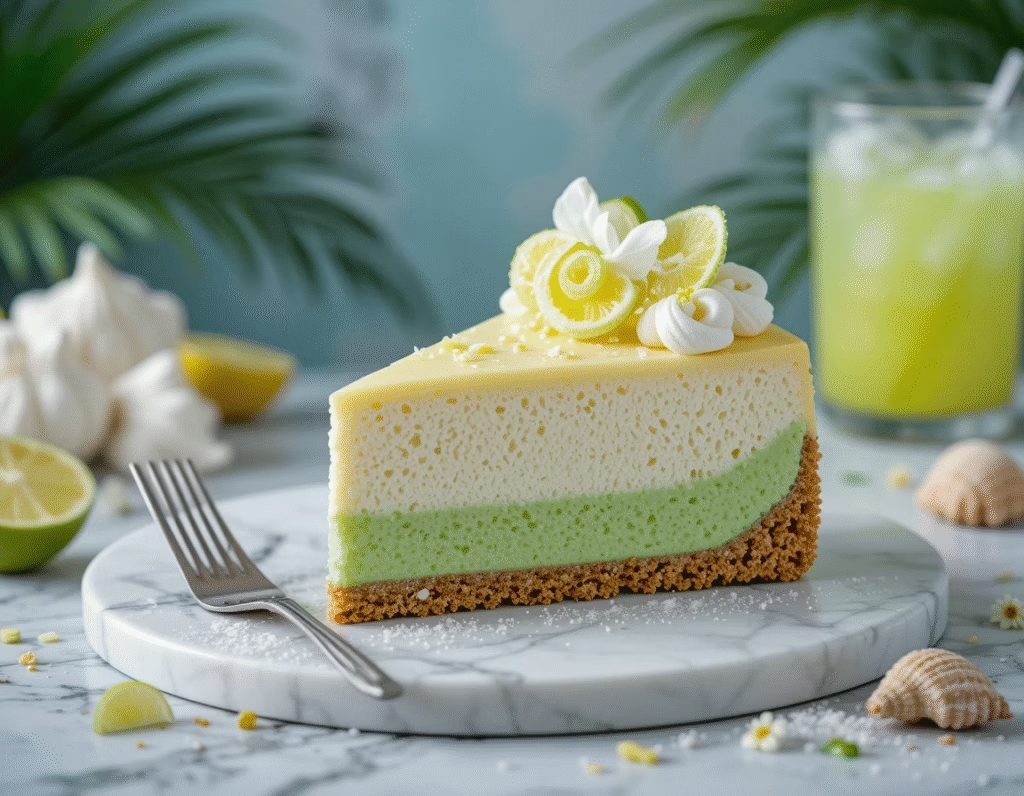
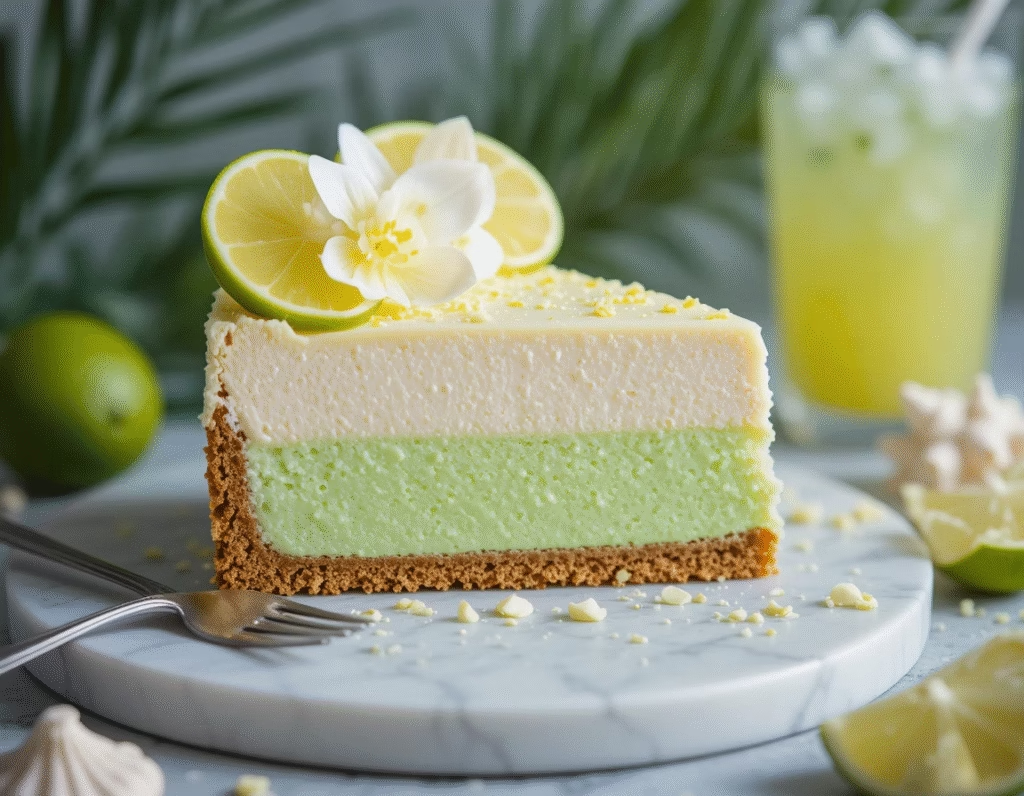
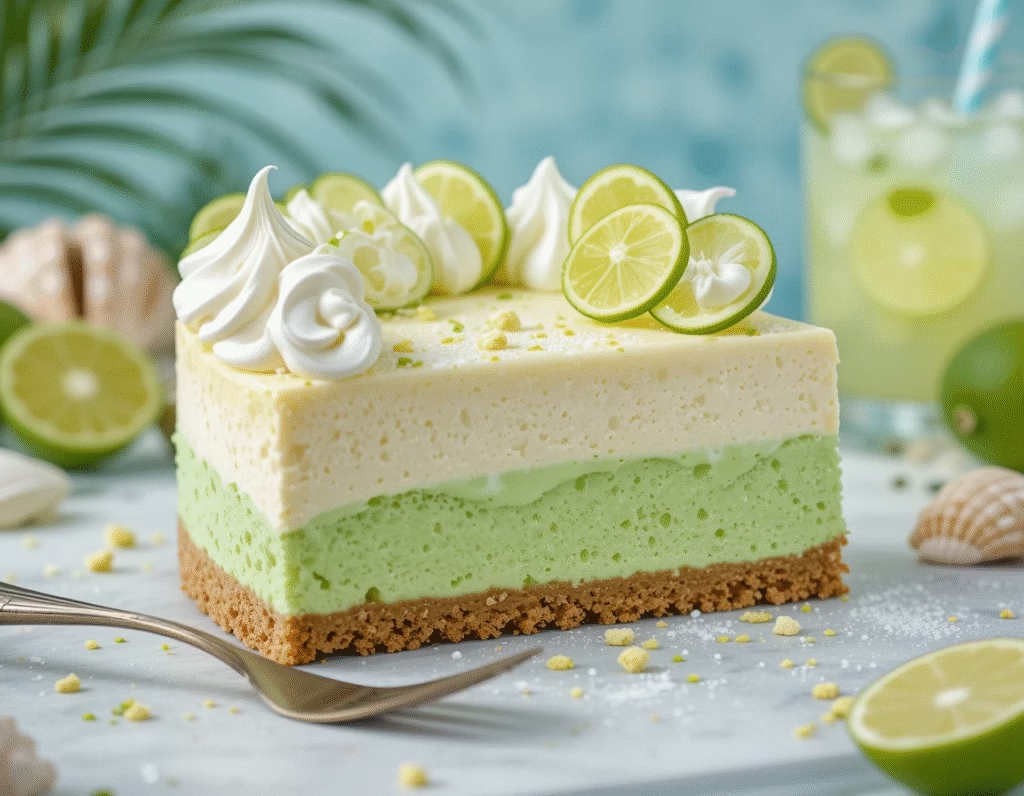
There’s something incredibly refreshing and unforgettable about a well-made Key Lime Cheesecake. With its creamy, tangy filling and buttery graham cracker crust, this dessert is the ultimate way to enjoy the zesty punch of key limes balanced against the richness of classic cheesecake. The Key Lime Cheesecake is not only perfect for warm-weather gatherings and holiday tables but also ideal for those moments when you want a dessert that feels indulgent yet light and citrusy.
What sets the Key Lime Cheesecake apart from other cheesecakes is its distinct key lime flavor—slightly more aromatic and less sharp than standard limes, key limes create a mellow, tropical brightness that complements the dense, creamy texture of the cheesecake base. Whether you’re a longtime fan of citrus desserts or trying key lime flavors for the first time, this cheesecake offers a deliciously smooth introduction.
Unlike traditional pies, the Key Lime Cheesecake combines two dessert favorites into one decadent bite: the classic richness of New York-style cheesecake and the zing of a traditional key lime pie. The result is a showstopping dessert that is both elegant and approachable. It’s a go-to option for backyard BBQs, family dinners, and even birthdays for those who prefer fruity over chocolatey sweets.
This blog post will walk you through everything you need to know to master the Key Lime Cheesecake from start to finish. We’ll cover the ingredients you’ll need, detailed instructions with full measurements, tips for perfect texture and flavor, and how to avoid common cheesecake pitfalls. You’ll also find suggestions for variations, storage advice, FAQs, and more—everything to make your baking process stress-free and your result spectacular.
Whether you’re baking your first cheesecake or have years of experience, this Key Lime Cheesecake recipe is designed to yield consistent, delicious results that everyone will rave about. With just the right balance of tart and sweet, this dessert is as refreshing as it is indulgent—and definitely one you’ll want to make again and again.
What You’ll Need
To make a delicious Key Lime Cheesecake, you’ll need high-quality ingredients and a few essential kitchen tools. While the ingredient list isn’t complicated, it’s important to understand what each item brings to the table in terms of flavor, texture, and structure. The magic of this dessert lies in the way tart key lime juice cuts through the richness of cream cheese, creating a dessert that’s both bright and creamy.
For the Crust:
- 1 ½ cups graham cracker crumbs
- ¼ cup granulated sugar
- 6 tablespoons unsalted butter, melted
This base gives the Key Lime Cheesecake a classic foundation that adds crunch and buttery richness to every bite. If you’d like a twist, you can use crushed vanilla wafers or ginger snaps instead of graham crackers for a hint of spice or sweetness.
For the Cheesecake Filling:
- 4 (8 oz) packages cream cheese, softened
- 1 cup granulated sugar
- ¾ cup sour cream or full-fat Greek yogurt
- 3 large eggs, room temperature
- ½ cup freshly squeezed key lime juice (about 20–25 key limes or ½ cup bottled key lime juice)
- 1 tablespoon key lime zest
- 1 teaspoon vanilla extract
Key limes are the star of the show here. If you can’t find fresh ones, bottled key lime juice (100% juice, no additives) is an acceptable substitute. The zest adds another layer of citrusy flavor, making this Key Lime Cheesecake truly pop.
Optional Topping:
- ¾ cup heavy cream
- 2 tablespoons powdered sugar
- Key lime zest or thin lime slices for garnish
A swirl of whipped cream on top adds a touch of elegance and softness, enhancing the visual appeal and mouthfeel of your Key Lime Cheesecake. Garnishing with lime zest or slices makes it even more eye-catching and celebratory.
Tools You’ll Need:
- 9-inch springform pan
- Mixing bowls
- Electric mixer or stand mixer
- Spatula
- Zester or microplane
- Citrus juicer
- Measuring cups and spoons
- Baking sheet for water bath (optional, but recommended if baking)
Having these tools and ingredients ready will make assembling your Key Lime Cheesecake seamless and enjoyable.
For another citrus twist, don’t miss our refreshing Strawberry Swirl Cheesecake Delight recipe.
How to Make (Include Full Measurements)
Making a Key Lime Cheesecake may seem intimidating, but with clear steps and the right ingredients, it’s easier than you think. This section breaks down the process—from preparing the crust to creating the creamy filling and baking the cheesecake to perfection. Whether it’s your first time or you’re a seasoned pro, this guide will walk you through it effortlessly.
Step 1: Prepare the Crust
Ingredients:
- 1 ½ cups graham cracker crumbs
- ¼ cup granulated sugar
- 6 tablespoons unsalted butter, melted
Instructions:
- Preheat your oven to 325°F (163°C).
- In a mixing bowl, combine the graham cracker crumbs and sugar.
- Stir in the melted butter until evenly moistened.
- Press the mixture into the bottom of a 9-inch springform pan using the bottom of a glass or measuring cup.
- Bake for 10 minutes, then remove from the oven and let it cool while you prepare the filling.
This buttery graham crust gives your Key Lime Cheesecake a solid, sweet base that balances the tangy lime filling.
Step 2: Make the Cheesecake Filling
Ingredients:
- 4 (8 oz) packages cream cheese, softened
- 1 cup granulated sugar
- ¾ cup sour cream or full-fat Greek yogurt
- 3 large eggs, room temperature
- ½ cup key lime juice (fresh or bottled)
- 1 tablespoon key lime zest
- 1 teaspoon vanilla extract
Instructions:
- In a large mixing bowl, beat the cream cheese until smooth and lump-free.
- Add sugar and mix until fully incorporated.
- Mix in sour cream (or Greek yogurt), vanilla extract, key lime juice, and zest.
- Add eggs one at a time, mixing on low speed just until combined.
- Pour the mixture over the pre-baked crust in your springform pan. Smooth the top with a spatula.
This creamy filling is where the magic of the Key Lime Cheesecake comes alive, offering a vibrant citrus punch in every bite.
Step 3: Bake the Cheesecake
- Place the filled springform pan into a larger baking dish and carefully pour hot water into the outer dish (water bath) until it reaches halfway up the sides.
- Bake for 55–65 minutes or until the edges are set but the center is slightly jiggly.
- Turn off the oven, crack the door, and allow the Key Lime Cheesecake to cool inside for 1 hour.
- Remove from the oven and refrigerate for at least 6 hours, preferably overnight.
Optional Topping:
Ingredients:
- ¾ cup heavy cream
- 2 tablespoons powdered sugar
Instructions:
Whip the cream and powdered sugar together until soft peaks form. Pipe or spread on top of your chilled Key Lime Cheesecake just before serving. Garnish with lime zest or slices.
Serving and Storage Tips
Once your Key Lime Cheesecake is perfectly chilled and ready to serve, a few tips will help you get the most out of this citrusy treat. From proper slicing techniques to long-term storage advice, this section ensures your cheesecake stays fresh and fabulous every time.
Serving Tips
- Chill thoroughly: The Key Lime Cheesecake must be completely chilled before slicing. At least 6 hours (preferably overnight) ensures that it’s firm and full-flavored.
- Use a hot knife for clean slices: Run a knife under hot water, wipe it dry, and slice. Clean the knife between cuts for that beautiful, bakery-style look.
- Garnish before serving: Top with whipped cream, key lime zest, or thin slices of lime for visual appeal. Even a sprinkle of crushed graham cracker or toasted coconut gives the Key Lime Cheesecake an elevated finish.
- Pair with drinks: Serve with iced tea, lemonade, or non-alcoholic sparkling cider for a refreshing pairing that complements the tangy flavors.
Storage Tips
- Refrigerate promptly: After serving, cover leftovers with plastic wrap or place them in an airtight container and return them to the fridge.
- Fridge life: The Key Lime Cheesecake will stay fresh in the refrigerator for up to 5 days. The flavor actually intensifies a bit by the second day, making it ideal for prepping ahead.
- Freezing: To freeze, wrap the cheesecake or individual slices in plastic wrap, then aluminum foil, and store in a freezer-safe bag. It can be frozen for up to 2 months.
- Thawing: When ready to enjoy, thaw overnight in the refrigerator. Avoid microwaving to preserve the texture and prevent sogginess.
Whether you’re serving it to guests or saving a few slices for yourself, these tips ensure your Key Lime Cheesecake stays as delicious on day five as it was on day one.
Mistakes to Avoid
Making a smooth, flavorful, and picture-perfect Key Lime Cheesecake may sound straightforward, but a few simple missteps can drastically affect your results. Whether it’s a cracked top or an overly tart bite, many issues can be avoided with some foresight. In this section, we’ll walk through the most common mistakes home bakers make and how to steer clear of them when preparing your Key Lime Cheesecake.
1. Using Regular Limes Instead of Key Limes
It might be tempting to swap key limes with standard Persian limes, but the flavor difference is noticeable. Key limes are smaller, more aromatic, and less sharp, giving your Key Lime Cheesecake its signature taste. If you can’t find fresh key limes, opt for 100% bottled key lime juice—but avoid sweetened or diluted alternatives.
2. Overmixing the Batter
One of the biggest reasons cheesecakes crack or become too dense is overmixing. It’s important to beat your cream cheese until smooth but mix the eggs in gently and slowly. Overmixing introduces excess air, which expands during baking and then contracts during cooling—causing your Key Lime Cheesecake to crack.
3. Skipping the Water Bath
The water bath (bain-marie) helps regulate oven temperature and keeps moisture in the oven, allowing the Key Lime Cheesecake to bake gently and evenly. Skipping this step increases the risk of a dry texture and unsightly cracks on top.
4. Removing the Cheesecake Too Soon
Don’t rush the cooling process. If you remove the Key Lime Cheesecake from the oven immediately or move it from a hot oven to a cold fridge, you’re inviting it to crack. Allow it to cool gradually in the oven with the door slightly ajar for one hour before moving it to the refrigerator.
5. Not Zesting the Limes Properly
Key lime zest is incredibly aromatic and adds a burst of citrus flavor. Avoid zesting too deeply—stop when you hit the white pith, which is bitter. The zest should be fine and fresh, not dried or pre-packaged, to maintain the fragrance and flavor balance of the Key Lime Cheesecake.
Avoiding these small mistakes can make the difference between a mediocre and a magnificent Key Lime Cheesecake.
Tips and Tricks
A truly memorable Key Lime Cheesecake isn’t just about following a recipe—it’s about those thoughtful little steps and secret techniques that elevate your dessert to bakery-quality. These tips and tricks will help you get perfect results, every single time.
1. Room Temperature Ingredients Are a Must
Ensure your cream cheese, eggs, and sour cream (or Greek yogurt) are all at room temperature before mixing. This helps everything blend smoothly without lumps, giving your Key Lime Cheesecake its creamy texture.
2. Use Fresh Zest and Juice
While bottled key lime juice is convenient, freshly squeezed juice has more depth and brightness. For zesting, use a microplane grater for fine, fluffy zest. The natural oils released from the fresh zest are what give Key Lime Cheesecake its signature citrus aroma.
3. Line the Pan for Easy Release
Lining the bottom of your springform pan with parchment paper not only helps prevent sticking, but also ensures the crust doesn’t crumble when transferring slices. It’s a small step that makes serving your Key Lime Cheesecake much easier and cleaner.
4. Try a Flavor Twist
While traditional Key Lime Cheesecake is divine on its own, you can experiment with flavors like coconut (by adding a bit of coconut cream or using shredded coconut in the crust) or ginger (by substituting gingersnaps for graham crackers). These additions amplify the tropical vibes.
5. Add a Sour Cream Layer (Optional)
If you love an extra tangy note, spread a thin layer of sweetened sour cream on top of the cheesecake before chilling. It adds a glossy finish and another layer of complexity to the Key Lime Cheesecake without overpowering the lime flavor.
6. Chill Overnight for Best Flavor
While you might be tempted to dive in sooner, chilling your Key Lime Cheesecake overnight allows all the flavors to meld and the texture to fully set. The longer rest time truly enhances the overall eating experience.
Suggestions
One of the greatest strengths of the Key Lime Cheesecake is its versatility. With a bright, citrusy flavor profile and a silky-smooth texture, this dessert serves as the perfect canvas for customization and creativity. Whether you’re planning a tropical-themed dinner party or just want to change things up in your baking routine, there are countless ways to make this recipe your own.
1. Make It Mini
If you’re hosting a gathering or simply want more manageable portions, try turning your Key Lime Cheesecake into individual servings. Use muffin tins lined with paper cups or mini springform pans to create personal cheesecakes. These are easy to serve and visually appealing. You can even swirl a little key lime puree or a dollop of whipped cream on top of each for presentation.
2. Tropical Toppings
Elevate your Key Lime Cheesecake by topping it with tropical fruit. Mango slices, kiwi rounds, or pineapple chunks add bursts of color and flavor that complement the citrusy cheesecake base. You could also make a mango-lime glaze for an extra glossy, flavorful finish.
3. No-Bake Version
For warmer months—or when you’re short on time—try a no-bake Key Lime Cheesecake. Use gelatin or agar-agar to stabilize the filling and allow it to set in the refrigerator. The result is a refreshing, mousse-like dessert that doesn’t require turning on the oven.
4. Crust Variations
While graham crackers are a classic, there are other crust options to consider. Try crushed digestive biscuits, vanilla wafers, or even gingersnaps for a spicy, warming contrast to the cool citrus filling. A coconut macaroon crust is also a fantastic match for a tropical-inspired Key Lime Cheesecake.
5. Cheesecake Bars
Turn your Key Lime Cheesecake into easy-to-slice bars by baking the filling in a rectangular baking pan lined with parchment paper. Once chilled, simply lift the whole cheesecake out and slice into bars for a convenient, handheld version of this creamy dessert.
6. Swirl in Some Raspberry
For a colorful twist, swirl in a few tablespoons of raspberry puree before baking. The tartness of raspberry complements the tangy lime and adds a beautiful marbled effect to your Key Lime Cheesecake.
No matter how you customize it, the Key Lime Cheesecake remains flavorful, crowd-pleasing dessert that’s hard to resist.
FAQ
When it comes to preparing the perfect Key Lime Cheesecake, questions are bound to arise—especially if it’s your first time using key limes in a dessert. Here are the most common questions bakers ask and detailed answers to ensure your cheesecake journey is smooth and successful.
Q1: Can I use bottled key lime juice instead of fresh?
Yes, you can! While fresh key lime juice gives the best flavor, bottled 100% key lime juice (like Nellie & Joe’s Famous Key West Lime Juice) is a convenient and widely used option. Just avoid any product that contains added sugar or preservatives to keep the Key Lime Cheesecake tasting fresh and authentic.
Q2: What’s the difference between key limes and regular limes?
Key limes are smaller, more aromatic, and slightly less acidic than standard Persian limes. This gives the Key Lime Cheesecake its mellow yet vibrant citrus profile. Substituting regular lime juice is possible, but it won’t replicate the exact flavor.
Q3: Can I freeze Key Lime Cheesecake?
Absolutely. You can freeze a fully set Key Lime Cheesecake for up to 2 months. Wrap it tightly in plastic wrap and aluminum foil. When ready to enjoy, thaw in the refrigerator overnight. Avoid microwaving to preserve the smooth texture.
Q4: Why did my cheesecake crack?
Cracking usually happens due to overbaking, rapid temperature changes, or overmixing the batter. Always use a water bath, let your Key Lime Cheesecake cool slowly, and avoid overmixing the eggs to reduce the chances of cracking.
Q5: Can I make this recipe gluten-free?
Yes! Use gluten-free graham crackers or a nut-based crust (like almond flour and butter) as a substitute for the base. The filling for Key Lime Cheesecake is naturally gluten-free, so with this one adjustment, it becomes a safe and delicious option for gluten-sensitive guests.
Q6: Can I make this cheesecake dairy-free?
It’s possible, but you’ll need to replace cream cheese with a dairy-free alternative, and use coconut cream or a non-dairy sour cream substitute. Keep in mind that while a dairy-free Key Lime Cheesecake can be delicious, the flavor and texture may vary.
Conclusion
The Key Lime Cheesecake is more than just a dessert—it’s an experience. With its smooth, creamy texture, refreshing key lime flavor, and crisp buttery crust, this dessert strikes the perfect balance between indulgence and brightness. Whether you’re serving it at a summer barbecue, a holiday dinner, or just because it’s a Tuesday, this cheesecake never fails to impress.
Throughout this article, we explored every facet of the Key Lime Cheesecake journey—from choosing the best ingredients and mastering the mixing method, to baking techniques, storage tips, and creative ways to serve it. The beauty of this recipe lies not only in its irresistible taste but also in its adaptability. You can make it your own with a tropical topping, switch up the crust, or even go no-bake on a hot day.
The tangy sweetness of the Key Lime Cheesecake makes it a memorable end to any meal. It’s light enough to refresh the palate, yet rich enough to satisfy even the most decadent dessert lovers. Once chilled and sliced, each bite offers the smoothness of cheesecake layered with the punch of fresh citrus—truly a combination that delights the senses.
With this guide in hand, you’re ready to create a bakery-worthy Key Lime Cheesecake in your own kitchen. Whether you’re making it for the first time or it’s a staple in your dessert rotation, this recipe delivers every time. Share it with loved ones, customize it to your taste, or keep it classic—either way, this cheesecake is bound to become a favorite.
Bake it, chill it, slice it, love it—the Key Lime Cheesecake is a timeless treat that brings a bit of sunshine to every occasion.