Creamy Biscoff Cheesecake Delight
Few desserts strike the perfect balance between nostalgic comfort and gourmet indulgence quite like Biscoff Cheesecake. This irresistible dessert brings together the creamy, tangy base of traditional cheesecake and the rich, caramelized flavor of Biscoff cookies. Whether you’re a seasoned cheesecake lover or simply someone looking to try something new and decadent, Biscoff Cheesecake offers a memorable flavor experience that satisfies every time.
At the heart of this dessert is Biscoff—those beloved spiced cookies with a deep caramel undertone and a slightly crisp bite. Biscoff cookies and cookie butter come together in this recipe to create a smooth, luscious cheesecake that’s equal parts cozy and elegant. It’s perfect for holiday gatherings, dinner parties, potlucks, or even a weekend baking project to treat yourself.
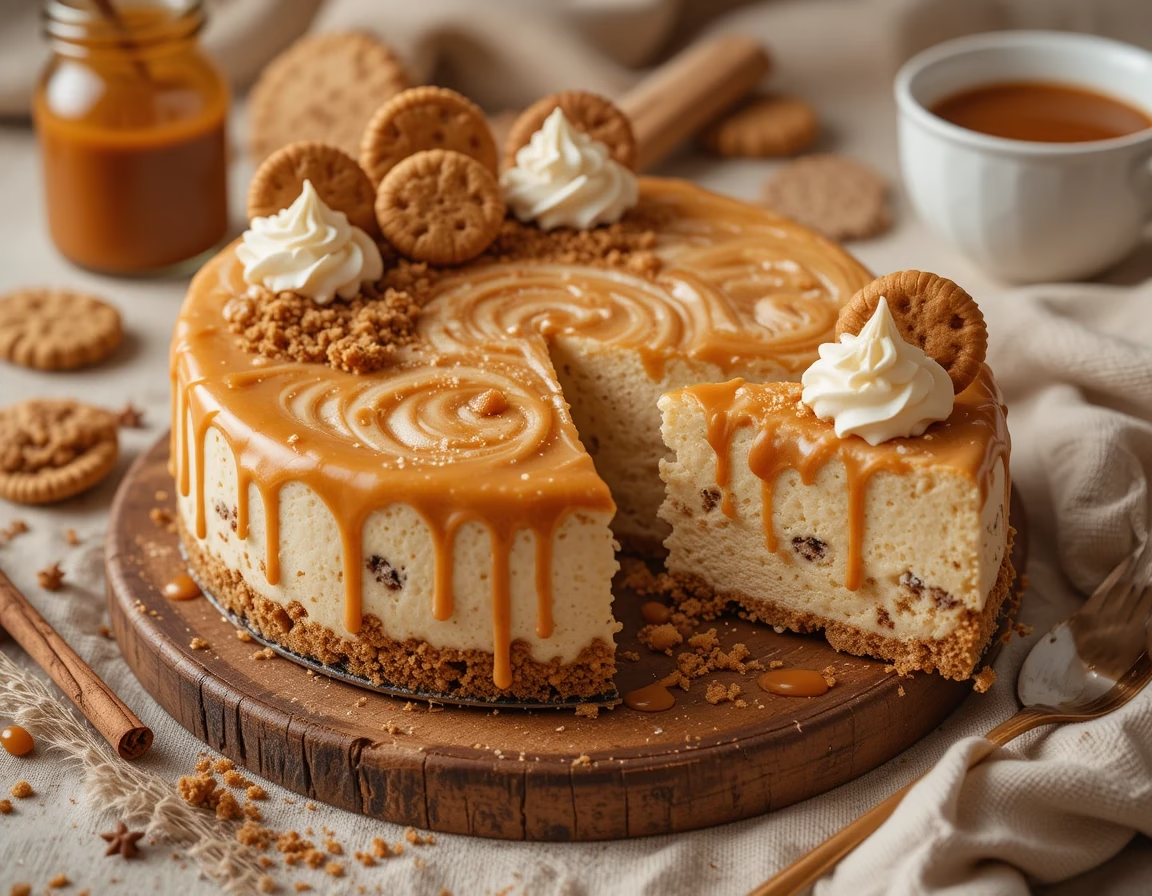
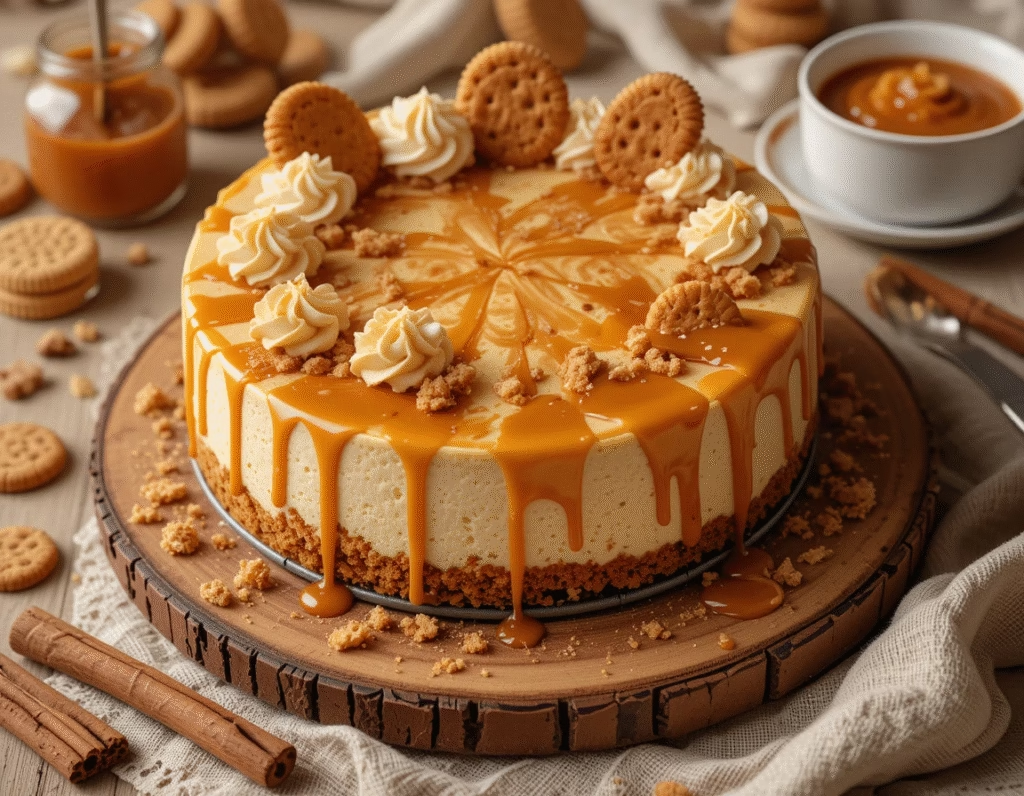
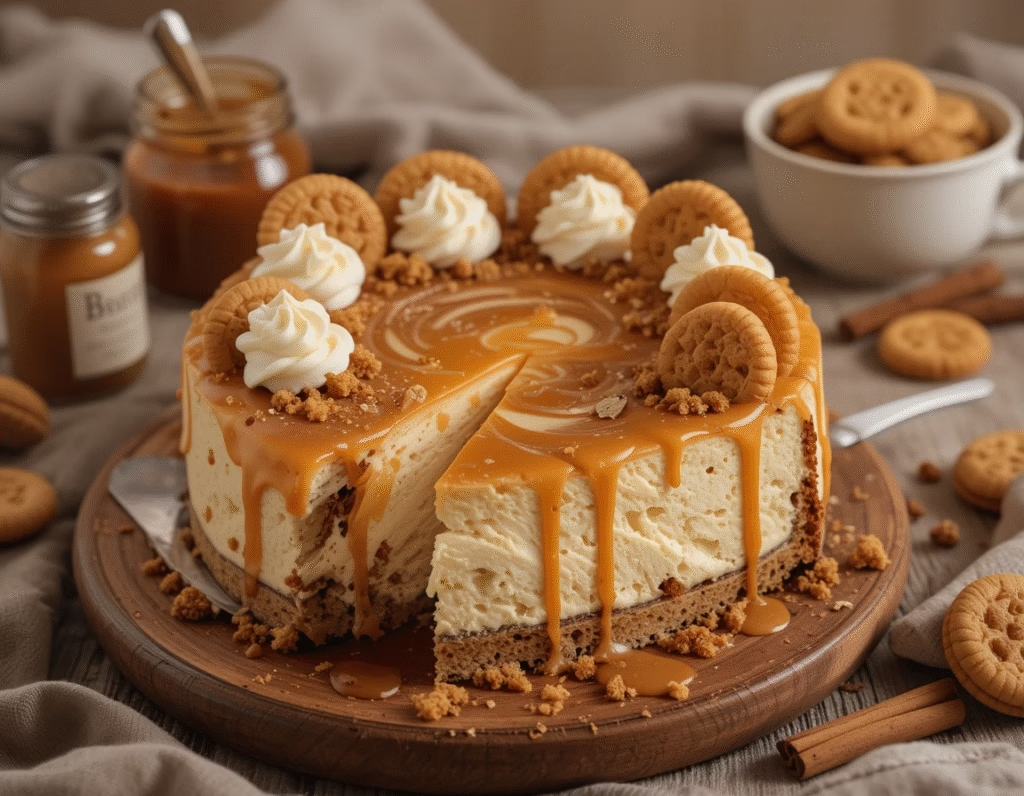
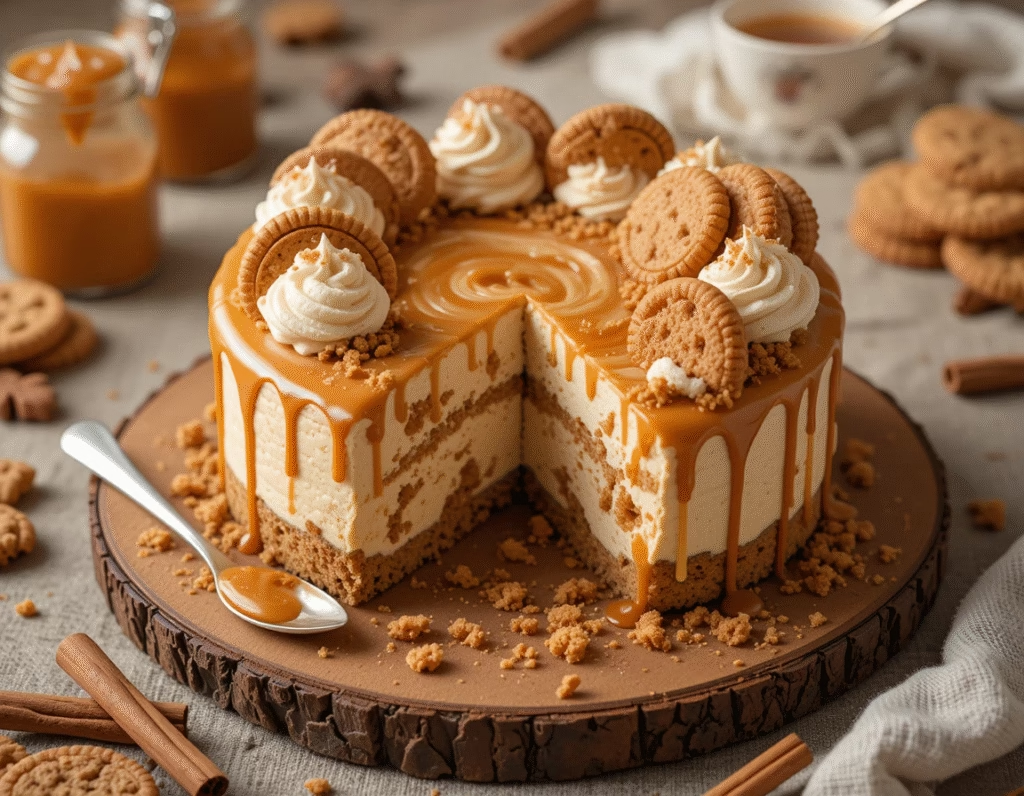
What makes Biscoff Cheesecake truly special is its multi-layered flavor and texture. The buttery cookie crust made from crushed Biscoff cookies provides the perfect contrast to the ultra-creamy cheesecake filling. Topped with a glossy layer of melted Biscoff spread and additional cookie crumbles, every bite bursts with caramel spice and creamy richness. It’s a show-stopping dessert that doesn’t require fussy techniques or hours of prep.
In this comprehensive guide, we’ll walk you through everything you need to know to master Biscoff Cheesecake in your own kitchen. From choosing the right ingredients to step-by-step baking instructions and tips on storing leftovers, we’ve got you covered. You’ll also learn how to avoid common mistakes, discover expert tricks to elevate your cheesecake game, and explore creative variations to make the recipe your own.
The best part? This Biscoff Cheesecake is as easy to make as it is delicious to eat. Whether you’re a beginner baker or an experienced pro, the results are guaranteed to impress. Prepare to fall in love with your new favorite dessert—because once you try a slice of Biscoff Cheesecake, there’s no turning back.
What You’ll Need
Before diving into the creation of your homemade Biscoff Cheesecake, it’s important to gather all the essential ingredients and tools. With just a handful of high-quality items, you’ll be well on your way to preparing a dessert that tastes like it came from a boutique bakery.
For the Crust:
- 2 cups Biscoff cookie crumbs (about 30 cookies)
- ½ cup unsalted butter, melted
- Pinch of salt (optional)
The crust is the flavorful foundation of your Biscoff Cheesecake. Using crushed Biscoff cookies gives it that signature caramel and spice profile that sets this cheesecake apart. Make sure to crush the cookies finely so the crust holds together well.
For the Cheesecake Filling:
- 3 (8 oz) blocks cream cheese, softened
- 1 cup granulated sugar
- 1 teaspoon vanilla extract
- ½ cup sour cream or full-fat Greek yogurt
- 3 large eggs, room temperature
- ½ cup Biscoff spread (cookie butter)
The creamy core of the Biscoff Cheesecake comes from high-quality cream cheese, a touch of sour cream for tang, and of course, plenty of Biscoff spread. Room-temperature ingredients are key for achieving a silky-smooth filling with no lumps.
For the Topping:
- ½ cup Biscoff spread, gently melted
- Biscoff cookie crumbs or halved cookies, for garnish
- Optional: whipped cream, caramel drizzle, or chocolate curls
The topping enhances the signature flavor of your Biscoff Cheesecake and adds beautiful visual appeal. A glossy layer of melted cookie butter paired with crumbled cookies makes the final presentation as stunning as it is scrumptious.
Tools You’ll Need:
- 9-inch springform pan
- Mixing bowls
- Hand or stand mixer
- Measuring cups and spoons
- Silicone spatula
- Food processor (for cookie crumbs)
- Baking sheet and foil (for water bath)
Using the right tools makes baking your Biscoff Cheesecake smoother and more efficient. A springform pan is especially important for easy removal and clean slices.
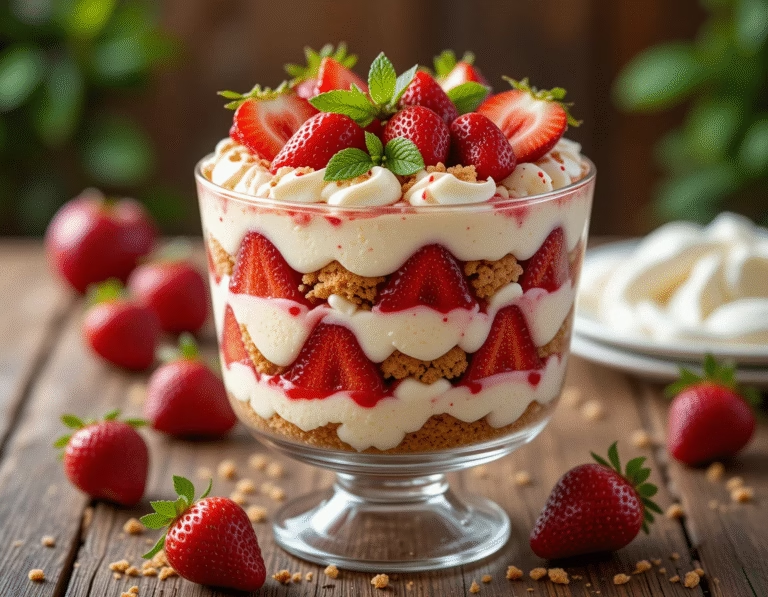
For a fruit-filled twist, check out our Strawberry Cheesecake Trifle Recipe recipe.
How to Make (Include Full Measurements)
Making a Biscoff Cheesecake at home is a rewarding experience that’s both simple and impressive. This guide will walk you through every step—from preparing the crust to layering on that final cookie butter topping. With patience and attention to detail, you’ll end up with a stunning and flavorful dessert that’s perfect for any celebration or sweet craving.
Step 1: Prepare the Biscoff Crust
Ingredients:
- 2 cups Biscoff cookie crumbs (around 30 cookies)
- ½ cup unsalted butter, melted
- Optional: pinch of salt for balance
Instructions:
- Preheat your oven to 325°F (163°C).
- Use a food processor to pulse the Biscoff cookies into fine crumbs.
- In a mixing bowl, combine the crumbs with melted butter. Stir until all crumbs are coated and resemble wet sand.
- Press the mixture into the bottom of a 9-inch springform pan using the back of a measuring cup.
- Bake the crust for 8–10 minutes. Remove and let it cool while you make the filling.
This Biscoff cookie crust is rich, buttery, and full of caramelized flavor—setting the perfect foundation for the luxurious filling of your Biscoff Cheesecake.
Step 2: Make the Cheesecake Filling
Ingredients:
- 3 (8 oz) blocks cream cheese, softened
- 1 cup granulated sugar
- 1 teaspoon vanilla extract
- ½ cup sour cream or Greek yogurt
- 3 large eggs, room temperature
- ½ cup Biscoff spread
Instructions:
- In a large mixing bowl, beat softened cream cheese on medium speed until smooth and fluffy.
- Add sugar and vanilla, and beat until fully combined.
- Mix in sour cream and Biscoff spread until the filling is light and uniform.
- Add the eggs one at a time, mixing on low speed after each addition. Do not overmix.
- Pour the filling over the cooled crust and smooth the top with a spatula.
This filling is where the true magic of Biscoff Cheesecake happens—creamy, rich, and perfectly flavored with cookie butter.
Step 3: Bake the Cheesecake
- Wrap the outside of the springform pan with two layers of foil to prevent leaks.
- Place the springform pan in a larger roasting pan and fill it with hot water halfway up the sides (a water bath).
- Bake at 325°F (163°C) for 55–65 minutes. The edges should be set while the center still slightly jiggles.
- Turn off the oven, crack the door, and let the cheesecake cool inside for 1 hour.
- Remove from the oven and refrigerate for at least 6 hours or overnight.
The water bath ensures your Biscoff Cheesecake bakes evenly and stays crack-free, with a beautifully smooth texture.
Step 4: Add the Biscoff Topping
Ingredients:
- ½ cup Biscoff spread, gently melted
- Biscoff cookie crumbs or halved cookies
Instructions:
- Once the cheesecake is fully chilled, pour the melted Biscoff spread over the top.
- Use an offset spatula to spread it into a smooth, even layer.
- Garnish with crushed or whole Biscoff cookies for decoration.
- Chill for 15–20 minutes to set the topping before slicing.
This final step brings your Biscoff Cheesecake full circle—with a cookie butter crown that highlights everything we love about this rich, spiced dessert.
Serving and Storage Tips
When it comes to enjoying your Biscoff Cheesecake, how you serve and store it can make a huge difference in both flavor and presentation. Below are the most effective ways to serve this showstopping dessert and keep it fresh so that every bite is as delicious as the first.
Serving Tips:
- Chill Before Serving:
After baking and cooling, your Biscoff Cheesecake must chill in the fridge for at least 6 hours—or preferably overnight. This allows the cheesecake to fully set and ensures the flavors mature and meld beautifully. - Clean Slicing:
To get clean, sharp slices, dip a sharp knife in hot water and wipe it clean between each cut. This is especially helpful with the sticky, creamy Biscoff topping. - Presentation Matters:
Top slices with whipped cream, caramel drizzle, or a whole Biscoff cookie for added flair. Serve on decorative plates or with fresh berries to enhance the visual appeal of your Biscoff Cheesecake. - Pairing Suggestions:
This cheesecake pairs wonderfully with non-alcoholic drinks like spiced chai, cold brew coffee, or a vanilla latte. These beverages complement the caramel and cinnamon notes in your Biscoff Cheesecake perfectly.
Storage Tips:
- Refrigeration:
Store your Biscoff Cheesecake in the fridge covered with plastic wrap or in a sealed container. It stays fresh for up to 5 days. Be sure to keep it cool at all times to preserve its texture and taste. - Freezing:
To freeze, wrap the entire cheesecake—or individual slices—tightly in plastic wrap, then in foil. Store in an airtight container and freeze for up to 2 months. Thaw overnight in the refrigerator before serving. - Avoid Room Temperature Storage:
Because Biscoff Cheesecake contains cream cheese and eggs, it should never be stored at room temperature for more than 2 hours. Always refrigerate leftovers immediately. - Make Ahead Friendly:
This cheesecake is perfect for prepping in advance. In fact, it tastes even better after a day in the fridge as the flavors settle and intensify. You can confidently prepare your Biscoff Cheesecake a day or two before your event.
Mistakes to Avoid
Even though Biscoff Cheesecake is a relatively simple dessert to make, there are a few common mistakes that can affect texture, flavor, and overall presentation. Whether you’re a beginner or an experienced baker, understanding these pitfalls will help you perfect your cheesecake and avoid frustration. Below are the most frequent missteps to watch out for—and exactly how to avoid them.
1. Using Cold Ingredients
This is one of the top reasons your Biscoff Cheesecake may turn out lumpy or uneven. Cold cream cheese or eggs don’t blend smoothly, which leads to a grainy texture in the batter. Always bring your cream cheese, eggs, and sour cream to room temperature before mixing. This small step ensures a silky, creamy filling—just what every Biscoff Cheesecake should have.
2. Overmixing the Batter
While you do want to fully incorporate your ingredients, overmixing—especially after adding the eggs—can introduce too much air. That trapped air expands during baking and can cause the Biscoff Cheesecake to puff up and crack, then collapse once cooled. Always mix on low speed and stop as soon as everything is blended.
3. Skipping the Water Bath
It might seem like a hassle, but baking your Biscoff Cheesecake in a water bath is crucial for even baking and preventing cracks. The steam helps keep the oven moist and allows the cheesecake to bake gently and evenly. Wrap your pan in foil to prevent leaks and make sure the water reaches halfway up the pan sides.
4. Baking at Too High a Temperature
Cheesecake should bake slowly and gently. Baking it at too high a temperature can cause the top to brown too quickly while the center remains underdone. Stick to a moderate 325°F (163°C) and use an oven thermometer to ensure accuracy. A slow, steady bake is the secret to a perfect Biscoff Cheesecake.
5. Not Letting It Cool Gradually
Taking your Biscoff Cheesecake straight from the oven to a cold kitchen counter can shock it, leading to cracks or a soggy base. Instead, let the cheesecake cool in the turned-off oven with the door cracked for an hour. This gradual cooling helps it set beautifully and maintain structure.
6. Cutting Before It’s Fully Set
Cheesecake needs time to chill and firm up. Cutting into your Biscoff Cheesecake too soon can result in messy slices and a runny center. For best results, refrigerate your cheesecake for at least 6 hours, or preferably overnight, before serving.
Avoiding these mistakes ensures your Biscoff Cheesecake turns out smooth, flavorful, and bakery-quality every single time.
Tips and Tricks
Now that you know what mistakes to steer clear of, let’s explore some of the best tips and tricks to elevate your Biscoff Cheesecake from great to truly unforgettable. These are the little secrets that bakers use to create picture-perfect, flavor-packed cheesecakes that guests rave about long after the last slice is gone.
1. Use a Springform Pan
A springform pan isn’t just convenient—it’s essential. It allows for easy release of your Biscoff Cheesecake without damaging the sides. Be sure to grease the sides lightly or line with parchment to prevent sticking and give you those clean, flawless edges.
2. Crush Cookies Finely for a Firm Crust
When making the crust, use a food processor to get the Biscoff cookie crumbs extra fine. This helps the butter bind everything together evenly and ensures the crust doesn’t crumble when sliced. A firm, tight base is key for every Biscoff Cheesecake.
3. Add Extra Cookie Crumbs Between Layers
Want even more Biscoff flavor? Try sprinkling a thin layer of cookie crumbs between the crust and the cheesecake filling. It adds a slight crunch and an extra caramelized depth that enhances the overall experience of your Biscoff Cheesecake.
4. Use Hot Water for Slicing
To keep your cheesecake slices clean and professional-looking, dip your knife in hot water and wipe it dry between cuts. This is especially important when cutting through the sticky, delicious Biscoff topping. Every slice of Biscoff Cheesecake will look bakery-worthy with this trick.
5. Chill the Topping Before Serving
After you spread the Biscoff topping over your cheesecake, pop it in the fridge for 15–20 minutes. This helps the topping set into a smooth, glossy finish that’s easier to slice and looks absolutely stunning on top of your Biscoff Cheesecake.
6. Add Creative Garnishes
Whipped cream swirls, caramel drizzle, crushed Biscoff cookies, or even a few chocolate curls can add elegance and extra flavor. Garnishing not only makes your Biscoff Cheesecake look incredible but also adds texture contrast that enhances the eating experience.
7. Make in Advance for Better Flavor
If you have the time, make your Biscoff Cheesecake a day before serving. The flavors deepen and meld beautifully with overnight chilling. Many bakers agree that cheesecake is actually better on Day 2!
Suggestions
One of the best parts about making Biscoff Cheesecake is how versatile it is. While the traditional recipe is already indulgent and flavorful, there are countless ways to tailor it to different tastes, dietary needs, and occasions. Whether you want to turn your cheesecake into a seasonal treat or elevate it with gourmet flair, the suggestions below will help you put your own spin on the classic Biscoff Cheesecake without sacrificing its rich cookie butter essence.
1. Make It No-Bake
If you’re looking for a shortcut or want to avoid turning on the oven, a no-bake Biscoff Cheesecake is a fantastic alternative. Simply skip the eggs and use whipped cream and gelatin or cream stabilizer to firm the filling. Chill overnight and top with Biscoff spread and cookie crumbles as usual. You’ll still get all the signature flavor with minimal effort.
2. Create Individual Servings
For parties or personal treats, consider making mini Biscoff Cheesecakes in cupcake liners or small jars. This makes serving a breeze, especially for events or dessert tables. Plus, individual servings look adorable and can be customized with toppings like fruit, chocolate drizzle, or a dollop of whipped cream.
3. Add a Chocolate Layer
To give your Biscoff Cheesecake an extra layer of indulgence, pour a thin ganache layer over the chilled cheesecake before adding the Biscoff topping. Chocolate and Biscoff are a match made in heaven, and the added richness will make each bite even more luxurious.
4. Infuse the Filling with Cinnamon or Espresso
To deepen the warm spiced notes of your Biscoff Cheesecake, consider adding a dash of cinnamon or a teaspoon of instant espresso powder to the filling. These additions complement the caramel flavor of Biscoff and bring out a more complex, bakery-style taste.
5. Go Vegan or Dairy-Free
With the rise of plant-based options, it’s easy to create a dairy-free or vegan Biscoff Cheesecake. Use dairy-free cream cheese, coconut whipped topping, and a flax egg substitute. Biscoff spread is already dairy-free, making it an ideal ingredient for vegan dessert lovers.
6. Add a Swirl of Fruit Puree
For a refreshing twist, swirl in raspberry or strawberry puree before baking. The tartness balances the sweetness of the Biscoff and gives your Biscoff Cheesecake a fruity kick and a stunning presentation. This variation is perfect for spring or summer gatherings.
These suggestions allow you to take your Biscoff Cheesecake from simple to sensational. Whether you’re accommodating dietary needs or just feeling adventurous, don’t be afraid to experiment with flavors, formats, and garnishes. The caramel, spiced essence of Biscoff pairs beautifully with many additions—and the results are always delicious.
FAQ
If you’ve got questions about baking or storing your Biscoff Cheesecake, you’re not alone. Many home bakers have the same questions about ingredients, techniques, and how to customize the recipe. This FAQ section covers the most common inquiries to help you achieve perfect results every time you make Biscoff Cheesecake.
Q1: Can I make Biscoff Cheesecake ahead of time?
Yes, and it’s actually recommended! Biscoff Cheesecake tastes even better the next day. The flavors have time to develop, and the texture becomes firmer and creamier. Make it one or two days in advance for the best results.
Q2: Can I freeze Biscoff Cheesecake?
Absolutely. Biscoff Cheesecake freezes very well. Wrap individual slices or the whole cheesecake tightly in plastic wrap and aluminum foil. Store in an airtight container and freeze for up to 2 months. Thaw in the refrigerator overnight before serving.
Q3: What if I don’t have a springform pan?
While a springform pan is ideal for easy release, you can still make Biscoff Cheesecake in a deep pie dish or a cake pan lined with parchment. Just note that removing clean slices may be a bit trickier, but the taste will still be incredible.
Q4: Can I make this gluten-free?
Yes! Just use gluten-free Biscoff-style cookies for the crust. The rest of the Biscoff Cheesecake ingredients are naturally gluten-free, so it’s an easy adjustment.
Q5: What’s the best way to melt Biscoff spread for the topping?
Microwave the Biscoff spread in a microwave-safe bowl for about 15–20 seconds. Stir until smooth, then pour over the chilled Biscoff Cheesecake. It should spread easily and create a glossy, beautiful finish.
Q6: Can I use reduced-fat cream cheese?
You can, but keep in mind that full-fat cream cheese gives Biscoff Cheesecake its signature richness and stability. Reduced-fat versions may alter the texture, making it softer and less firm when sliced.
Q7: Is Biscoff spread the same as cookie butter?
Yes! Biscoff spread is a type of cookie butter made from Lotus Biscoff cookies. It has a rich, caramelized flavor and creamy consistency, perfect for mixing into or topping your Biscoff Cheesecake.
Conclusion
If you’re looking for a dessert that’s guaranteed to impress yet easy to prepare, Biscoff Cheesecake is your new go-to showstopper. With its spiced cookie crust, velvety filling, and rich Biscoff topping, this cheesecake is the ultimate expression of indulgence. Each bite is layered with flavor—from the crunchy base to the creamy center to the caramel-glazed finish.
Whether you’re baking for a special holiday, celebrating a birthday, or simply satisfying a craving, Biscoff Cheesecake never disappoints. It’s a dessert that looks bakery-perfect but is easily achievable at home with just a few pantry staples. Plus, the recipe is endlessly customizable—no-bake options, mini versions, vegan swaps, and fruit additions are just the beginning of what you can do with this flavor-packed creation.
One of the standout qualities of Biscoff Cheesecake is its versatility. You can prep it ahead of time for stress-free entertaining, freeze slices for future cravings, or dress it up with toppings to match the season. It’s rich enough for special occasions but easy enough to make just because.
Above all, Biscoff Cheesecake is a celebration of flavor and texture. The cookie butter spread adds warmth and depth, while the cream cheese base keeps it lush and balanced. And let’s not forget the signature crust, made entirely from those iconic Biscoff cookies—truly the heart of the dessert.
So go ahead, preheat that oven, stock up on cookie butter, and get ready to bake the most addictive cheesecake you’ve ever made. Once you’ve tasted your homemade Biscoff Cheesecake, it won’t be your last.