Easy Homemade Marble Cake Recipe
There’s something irresistibly charming about a Marble Cake Recipe. Swirled with delicate ribbons of vanilla and chocolate batter, this cake isn’t just a treat for your taste buds—it’s a visual delight that promises both flavor and nostalgia in every bite. Whether you grew up enjoying this classic at birthday parties, bake sales, or family dinners, marble cake continues to be a beloved favorite across generations.
What makes a marble cake special is its simplicity combined with its visual appeal. It has the soft crumb of a traditional butter cake, but with the added richness of chocolate and the playful swirl that makes each slice unique. It’s ideal for those moments when you can’t quite decide between vanilla and chocolate—because with marble cake, you get both.
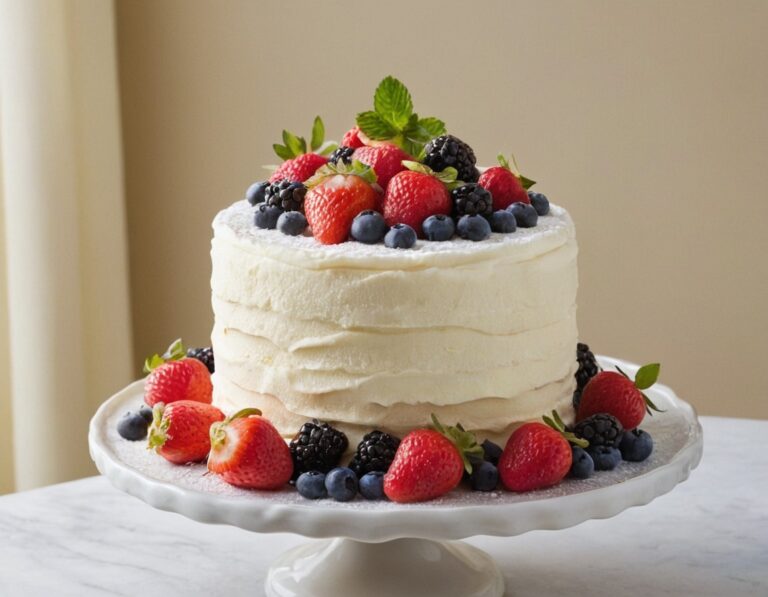
Marble cake is incredibly versatile. It’s equally welcome at a Sunday brunch as it is at a formal celebration. It doesn’t demand extravagant frosting or complicated layers to shine. In fact, most marble cakes are served plain, with just a dusting of powdered sugar or a drizzle of glaze, allowing the beautifully marbled interior to take center stage. That said, it’s also a perfect canvas if you feel like dressing it up with ganache, whipped cream, or fresh berries.
And let’s not forget the experience of baking it. There’s something uniquely satisfying about dragging a knife or skewer through the two batters, watching the swirls form before your eyes. It feels creative—almost like baking meets art. Kids love helping with this part, and adults are always impressed when the cake is sliced and the intricate marbling is revealed.
In this blog post, we’ll explore how to make the perfect marble cake from scratch with easy-to-follow steps and accessible ingredients. You’ll learn which tools to use, tips for achieving the ideal swirl, and suggestions for storage and serving. We’ll also cover common mistakes and helpful tricks to elevate your cake from good to unforgettable.
What You’ll Need to Make Marble Cake
Marble cake might look fancy with its beautiful swirls, but it’s made from basic pantry staples—ingredients that are likely already sitting in your kitchen. The key is using high-quality versions of these ingredients and following a precise method to get that moist, tender crumb and striking marbled interior.
Below is everything you’ll need, broken down into ingredients and essential tools:
🧂 Ingredients
For the Base Cake Batter:
- 2 ½ cups (315g) all-purpose flour – sifted for a light crumb
- 2 ½ teaspoons baking powder – for lift and structure
- ½ teaspoon salt – balances the sweetness
- 1 cup (2 sticks or 226g) unsalted butter, softened – brings richness and moisture
- 1 ¾ cups (350g) granulated sugar – sweetens and helps create a tender crumb
- 4 large eggs – provide structure and moisture
- 1 tablespoon pure vanilla extract – for warm flavor
- 1 cup (240ml) whole milk – keeps the batter smooth and moist
For the Chocolate Swirl:
- ⅓ cup (30g) unsweetened cocoa powder – provides a deep chocolate flavor
- 2 tablespoons granulated sugar – offsets cocoa’s bitterness
- 3 tablespoons milk (whole or 2%) – helps smooth the chocolate batter
🍴 Tools and Equipment
To make a proper marble cake, you’ll want to have the following tools on hand:
- Two mixing bowls – one for the vanilla base and one for the chocolate swirl
- Measuring cups and spoons – for accuracy
- Stand mixer or electric hand mixer – for creaming butter and sugar efficiently
- Rubber spatula – for folding and scraping down the batter
- 9×5 inch loaf pan or 9-inch round cake pan – depending on your preferred shape
- Toothpick or butter knife – for swirling the batters together
- Cooling rack – to let the cake cool evenly
- Sifter or sieve – for aerating flour and dusting powdered sugar if desired
📝 Ingredient Notes
- Butter: Use unsalted butter so you can control the salt content. Room temperature butter is essential for proper creaming.
- Sugar: Regular white sugar works best. Avoid coarse raw sugar as it doesn’t blend as smoothly.
- Flour: Make sure to measure your flour correctly by spooning it into the cup and leveling it off with a knife to avoid packing.
- Milk: Whole milk gives the best texture, but you can use 2% in a pinch. Avoid non-dairy milks unless adapting for allergies.
Getting the ingredients and tools right from the start makes the rest of the process go smoothly. Quality, freshness, and proper measuring are your best friends when preparing to bake a moist, flavorful marble cake.
How to Make Marble Cake (Step-by-Step with Full Measurements)
Making a marble cake from scratch is a rewarding process that combines the best of vanilla and chocolate flavors into one stunning loaf or round cake. The swirl pattern might look complicated, but it’s surprisingly easy once you know the method. Here’s how to bring your marble cake to life, step-by-step.
🧁 Full Ingredients Recap
For Vanilla Batter:
- 2 ½ cups (315g) all-purpose flour
- 2 ½ tsp baking powder
- ½ tsp salt
- 1 cup (226g) unsalted butter, softened
- 1 ¾ cups (350g) granulated sugar
- 4 large eggs
- 1 tbsp pure vanilla extract
- 1 cup (240ml) whole milk
For Chocolate Batter:
- ⅓ cup (30g) unsweetened cocoa powder
- 2 tbsp granulated sugar
- 3 tbsp milk
🥣 Directions
Step 1: Preheat & Prepare Pan
Start by preheating your oven to 350°F (175°C). Grease a 9×5-inch loaf pan or a 9-inch round cake pan with non-stick spray or butter, then line the bottom with parchment paper for easy removal.
Step 2: Mix the Dry Ingredients
In a medium bowl, whisk together the flour, baking powder, and salt. Set aside.
Step 3: Cream the Butter and Sugar
In a large mixing bowl, beat the softened butter and sugar together on medium-high speed for 3-4 minutes, until light and fluffy. This incorporates air for a tender crumb.
Step 4: Add the Eggs and Vanilla
Add the eggs one at a time, beating well after each addition. Then add the vanilla extract. The mixture may look a bit curdled—that’s okay.
Step 5: Add the Flour and Milk
Reduce mixer speed to low. Alternate adding the flour mixture and milk to the butter mixture, beginning and ending with flour (flour → milk → flour → milk → flour). Mix just until combined.
Step 6: Make the Chocolate Batter
Transfer about 1 ½ cups of the vanilla batter into a separate bowl. Mix in cocoa powder, 2 tablespoons sugar, and 3 tablespoons milk until smooth and well combined.
Step 7: Layer and Swirl
Pour half of the vanilla batter into the prepared pan, followed by half of the chocolate batter. Repeat with the remaining batters. Use a butter knife or skewer to gently swirl the batters together. Don’t overmix—just a few figure-eight motions will do.
Step 8: Bake
Bake for 50–60 minutes or until a toothpick inserted in the center comes out clean. If using a round pan, start checking at 45 minutes. Let the cake cool in the pan for 10–15 minutes, then transfer to a wire rack.
🍫 Optional Toppings
- A light dusting of powdered sugar
- A simple vanilla glaze (1 cup powdered sugar + 1–2 tbsp milk)
- A drizzle of melted chocolate
Now that your marble cake is ready, let’s talk about how to serve and store it to maintain that perfect texture.
🍽️ Serving and Storage Tips
One of the best things about marble cake—aside from its stunning swirl and rich flavor—is its versatility. Whether you’re serving it for brunch, dessert, or even with an afternoon cup of coffee, this cake is always a crowd-pleaser. And with the right storage, you can keep it fresh for several days or even freeze it for future enjoyment.
🍴 Serving Tips
Temperature Matters:
Marble cake is best served at room temperature. Let it sit out for at least 20–30 minutes if you’ve stored it in the fridge. This allows the butter in the cake to soften, making each bite moist and flavorful.
Pair with Simple Sides:
- Serve with a scoop of vanilla or chocolate ice cream
- Add a dollop of whipped cream or Greek yogurt
- Fresh berries (like strawberries or raspberries) pair beautifully with the vanilla-chocolate combo
- A dusting of powdered sugar can elevate the visual appeal without adding complexity
Great for Any Occasion:
Marble cake travels well and is sturdy enough to be sliced and packed for picnics, lunchboxes, or potlucks. It’s also elegant enough to be plated with a drizzle of glaze or ganache for a more formal dessert.
🧊 Storage Tips
Short-Term Storage (2–4 Days):
Store the cooled marble cake in an airtight container at room temperature. If your kitchen is particularly warm, store it in the fridge, but keep in mind that refrigeration may firm up the texture slightly. Always allow the cake to come to room temp before serving.
Refrigeration (Up to 1 Week):
Wrap the cake tightly in plastic wrap or store it in a container with a tight seal to prevent it from absorbing odors. You can also refrigerate individual slices for convenient snacking.
Freezing Instructions (Up to 3 Months):
To freeze, wrap the whole cake or individual slices in plastic wrap, then a layer of aluminum foil. Place wrapped cake into a freezer-safe bag or container. Thaw overnight in the refrigerator or for a few hours at room temperature.
♻️ Leftover Ideas
- Toast slices lightly and spread with butter or chocolate hazelnut spread
- Use in layered trifles or parfaits with cream and fruit
- Crumble into cake pops or use as a base for dessert bars
A marble cake is one of those delightful desserts that doesn’t just taste amazing the day it’s baked—it can remain moist and flavorful for days with proper storage.
Mistakes to Avoid When Making Marble Cake
Even though marble cake is relatively simple, there are a few common pitfalls that can affect both its texture and appearance. Whether you’re a beginner baker or someone with years of experience, knowing what to avoid can make all the difference in achieving a cake that’s soft, swirled perfectly, and full of flavor. Here’s a breakdown of the most frequent mistakes and how to steer clear of them.
❌ Overmixing the Batter
This is one of the most common errors. Once you add the flour to the wet ingredients, mix only until just combined. Overmixing at this stage activates the gluten in the flour, leading to a dense, chewy cake instead of the soft, tender crumb you’re aiming for.
❌ Using Cold Ingredients
Using cold butter, milk, or eggs can cause the batter to curdle or not mix evenly. Always make sure your ingredients are at room temperature before starting. This ensures smoother blending and better aeration, which helps the cake rise properly and have an even texture.
❌ Incorrect Swirling Technique
When it comes to marbling, less is more. Too much swirling can cause the two batters to blend completely, resulting in a muddy-looking cake rather than a defined marbled pattern. Use a butter knife or skewer and make a few gentle figure-eight motions—no more than 3–4 swirls per section.
❌ Uneven Batter Distribution
Pouring all of the vanilla batter first, then dumping the chocolate on top, often leads to a cake that’s mostly one flavor on the bottom and the other on top. Layer the batters in alternating spoonfuls and then swirl to ensure a more even distribution of flavors throughout the cake.
❌ Not Prepping the Pan Properly
Failing to grease and line your baking pan can result in the cake sticking and breaking when you try to remove it. Always use non-stick spray and parchment paper on the bottom of the pan for easy, clean removal.
❌ Opening the Oven Too Early
Opening the oven door before the cake has set can cause it to sink in the middle. Try to avoid opening the oven until you’re close to the minimum baking time. If you must check, do it quickly and gently.
❌ Ignoring Proper Cooling
Cutting into the cake while it’s still hot can ruin its structure and create a gummy texture. Let the cake cool in the pan for 10–15 minutes, then transfer to a wire rack and cool completely before slicing.
Avoiding these simple but significant mistakes can help you produce a flawless marble cake that looks as stunning as it tastes. With experience, you’ll be able to trust your instincts and know just how much to mix, swirl, and bake.
💡 Tips and Tricks for the Perfect Marble Cake
While avoiding mistakes is important, the real magic happens when you know the tricks that elevate a good cake to a great one. From enhancing flavor to improving texture and presentation, these tried-and-true tips will help you get the most out of your marble cake recipe every single time.
🧁 Enhance Your Chocolate Batter
Want an even richer chocolate flavor? Try using Dutch-processed cocoa for a smoother, darker taste. You can also add a small amount of melted dark chocolate (about 2 tablespoons) to the chocolate portion for an extra depth of flavor and a denser swirl.
🧈 Use Quality Butter
Butter is one of the key ingredients in this recipe, so opt for a high-quality, unsalted butter. European-style butters with higher fat content (around 82%) can lend a richer flavor and creamier texture.
🥛 Don’t Skip the Vanilla
Pure vanilla extract makes a big difference in flavor compared to imitation versions. If you’re feeling fancy, try using vanilla bean paste or seeds from a real vanilla pod for a luxurious aroma and speckled appearance in the batter.
🧮 Spoon and Level Your Flour
Too much flour can ruin the texture of your cake. Instead of scooping straight from the bag, use the spoon-and-level method: spoon the flour into the measuring cup, then level it off with a knife. Or better yet, use a kitchen scale for precision.
🔁 Double the Swirl, Not the Effort
To achieve a beautifully marbled interior, alternate spoonfuls of vanilla and chocolate batter in your pan. You don’t have to be exact. Think of it like layering lasagna—just more deliciously chaotic. Then gently swirl as described in the method for that iconic marbled look.
🧁 Turn Into Cupcakes
Want individual portions? This batter works great for cupcakes, too. Use a muffin tin and reduce the baking time to around 18–22 minutes. Swirl in each cup for beautiful marbling.
🍫 Optional Add-Ins
- Mini chocolate chips in the chocolate batter for added texture
- Orange zest in the vanilla batter for a bright, citrusy twist
- Espresso powder (½ teaspoon) to intensify the chocolate flavor
🧼 Easy Clean-Up Tip
Use an ice cream scoop to divide the batters into your pan for less mess and better portion control. Also, line your mixing area with parchment paper or a silicone mat to simplify cleanup.
Suggestions: Creative Twists and Serving Ideas for Marble Cake
Marble cake may be a classic, but that doesn’t mean you can’t get creative with it. In fact, this beloved dessert is incredibly adaptable—perfect for both everyday enjoyment and special occasions. Whether you’re looking to add a unique flavor, elevate your presentation, or tailor it to a specific diet, there are countless ways to personalize your marble cake. Here are several delicious ideas and serving suggestions to inspire your next bake.
🍊 Flavor Variations
- Chocolate Orange Marble Cake:
Add 1 tablespoon of orange zest and 1 teaspoon of orange juice to the vanilla batter. Chocolate and orange pair beautifully, giving your cake a citrusy twist. - Mocha Marble Cake:
Mix ½ teaspoon of instant espresso powder into the chocolate batter for a subtle coffee note that deepens the chocolate flavor. - Almond-Vanilla Swirl:
Swap the vanilla extract with almond extract in half the batter to create a nutty contrast that blends wonderfully with the chocolate. - Coconut-Chocolate Combo:
Add ½ cup of shredded coconut to the vanilla portion for extra texture and a tropical flair.
🎂 Special Occasion Ideas
- Birthday Cake Upgrade:
Layer the marble cake with chocolate ganache or whipped cream frosting and fresh berries for a celebration-worthy dessert. - Holiday Baking:
Use festive cookie cutters to trim the cake into shapes once baked and cooled—great for Christmas or Easter platters. - Afternoon Tea:
Serve alongside Earl Grey or a fruity herbal tea for a refined snack that looks as good as it tastes.
🍰 Glaze and Topping Ideas
- Simple Vanilla Glaze:
Combine 1 cup powdered sugar with 1–2 tablespoons of milk and ½ teaspoon vanilla extract. Drizzle over the cooled cake. - Chocolate Ganache Drizzle:
Melt ½ cup chocolate chips with ¼ cup heavy cream and pour it over the cake for a rich finish. - Dusting of Powdered Sugar:
Sometimes less is more—a simple dusting before serving makes a clean, elegant presentation.
🧁 Muffins or Mini Cakes
Transform your marble cake into:
- Mini bundt cakes using small molds
- Cupcakes with marble batter in each cup (bake for 18–22 minutes)
- Snack-size loaf cakes that freeze well and are perfect for gifting
🍽️ Diet-Friendly Suggestions
- Gluten-Free:
Use a 1:1 gluten-free flour blend. Make sure it contains xanthan gum or add ½ teaspoon separately for structure. - Dairy-Free:
Replace butter with plant-based margarine and milk with almond or oat milk. - Reduced Sugar:
Lower sugar by ¼ cup without compromising the structure—especially if you add sweet toppings like glaze or fruit.
There’s no shortage of ways to make your marble cake uniquely yours. Whether you’re swapping flavors or switching up the form, the suggestions above ensure your cake is always fresh, creative, and crave-worthy.
❓ FAQ: Your Marble Cake Questions Answered
When it comes to baking marble cake, even seasoned home bakers sometimes have questions. Below, we’ve compiled the most frequently asked questions to help you troubleshoot, adapt, and perfect your cake. From storage and substitutions to understanding ingredients, these insights will help you bake with confidence.
🤔 Can I make marble cake in advance?
Absolutely! Marble cake actually tastes better the next day as the flavors settle and the crumb softens. You can make it up to 2 days in advance and store it in an airtight container at room temperature or refrigerate it for up to a week.
🧊 Can I freeze marble cake?
Yes, and it freezes beautifully. Wrap slices or the whole cake tightly in plastic wrap, then foil, and freeze for up to 3 months. Thaw at room temperature for several hours before serving. This makes it ideal for meal prepping or future entertaining.
🧁 Can I turn this into cupcakes or a layer cake?
Definitely. Divide the batter evenly among cupcake liners and bake at 350°F (175°C) for 18–22 minutes. For a layer cake, use two 8- or 9-inch round pans and bake for 25–30 minutes, checking with a toothpick for doneness.
🍶 What kind of cocoa powder should I use?
You can use either natural unsweetened cocoa or Dutch-processed cocoa. Dutch cocoa will give a darker, smoother chocolate flavor, while natural cocoa provides a more acidic and classic taste. Both work well depending on your preference.
🥛 Can I use buttermilk instead of regular milk?
Yes. Buttermilk will give your cake a slightly tangier flavor and a softer crumb. It also works well with both vanilla and chocolate batters. If using, swap it 1:1 with whole milk.
🥚 Can I make this egg-free?
Yes, with some adjustments. Use ¼ cup unsweetened applesauce or a commercial egg replacer per egg. Just note the texture may be slightly more dense and moist, but still delicious.
🎂 Why did my marble cake sink in the middle?
This usually happens if:
- The oven door was opened too early
- The cake was underbaked
- The batter was overmixed
- Your leavening agents (baking powder) were expired
Use fresh ingredients, check oven temperature with a thermometer, and don’t peek too soon.
🧂 Can I reduce the sugar?
Yes, by up to ¼ cup without affecting texture. Keep in mind the cake may be slightly less sweet, so balance with toppings if needed.
Conclusion: Why Marble Cake Is Always a Winner
Marble cake stands the test of time for a reason. It combines the best of both dessert worlds—rich chocolate and smooth vanilla—swirled together in a beautiful, eye-catching pattern that’s as delightful to look at as it is to eat. It’s a cake that manages to be both nostalgic and versatile, equally at home on a casual afternoon table or a festive celebration spread.
What makes marble cake truly special is its ability to adapt to any occasion and satisfy every kind of sweet tooth. Whether you’re baking it for a birthday, a brunch, or just a quiet weekend treat, this cake brings comfort, joy, and that homemade goodness we all crave. Plus, with so many ways to make it your own—adding flavors, changing shapes, making it gluten- or dairy-free—you can bake a version that fits your exact tastes or dietary needs.
From the precise art of swirling the batter to the gentle aroma that fills your kitchen as it bakes, this is a cake that invites you to enjoy the process as much as the result. The ingredients are simple and pantry-friendly, yet the end result is a showstopper. It’s the kind of cake that makes people say, “Wow, you made that?”