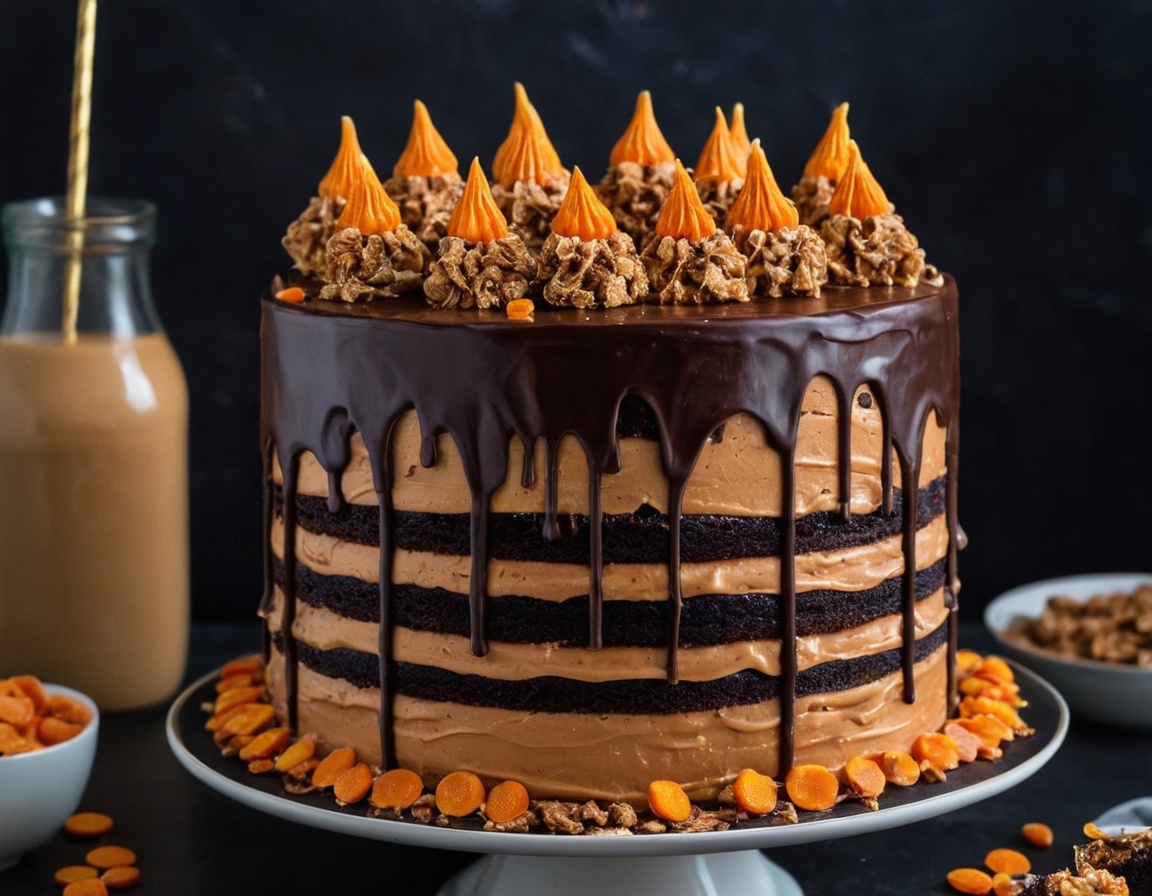
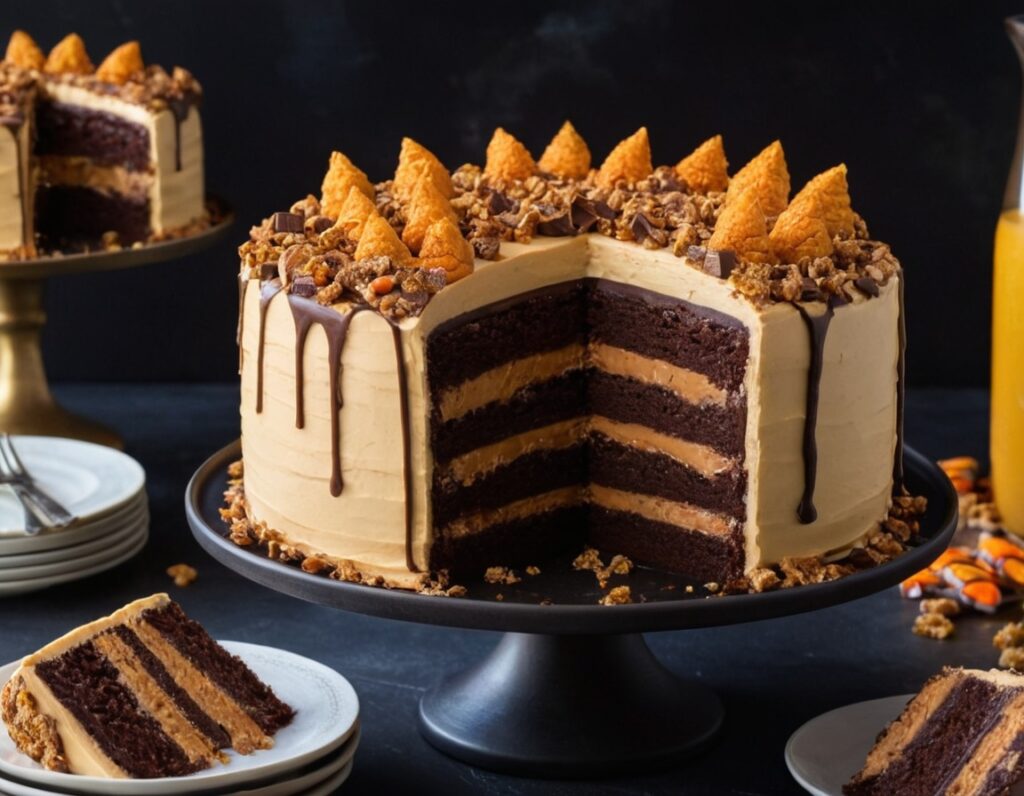
How To Make Ultimate Butterfinger Cake Recipe
Butterfinger cake recipe is a decadent dessert that combines the crunchy, peanut buttery goodness of Butterfinger candy bars with the soft, moist texture of a rich cake. This dessert has gained a cult following among candy lovers and cake enthusiasts alike because it brings together the best of both worlds—a luscious, buttery cake layered or topped with chopped Butterfinger pieces, creating a wonderful contrast in texture and flavor.
Originating from the popular Butterfinger candy bar made by Nestlé, this cake captures the essence of that beloved treat in a more indulgent and shareable form. Its appeal lies not only in its delicious taste but also in its versatility; it can be made as a layered cake, a sheet cake, or even cupcakes. Whether you’re looking to impress guests at a party, bake a special dessert for family, or just satisfy your sweet tooth, Butterfinger cake is a fantastic choice.
The magic of this recipe comes from the combination of rich cake layers, creamy frosting, and the crunch of the candy pieces. The cake batter often includes a moist yellow or vanilla base, which perfectly complements the peanut butter and chocolate flavors found in Butterfinger bars. The frosting, typically a buttercream or cream cheese frosting, is generously spread between the layers and over the top, holding the candy pieces in place and adding even more lusciousness.
If you’re wondering whether you can customize the recipe or how difficult it might be, rest assured that this recipe is approachable for bakers of all skill levels. Using readily available ingredients and straightforward steps, you can whip up a show-stopping dessert in no time. Plus, the visual appeal of the cake covered with chopped Butterfinger bars makes it as impressive to look at as it is to eat.
In this blog post, you’ll find detailed instructions on everything you need to make your own Butterfinger cake, from the list of ingredients to tips for serving, storing, and avoiding common mistakes. Whether you want to keep it classic or add your personal twist, this recipe is sure to become a favorite in your baking repertoire.
What You’ll Need
To make a delicious Butterfinger cake that’s moist, flavorful, and perfectly textured, you’ll need a combination of common baking ingredients and the star of the show—Butterfinger candy bars. Below is a comprehensive list of what you’ll require, along with some helpful notes to ensure you’re prepared before you start baking.
Cake Ingredients:
- All-purpose flour – 2 ½ cups (carefully measured by spooning into the cup and leveling off)
- Granulated sugar – 2 cups
- Baking powder – 2 ½ teaspoons
- Salt – ½ teaspoon
- Unsalted butter – 1 cup (2 sticks), softened at room temperature
- Eggs – 4 large, at room temperature
- Whole milk – 1 cup
- Pure vanilla extract – 2 teaspoons
- Buttermilk – ½ cup (adds moistness and tenderness)
Frosting Ingredients:
- Unsalted butter – 1 cup (2 sticks), softened
- Powdered sugar – 4 cups, sifted for smoothness
- Heavy cream – 2-4 tablespoons (adjust for desired consistency)
- Pure vanilla extract – 1 teaspoon
- Salt – A pinch, to balance sweetness
Candy Topping:
- Butterfinger candy bars – 4-5 standard-sized bars, chopped into small pieces
- Optional: Chopped peanuts or peanut butter chips for extra texture
Equipment Needed:
- Two 9-inch round cake pans or a 9×13-inch baking dish
- Mixing bowls
- Electric mixer or stand mixer
- Measuring cups and spoons
- Cooling racks
- Spatula and knife for frosting and chopping candy
Notes:
- Using unsalted butter allows you to control the salt level in your cake and frosting better.
- Room temperature eggs and butter blend more easily, resulting in a smoother batter and frosting.
- Buttermilk in the batter reacts with baking powder to create a tender crumb, but if you don’t have buttermilk, a milk and vinegar/lemon juice substitute works well.
- Chopping the Butterfinger bars into small pieces helps distribute the candy evenly through the frosting or between layers, giving every bite a satisfying crunch.
- If you want a richer flavor, consider using heavy cream in the frosting instead of milk, or add a little peanut butter for an extra nutty kick.
Having everything prepared and measured before you begin makes the baking process smoother and more enjoyable. This recipe is perfect for bakers who want a show-stopping cake with minimal fuss but maximum flavor.
How to Make (Include Full Measurements)
Creating a delicious Butterfinger cake at home is easier than you might think, especially when you have a clear, step-by-step guide. This recipe delivers a moist, tender cake layered with creamy frosting and crunchy Butterfinger pieces that add a satisfying texture. Follow these detailed instructions to bake your cake to perfection.
Step 1: Prepare Your Ingredients and Equipment
Before you start, preheat your oven to 350°F (175°C). Grease two 9-inch round cake pans or line a 9×13-inch baking dish with parchment paper for easy removal. Gather all your measured ingredients to keep the baking process smooth and efficient.
Step 2: Make the Cake Batter
In a large mixing bowl, whisk together the dry ingredients: 2 ½ cups all-purpose flour, 2 teaspoons baking powder, and ½ teaspoon salt. Set this aside. In your stand mixer or with a hand mixer, beat 1 cup softened unsalted butter and 2 cups granulated sugar together on medium speed until the mixture is light and fluffy, about 3-5 minutes. This step is essential to create a light crumb.
Add 4 large eggs, one at a time, beating well after each addition to ensure they incorporate fully. Next, mix in 2 teaspoons pure vanilla extract.
Now, alternate adding the dry ingredients and the liquids: begin with 1 cup whole milk mixed with ½ cup buttermilk (or your homemade substitute), adding them gradually in three additions. Mix each addition just until combined—avoid overmixing, as this can toughen the cake.
Step 3: Bake the Cake
Pour the batter evenly into your prepared pans, smoothing the tops with a spatula. Place them in the preheated oven and bake for about 30-35 minutes (for round pans) or 40-45 minutes for a 9×13 pan. Test doneness by inserting a toothpick into the center—if it comes out clean or with a few moist crumbs, the cake is ready.
Remove the pans from the oven and let them cool for about 10-15 minutes. Then, carefully remove the cakes from the pans and transfer them to a cooling rack to cool completely before frosting.
Step 4: Prepare the Frosting
In a large bowl, beat 1 cup softened unsalted butter until creamy. Gradually add 4 cups sifted powdered sugar, mixing on low speed to prevent a sugar cloud. Add 1 teaspoon pure vanilla extract, a pinch of salt, and 2-4 tablespoons heavy cream to reach your desired consistency. Beat on high speed for 3-4 minutes until the frosting is light and fluffy.
Step 5: Assemble the Cake
Once the cakes have cooled completely, place one layer on a serving plate or cake stand. Spread a generous amount of frosting over the top. Sprinkle chopped Butterfinger candy pieces evenly on the frosting layer to add texture and flavor. Place the second cake layer on top, then frost the top and sides of the entire cake.
For an extra decadent touch, press additional chopped Butterfinger pieces onto the sides or sprinkle on top as a final garnish. Refrigerate the cake for about 30 minutes to set the frosting if desired, then bring it back to room temperature before serving for the best texture.
Serving and Storage Tips
Serving and storing your Butterfinger cake properly will keep it fresh, moist, and delicious for as long as possible, ensuring every bite is as good as the first. Here are some expert tips to help you enjoy your cake to the fullest.
Serving Tips
Butterfinger cake is a crowd-pleaser and works well for celebrations, casual get-togethers, or just as a special treat. For the best flavor and texture, serve the cake at room temperature. If you’ve refrigerated the cake to set the frosting, remove it from the fridge about 30 minutes before serving to allow the cake to soften.
Pair the cake with a simple side like vanilla ice cream or fresh berries to complement the rich peanut buttery flavors. If you want to elevate your presentation, drizzle some melted chocolate over the top or serve slices with a dollop of whipped cream.
When slicing the cake, use a sharp knife dipped in hot water and wiped dry between cuts to create clean, neat slices without tearing the frosting or crumbling the cake.
Storage Tips
Butterfinger cake stores well, but to maintain its texture and freshness, it’s important to store it correctly:
- Room Temperature: If you plan to consume the cake within 2 days, store it in an airtight container or cover it loosely with plastic wrap at room temperature. Keep it away from direct sunlight and heat sources.
- Refrigeration: Because the frosting contains butter and possibly cream, refrigeration helps prolong freshness. Wrap the cake in plastic wrap or keep it in an airtight container to prevent it from drying out or absorbing fridge odors. Let the cake come to room temperature before serving.
- Freezing: For longer storage, Butterfinger cake freezes well. Wrap the cake tightly in plastic wrap, then aluminum foil to protect it from freezer burn. You can freeze the entire cake or individual slices. When ready to eat, thaw in the refrigerator overnight and then bring to room temperature.
Avoid Moisture Issues
Candy toppings like Butterfinger can become sticky or soggy if stored improperly. To avoid this, ensure the cake is completely cooled before frosting and topping it. Also, try to avoid exposing the cake to humidity or moisture during storage.
Mistakes to Avoid
Baking a Butterfinger cake can be straightforward, but even experienced bakers sometimes run into pitfalls that affect the cake’s texture, flavor, or appearance. Knowing common mistakes and how to avoid them will help ensure your cake turns out moist, flavorful, and visually stunning every time.
Overmixing the Batter
One of the most common errors when making cake batter is overmixing. While it’s important to combine ingredients thoroughly, mixing the batter excessively develops gluten in the flour, which can lead to a dense and tough cake instead of a light and tender crumb. Mix just until the dry ingredients are incorporated, especially after adding the flour. This preserves the cake’s soft texture and keeps it from becoming chewy.
Using Cold Ingredients
For a smooth batter and even rising, it’s crucial that your butter, eggs, and dairy (milk, buttermilk) are at room temperature before you begin. Cold ingredients don’t blend well and can cause the batter to curdle or separate, resulting in uneven texture or baking issues. Take the time to let these ingredients sit out for about 30-60 minutes before mixing.
Not Measuring Ingredients Properly
Accurate measurements are the backbone of baking success. Too much flour can dry out your cake, while too little sugar can impact sweetness and structure. Use measuring cups and spoons correctly—spoon flour lightly into the cup and level it off with a knife instead of scooping directly from the bag. For sugar and liquids, fill the cups to the brim and level as needed.
Baking at the Wrong Temperature
Oven temperatures vary, and baking your cake at too high or too low a temperature can cause problems. A temperature that’s too high can burn the edges before the center is cooked, while too low can result in a dense or undercooked cake. Use an oven thermometer to ensure your oven is accurate and avoid opening the oven door frequently during baking, which lowers the temperature.
Frosting and Candy Toppings While Cake is Warm
Applying frosting or candy pieces while the cake is still warm is a recipe for disaster. Warm cakes can cause frosting to melt and slide off, and candy toppings may lose their crunch or stickiness. Always allow your cake to cool completely on a wire rack before frosting and decorating.
Not Preparing Pans Properly
Greasing and lining your baking pans properly prevents sticking and ensures easy removal. Use parchment paper at the bottom of your pans and grease the sides lightly. If you skip this step, your cake may tear or crumble when removed.
Skipping the Cooling Time
Patience is key. Don’t rush to assemble or frost the cake right out of the oven. Allowing the cake to cool fully prevents the frosting from melting and the candy from losing texture. Cooling also helps the cake set and slice more cleanly.
By avoiding these common mistakes, you’ll achieve the perfect Butterfinger cake that’s moist, flavorful, and beautifully presented.
Tips and Tricks
To elevate your Butterfinger cake baking experience, here are some expert tips and tricks that will make the process easier and the result even more delicious. These insider secrets come from years of baking and experimenting with layered cakes and candy toppings.
Use Fresh Butterfinger Bars
The crunch and flavor of your candy topping make a big difference. Use fresh Butterfinger bars to ensure maximum crunch and a rich peanut butter taste. If your candy bars have been sitting around for a while, they can become stale and lose texture.
Chop Candy Pieces Small but Not Too Fine
Chop your Butterfinger candy into small, bite-sized chunks rather than powdering them. This helps distribute the crunch evenly without overwhelming the cake. Larger pieces add a satisfying texture and bursts of flavor in every bite.
Experiment with Frosting Flavors
While classic buttercream or cream cheese frosting pairs beautifully with Butterfinger cake, consider adding a touch of peanut butter to your frosting for enhanced flavor harmony. You can also swirl in a bit of chocolate or caramel for extra indulgence.
Don’t Skip Sifting Powdered Sugar
Sifting your powdered sugar before adding it to the frosting prevents lumps and ensures a silky smooth finish. This small step will save you time and frustration when whipping up the frosting.
Use Cake Strips for Even Baking
If you bake round layers, use cake strips around the pans. These fabric strips keep the sides cooler during baking, preventing doming and resulting in flat, even layers that stack beautifully.
Chill Cake Before Decorating
Once frosted, chill your cake for about 20-30 minutes to let the frosting set. This makes applying additional decorations or chopped candy easier and prevents them from sliding off.
Store Leftovers Properly
If you want to keep leftovers fresh, cover the cake tightly with plastic wrap or store it in an airtight container. This prevents drying out and preserves the candy’s crispness.
Customize With Your Favorite Nuts or Chocolate
For a personalized touch, add chopped peanuts, crushed pretzels, or chocolate chips alongside the Butterfinger pieces. These mix-ins add variety in flavor and texture that complement the cake perfectly.
With these tips and tricks, you’ll be able to bake a Butterfinger cake that not only tastes amazing but looks professionally made every time.

Suggestions
When it comes to enjoying Butterfinger cake, there are plenty of ways to customize and enhance your experience to suit different tastes, occasions, and dietary preferences. Whether you want to make this cake a showstopper for a special event or adapt it for a lighter treat, these suggestions will inspire you to get creative with your baking.
Alternative Frosting Options
While the classic buttercream frosting complements the rich flavors of Butterfinger candy perfectly, you might want to experiment with different types of frosting depending on your preference:
- Cream Cheese Frosting: Adds a subtle tang that balances the sweetness and adds a creamy texture.
- Peanut Butter Frosting: Amplifies the peanut flavor, creating a richer and more decadent taste.
- Chocolate Ganache: For chocolate lovers, a smooth ganache drizzle on top or as a layer can add luxurious depth.
Gluten-Free Variation
For those with gluten sensitivities, you can easily swap the all-purpose flour for a gluten-free baking flour blend. Make sure the blend includes xanthan gum or another binder to maintain the cake’s structure. The result is a delicious cake suitable for more dietary needs without sacrificing flavor.
Nut-Free Adaptations
If you or your guests have nut allergies, you can substitute the Butterfinger candy pieces with safe alternatives like crushed pretzels or toffee bits, which still provide the crunchy texture and sweetness but avoid potential allergens.
Serving Suggestions
Butterfinger cake pairs wonderfully with several accompaniments:
- Serve with a scoop of vanilla or coffee ice cream for an indulgent dessert.
- Pair with fresh berries or a berry compote to add a refreshing contrast.
- A cup of strong black coffee or a creamy latte complements the sweetness beautifully, making it a perfect afternoon treat.
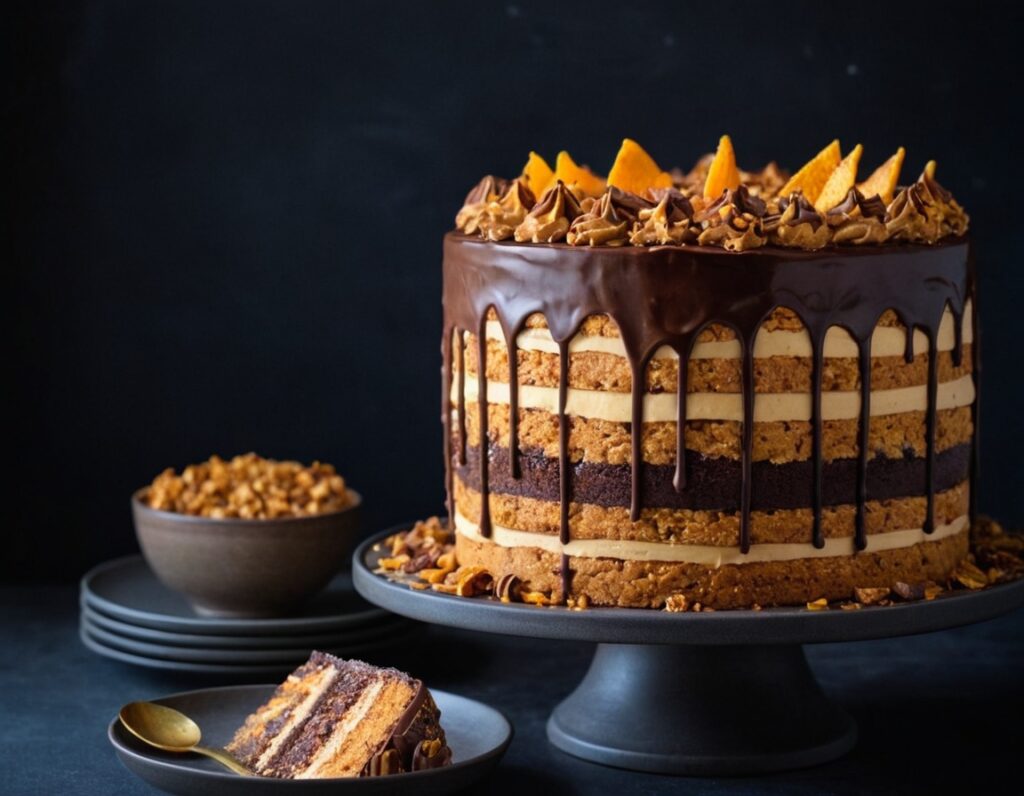
Presentation Ideas
Elevate your cake presentation by adding edible gold leaf accents or dusting the top lightly with cocoa powder. You could also pipe decorative borders or rosettes with frosting around the edges and sprinkle chopped Butterfinger pieces over the top for an eye-catching finish.
Making Mini Cakes or Cupcakes
This recipe can be scaled down to make mini cakes or cupcakes, ideal for parties or portion control. Just adjust the baking time accordingly—mini cupcakes typically bake in 15-20 minutes at 350°F. Frost and decorate as you would a full-sized cake for a fun, bite-sized treat.
Gift Idea
Butterfinger cake also makes a thoughtful homemade gift. Bake the cake or cupcakes, package them beautifully in a decorative box or tin, and share the joy of your baking with friends or family.
FAQ
To help you master the Butterfinger cake and answer some of the most common questions, here is a detailed FAQ section. Whether you’re a beginner or experienced baker, these answers will make your baking journey smoother.
Can I Use Store-Bought Cake Mix Instead of Homemade Batter?
Yes, you can use a high-quality yellow or vanilla cake mix to save time. Just enhance the batter with a teaspoon of vanilla extract and perhaps a little extra butter for richness. However, homemade batter tends to have better texture and flavor.
How Should I Store Butterfinger Cake?
Store the cake in an airtight container in the refrigerator to keep the frosting fresh and candy pieces crunchy. Before serving, bring the cake to room temperature for best taste and texture.
Can I Make Butterfinger Cake Ahead of Time?
Absolutely! You can bake the cake layers a day or two in advance and store them wrapped tightly in plastic wrap at room temperature or refrigerated. Frost and decorate on the day you plan to serve it.
What Can I Substitute for Buttermilk?
If you don’t have buttermilk, you can make a substitute by adding 1 tablespoon of white vinegar or lemon juice to 1 cup of milk. Let it sit for 5 minutes before using.
How Do I Prevent the Candy Pieces from Sinking?
Ensure your frosting is thick enough to hold the candy pieces. If the frosting is too thin or warm, candy can sink or slide off. Chill the cake briefly after frosting before adding the candy pieces for better adherence.
Can I Freeze Butterfinger Cake?
Yes, Butterfinger cake freezes well. Wrap the cake tightly in plastic wrap and then foil, and freeze for up to 2 months. Thaw in the refrigerator overnight before bringing to room temperature.
How Do I Make the Cake More Moist?
Using buttermilk, as this recipe calls for, helps keep the cake moist. Avoid overbaking and ensure not to overmix the batter to maintain tenderness. Also, proper storage prevents drying out.
Conclusion
In summary, the Butterfinger cake recipe is a delightful dessert that combines the rich, buttery flavor of classic pound cake with the irresistible crunch and sweetness of Butterfinger candy pieces. This cake is perfect for celebrations, casual gatherings, or whenever you want to treat yourself and loved ones to something special and indulgent. With the right ingredients, careful preparation, and attention to detail, you can create a moist, tender cake layered with creamy frosting and topped with crunchy candy that will impress everyone.
Throughout this guide, we’ve covered everything from essential ingredients to common mistakes to avoid, as well as helpful tips and creative suggestions to personalize the cake to your liking. Whether you stick with the traditional buttercream frosting or experiment with peanut butter or chocolate ganache, the end result is a crowd-pleaser that’s both visually stunning and delicious.
Remember that baking is both a science and an art. Don’t hesitate to adapt the recipe to your preferences and dietary needs, whether that means going gluten-free, nut-free, or making mini cupcakes. Taking your time with each step, from measuring and mixing to frosting and decorating, ensures the best outcome.
Finally, this Butterfinger cake recipe is more than just a dessert—it’s an opportunity to share joy, creativity, and love through baking. So gather your ingredients, preheat your oven, and start creating your own irresistible Butterfinger cake that will surely become a favorite in your kitchen.
Happy baking!