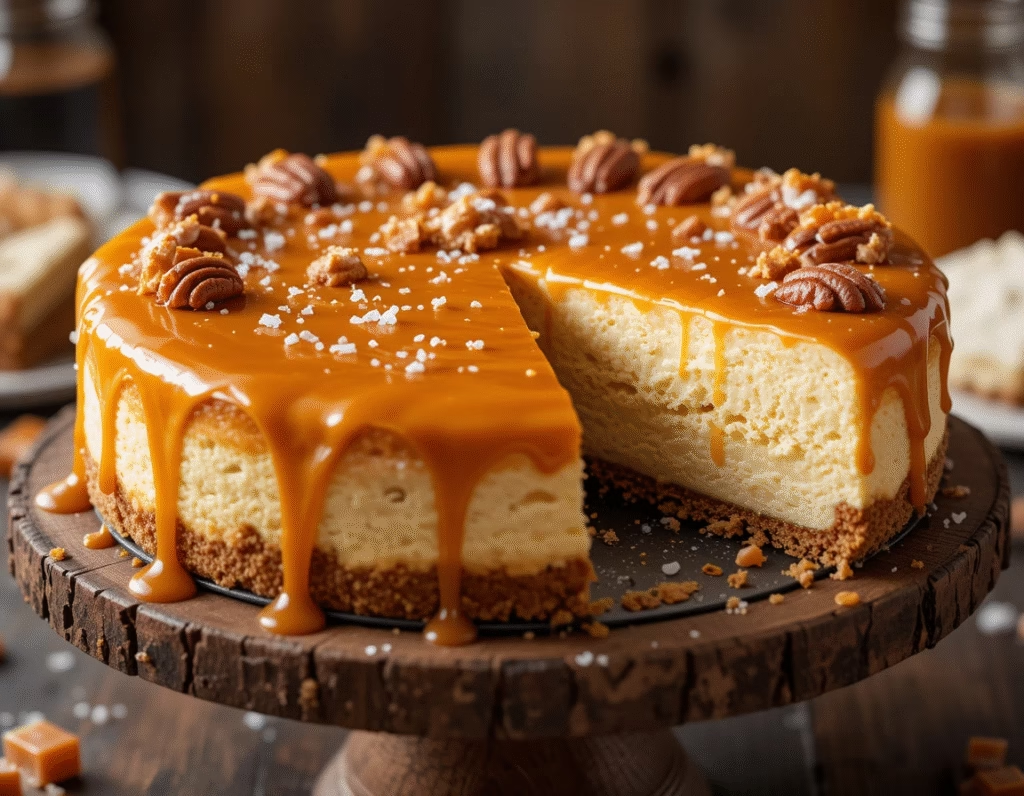
Salted Caramel Cheesecake Bliss
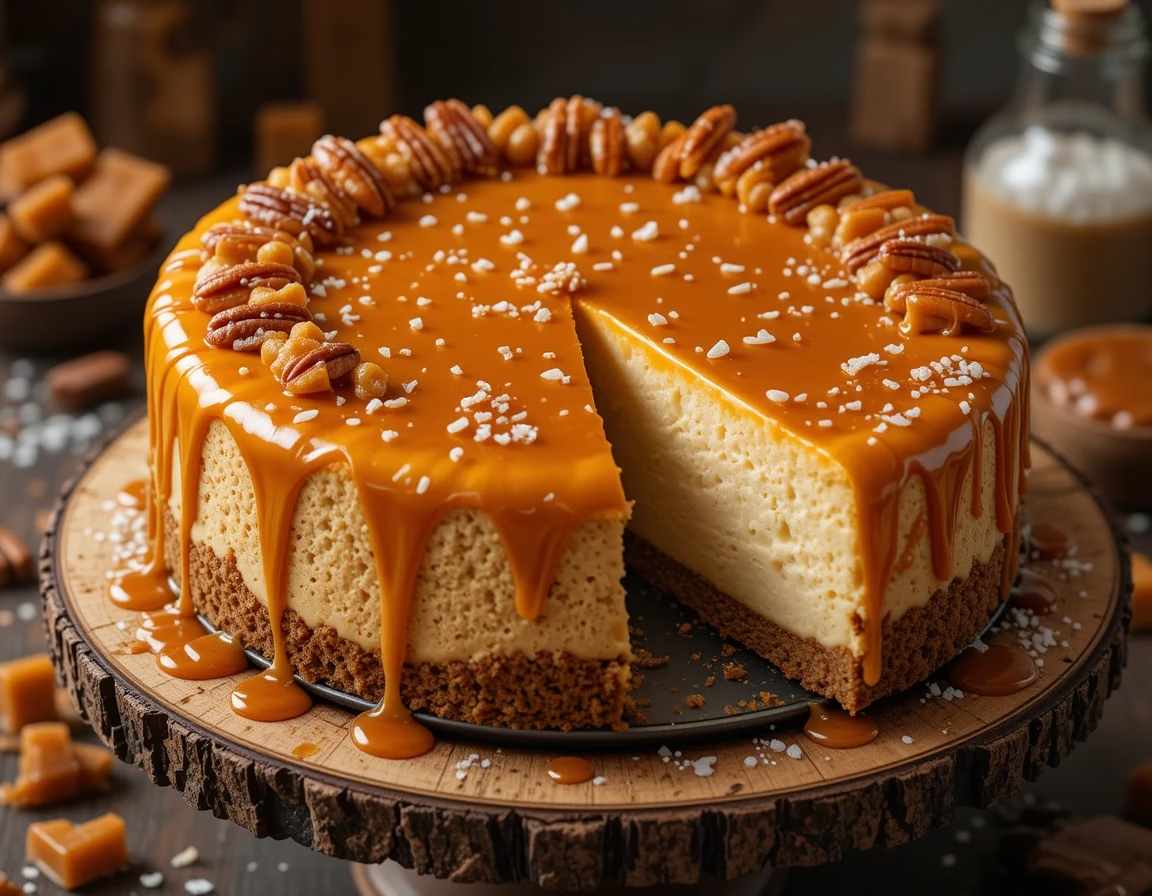
There’s something undeniably indulgent about a perfectly made Salted Caramel Cheesecake. Combining the rich, creamy decadence of classic cheesecake with the buttery, sweet-salty contrast of golden caramel, this dessert is the ultimate treat for cheesecake lovers and caramel fanatics alike. With its beautiful presentation and crowd-pleasing flavor, the Salted Caramel Cheesecake is a standout option for birthdays, holidays, or any special celebration.
What makes this cheesecake truly irresistible is the balance it strikes. The smooth tang of the cream cheese filling pairs harmoniously with the deep, toasted sweetness of homemade caramel sauce, while the touch of sea salt elevates the entire flavor experience. The result? A Salted Caramel Cheesecake that feels both luxurious and comforting—a dessert that tastes as stunning as it looks.
In the world of cheesecakes, where countless variations exist, the Salted Caramel Cheesecake carves out its niche through contrast and complexity. Unlike fruit-based versions, which often lean bright and tart, this recipe delivers a warm, toasty depth thanks to the caramel. It’s a dessert that feels right at home on a holiday dessert table, but it’s also surprisingly easy to make and accessible enough for casual get-togethers.
This article will guide you step-by-step in creating your own Salted Caramel Cheesecake from scratch. From choosing the best ingredients to mastering the swirl of homemade caramel, you’ll get all the know-how you need to create a bakery-quality dessert in your own kitchen. We’ll also cover tips for baking, serving, and storing your cheesecake to perfection—along with some creative suggestions and answers to the most common questions bakers ask when making this caramel-infused classic.
Whether you’re new to baking or already a cheesecake enthusiast, this Salted Caramel Cheesecake recipe will quickly become a go-to in your dessert collection. Its sweet and salty profile, creamy texture, and stunning visual appeal make it a favorite for all seasons. Get ready to impress your family and friends with a dessert that’s every bit as delicious as it is beautiful.
What You’ll Need
Before diving into the process of making a Salted Caramel Cheesecake, it’s essential to gather all your ingredients and tools. This helps ensure a smooth, stress-free baking experience and sets you up for the best results possible. A great Salted Caramel Cheesecake is all about quality components—each layer, from crust to filling to topping, plays a crucial role in creating the perfect bite.
For the Crust:
- 1 ¾ cups graham cracker crumbs
- ¼ cup light brown sugar
- ½ teaspoon ground cinnamon (optional)
- ½ cup unsalted butter, melted
The crust is the cheesecake’s foundation. Using graham crackers gives the Salted Caramel Cheesecake its classic base, while brown sugar and a hint of cinnamon add depth and richness that complements the caramel topping.
For the Cheesecake Filling:
- 4 (8 oz) packages full-fat cream cheese, softened
- 1 ¼ cups granulated sugar
- 1 tablespoon cornstarch
- 1 cup sour cream, room temperature
- 1 teaspoon pure vanilla extract
- 4 large eggs, room temperature
Cream cheese is the heart of this dessert, and using full-fat blocks ensures a dense, creamy texture. The cornstarch helps prevent cracking, and sour cream provides a slight tang that balances the sweet caramel flavor.
For the Salted Caramel Sauce:
- 1 cup granulated sugar
- 6 tablespoons unsalted butter, room temperature
- ½ cup heavy cream
- ½ teaspoon sea salt (adjust to taste)
This homemade caramel is the star of the Salted Caramel Cheesecake. It adds that buttery richness and signature salty edge. Always use high-quality sea salt and real butter for the best results.
Tools You’ll Need:
- 9-inch springform pan
- Roasting pan (for water bath)
- Aluminum foil (to wrap the springform)
- Electric mixer or stand mixer
- Saucepan (for caramel)
- Silicone spatula
- Large mixing bowls
Having these tools ready will make your process more efficient. The springform pan is crucial for releasing the cheesecake cleanly, and a water bath ensures even baking and prevents cracks—especially important for the smooth finish of your Salted Caramel Cheesecake.
How to Make (Include Full Measurements)
Creating a Salted Caramel Cheesecake from scratch may look intricate, but once broken down into steps, it becomes surprisingly manageable. With a graham cracker crust, a silky cheesecake base, and a rich homemade salted caramel topping, this dessert delivers indulgence at every level. Follow these detailed instructions to build your perfect Salted Caramel Cheesecake.
Step 1: Prepare the Crust
Ingredients:
- 1 ¾ cups graham cracker crumbs
- ¼ cup light brown sugar
- ½ teaspoon cinnamon (optional)
- ½ cup unsalted butter, melted
Instructions:
- Preheat your oven to 350°F (175°C).
- In a mixing bowl, stir together the graham cracker crumbs, brown sugar, and cinnamon.
- Add melted butter and mix until the crumbs are evenly moistened.
- Press the mixture firmly into the bottom of a 9-inch springform pan.
- Bake for 10 minutes, then remove and let cool while you prepare the filling.
Step 2: Make the Cheesecake Filling
Ingredients:
- 4 (8 oz) blocks full-fat cream cheese, softened
- 1 ¼ cups granulated sugar
- 1 tablespoon cornstarch
- 1 cup sour cream (room temperature)
- 1 teaspoon vanilla extract
- 4 large eggs (room temperature)
Instructions:
- In a large bowl or stand mixer, beat the cream cheese on medium speed until smooth.
- Add sugar and cornstarch, and mix until fully combined.
- Add sour cream and vanilla; blend just until incorporated.
- Add eggs one at a time, mixing on low after each addition. Do not overmix.
Pour the batter over your prepared crust, smoothing out the top. For an ultra-smooth finish and to avoid cracks, use a water bath.
Step 3: Water Bath & Bake
- Wrap the outside of your springform pan tightly in two layers of heavy-duty aluminum foil.
- Place it in a large roasting pan and fill the pan with hot water halfway up the sides of the cheesecake pan.
- Bake at 325°F (163°C) for 60–70 minutes. The center should jiggle slightly when gently shaken.
- Turn off the oven and let the Salted Caramel Cheesecake cool inside the oven with the door cracked open for 1 hour.
- Remove and allow to cool at room temperature before refrigerating for at least 6 hours or overnight.
Step 4: Make the Salted Caramel Sauce
Ingredients:
- 1 cup granulated sugar
- 6 tablespoons unsalted butter
- ½ cup heavy cream
- ½ teaspoon sea salt
Instructions:
- In a medium saucepan over medium heat, melt the sugar, stirring constantly with a wooden spoon.
- Once melted and amber in color, add the butter. Stir until melted and combined.
- Slowly pour in the heavy cream while stirring—it will bubble up, so be careful.
- Stir in the sea salt and let cool for 10–15 minutes before pouring over the chilled cheesecake.
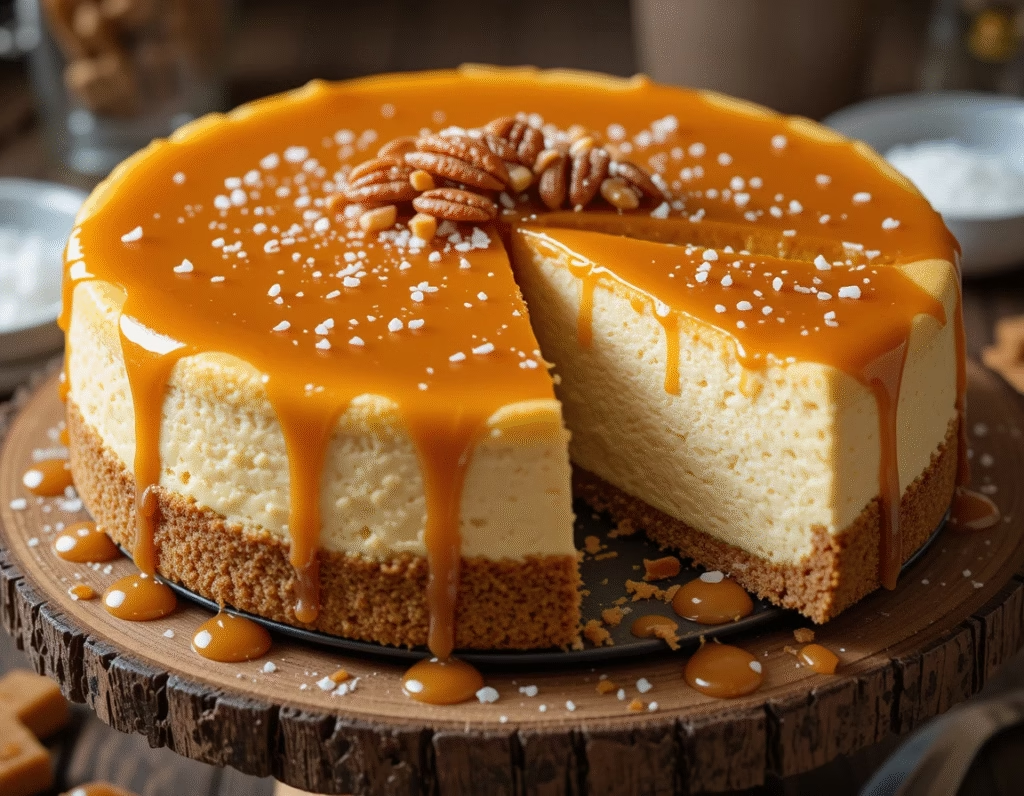
Once your cheesecake is fully chilled, drizzle or pour your cooled caramel over the top. You can reserve some for serving. The rich, glossy finish adds the final touch that transforms this dessert into a true Salted Caramel Cheesecake masterpiece.
Serving and Storage Tips
Once you’ve baked your Salted Caramel Cheesecake to creamy perfection and topped it with a golden layer of salted caramel, it’s time to think about presentation, serving, and storage. Whether you’re preparing it for a special event or simply enjoying a slice with coffee, these tips will ensure your cheesecake is as enjoyable to serve as it is to eat.
Serving Tips
- Use a hot knife for perfect slices.
Dip your knife in hot water and wipe it dry between each slice. This prevents the rich caramel topping from dragging across the surface, giving your Salted Caramel Cheesecake clean, photo-worthy cuts. - Bring to room temperature for the best flavor.
Remove the cheesecake from the fridge about 15 minutes before serving. The texture becomes silkier, and the flavor more pronounced at slightly warmer temperatures. - Add fresh toppings if desired.
A sprinkle of flaky sea salt over the caramel just before serving adds a gourmet touch. You can also garnish with whipped cream, chopped pecans, or a drizzle of reserved caramel. These enhancements give your Salted Caramel Cheesecake extra texture and visual appeal. - Serve with a beverage that complements the richness.
Pair the cheesecake with black coffee, a caramel-flavored herbal tea, or even a sparkling citrus drink. These balance out the rich, buttery profile of the Salted Caramel Cheesecake and keep the experience refreshing.
Storage Tips
- Refrigerate promptly.
Always refrigerate your Salted Caramel Cheesecake within two hours of serving. Store it in an airtight container or wrap tightly in plastic wrap. - Use a cake carrier or tall container to protect the caramel.
Because of its sticky topping, it’s best to store the cheesecake in a container that doesn’t touch the top. This keeps your caramel layer smooth and attractive. - Enjoy within 4–5 days.
The cheesecake will taste freshest during the first few days. The texture may soften slightly over time, but it remains rich and flavorful. - Freezing the cheesecake is an option.
To freeze the Salted Caramel Cheesecake, chill it completely, then wrap in plastic wrap followed by aluminum foil. It can be frozen for up to 2 months. Thaw overnight in the refrigerator before serving.
By following these serving and storage practices, you can ensure your Salted Caramel Cheesecake remains as flawless and delicious on day three as it was fresh out of the oven.
Mistakes to Avoid
Making a flawless Salted Caramel Cheesecake requires precision, patience, and a few pro tips. Even small missteps can lead to major issues—like cracked tops, runny centers, or gritty caramel. Fortunately, these mistakes are easily avoidable once you know what to watch out for. Below are some of the most common errors people make when preparing a Salted Caramel Cheesecake, along with simple ways to steer clear of them.
1. Using Cold Ingredients
It might seem convenient to grab cream cheese and eggs straight from the fridge, but cold ingredients can ruin the smoothness of your cheesecake batter. Cold cream cheese resists blending, leaving your Salted Caramel Cheesecake lumpy rather than creamy. Let all your ingredients—especially cream cheese, eggs, and sour cream—sit at room temperature for at least 30 minutes before mixing.
2. Overmixing the Batter
Overmixing incorporates excess air into the filling, which can cause the Salted Caramel Cheesecake to puff up while baking and then crack or collapse as it cools. Once your ingredients are combined, mix just until smooth. Use a low speed on your mixer and avoid the temptation to whip the batter.
3. Skipping the Water Bath
The water bath is crucial for creating the smooth, custard-like texture that defines a great Salted Caramel Cheesecake. Without it, the cake may bake unevenly, and the top is likely to crack. Wrap your springform pan tightly in foil to prevent leaks, and always bake your cheesecake in a water bath for the best results.
4. Not Cooling Properly
If you remove the cheesecake from the oven and immediately put it in the fridge, it can shock the structure and lead to cracks. Instead, turn off the oven and let the Salted Caramel Cheesecake rest with the door slightly open for an hour. Then, bring it to room temperature before chilling in the fridge overnight.
5. Rushing the Caramel Sauce
Caramel can go from perfect to burned in seconds. Stir constantly and keep a close eye on the color—it should be a rich amber, not dark brown. Pouring the sauce while it’s too hot or too runny can melt the top layer of your cheesecake, ruining its presentation. Always let your caramel cool before drizzling it over the Salted Caramel Cheesecake.
Avoiding these common mistakes will help you create a picture-perfect, ultra-smooth Salted Caramel Cheesecake every single time.
Tips and Tricks
Mastering the art of the Salted Caramel Cheesecake means going beyond the recipe. These tried-and-true tips and clever tricks will help you achieve not just a delicious dessert, but one that looks professional, slices cleanly, and keeps guests coming back for seconds.
1. Use High-Quality Sea Salt
The “salted” element in a Salted Caramel Cheesecake isn’t just a gimmick—it’s what elevates the sweetness of the caramel and deepens its flavor. Use flaky or fine sea salt (never table salt) for a clean, balanced finish. A sprinkle on top right before serving can enhance presentation and flavor.
2. Invest in a Good Springform Pan
A sturdy springform pan with a tight seal makes all the difference. A cheap or poorly made pan can leak during the water bath, soaking the crust and ruining your cheesecake. Choose a 9-inch pan with high sides and pair it with heavy-duty foil to keep your Salted Caramel Cheesecake safe and dry.
3. Blend Your Batter Thoroughly—but Gently
Cream cheese needs to be fully smooth before you add other ingredients. Start by beating it alone, then add sugar, then sour cream, and finally the eggs. Use a spatula to scrape down the bowl often to avoid lumps, ensuring a silky Salted Caramel Cheesecake from edge to center.
4. Chill for Flavor Development
While chilling is necessary to help your Salted Caramel Cheesecake set, it also improves the flavor. The ingredients meld beautifully after resting overnight. If you have time, make your cheesecake a full day in advance—it will taste even better the next day.
5. Use the Caramel Strategically
For a luxurious finish, reserve some caramel to drizzle just before serving. You can also mix a thin ribbon into the top inch of the batter before baking, adding a subtle caramel flavor inside the Salted Caramel Cheesecake. Be cautious not to over-swirl—less is more when it comes to contrast.
6. Clean Your Knife Between Cuts
To get clean, beautiful slices, dip your knife in hot water and wipe it dry before each cut. This avoids dragging caramel across the surface and keeps the layers neat and appealing.
By using these smart techniques, you’ll take your Salted Caramel Cheesecake from homemade to heavenly—turning it into the kind of dessert people will request again and again.
Suggestions
A well-made Salted Caramel Cheesecake is already a showstopper, but there’s plenty of room to personalize, elevate, or theme your dessert to suit any occasion or taste. Whether you want to adjust the crust, infuse the cheesecake with different flavors, or dress it up for a party, these thoughtful suggestions can help you take this classic recipe in delicious new directions—without losing the magic of the original.
1. Try a New Crust Option
While the traditional graham cracker crust is a perfect match for the Salted Caramel Cheesecake, you can experiment with alternatives to suit different preferences or dietary needs. A chocolate cookie crust adds a rich depth that complements the caramel’s buttery sweetness. A shortbread cookie crust brings a buttery, crumbly texture that’s both elegant and indulgent. For a gluten-free twist, try finely ground almonds or gluten-free vanilla wafers mixed with butter.
Each crust variation adds its own texture and flavor dimension, making your Salted Caramel Cheesecake feel new every time you bake it.
2. Add Texture with Toppings
The creamy smoothness of a Salted Caramel Cheesecake is one of its best features, but adding a bit of texture on top can enhance the overall experience. Consider sprinkling toasted pecans, crushed pretzels, or chopped chocolate over the caramel layer just before serving. These additions offer crunch and contrast while highlighting the sweet-and-salty theme.
3. Mini Cheesecakes for Parties
Hosting a dinner party or holiday gathering? Turn your Salted Caramel Cheesecake into mini cheesecakes using a muffin tin. Line each cavity with cupcake liners and fill with crust and batter as usual. Bake for 15–18 minutes at 325°F, then top each with a spoonful of salted caramel once cooled. Guests will love these adorable, portable versions of your signature dessert.
4. Serve with Seasonal Pairings
You can tailor the Salted Caramel Cheesecake to different times of the year by pairing it with seasonal fruits or flavors. In fall, top it with sautéed apples or pears. During the winter holidays, serve it with cinnamon whipped cream. In summer, a light berry compote adds a pop of color and a hint of tartness.
5. Make it a Cheesecake Bar
For an interactive dessert table, set up a cheesecake bar featuring slices of Salted Caramel Cheesecake alongside bowls of toppings: mini chocolate chips, sea salt flakes, chopped nuts, and fruit sauces. Guests can build their perfect slice, making dessert both fun and memorable.
With just a few creative twists, your Salted Caramel Cheesecake can become the centerpiece of any event—or a versatile dessert you never tire of making.
FAQ
Even seasoned bakers have questions when it comes to crafting the perfect Salted Caramel Cheesecake. Below are answers to some of the most frequently asked questions to help you troubleshoot issues, save time, and get the most out of this beloved dessert.
Q1: Can I use store-bought caramel instead of making it from scratch?
Yes, store-bought caramel can be used in place of homemade if you’re short on time. However, for the most authentic and flavorful Salted Caramel Cheesecake, we recommend making your own. Homemade caramel has a richer, fresher taste and allows you to control the salt level more precisely.
Q2: What’s the best way to prevent cracks in my cheesecake?
Use a water bath and avoid overbaking. Additionally, do not open the oven door during the baking process. Let the Salted Caramel Cheesecake cool slowly by turning the oven off and cracking the door. Sudden temperature changes are a major cause of cracking.
Q3: How can I make the cheesecake ahead of time?
The Salted Caramel Cheesecake is an ideal make-ahead dessert. Bake it up to 2 days in advance, store it in the fridge, and add the caramel topping right before serving. You can also freeze the cheesecake (without caramel) for up to 2 months, then thaw in the fridge overnight.
Q4: Can I freeze slices of Salted Caramel Cheesecake?
Yes! After baking and chilling, slice the Salted Caramel Cheesecake, wrap each piece in plastic wrap and then foil, and freeze in an airtight container. When ready to enjoy, unwrap and thaw overnight in the refrigerator.
Q5: Can I make it without a water bath?
While it’s possible to bake a Salted Caramel Cheesecake without a water bath, it’s not recommended. The water bath helps regulate oven temperature and prevents the cheesecake from cracking or overbaking on the edges while remaining raw in the center.
Q6: What’s the best salt to use for the caramel?
Use high-quality sea salt. Flaky sea salt (like Maldon) works beautifully as a finishing touch. Avoid iodized table salt, which has a sharper taste and can overpower the caramel flavor in your Salted Caramel Cheesecake.
Conclusion
The Salted Caramel Cheesecake is more than just a dessert—it’s an experience. From its buttery graham cracker crust to its luxuriously smooth cream cheese filling and rich, glossy caramel topping, every component is crafted to delight the senses. Whether you’re baking it for a holiday gathering, a birthday celebration, or simply because you crave something decadent, this cheesecake delivers unforgettable results.
What sets the Salted Caramel Cheesecake apart is its perfect balance of sweet and salty. The homemade caramel sauce brings warmth and depth, while the touch of sea salt enhances every bite. It’s indulgent without being overwhelming, and classic without being predictable. Each time you make it, you’re likely to find yourself falling in love with it all over again.
This recipe is ideal for both seasoned bakers and enthusiastic beginners. With a few simple tools, some high-quality ingredients, and a little patience, you can create a Salted Caramel Cheesecake that rivals those from any high-end bakery. And thanks to the helpful suggestions, tips, and FAQs included in this guide, even common baking challenges can be confidently avoided or resolved.
Perhaps the most satisfying part of baking a Salted Caramel Cheesecake is watching your guests take their first bite—the moment their eyes widen and smiles spread across their faces. It’s a dessert that never fails to impress and always leaves a lasting impression.
Whether you choose to enjoy it plain, dress it up with garnishes, or serve it with seasonal fruits, your Salted Caramel Cheesecake will always shine as a centerpiece. It freezes well, stores beautifully, and even tastes better the next day, making it the perfect make-ahead treat.
So go ahead, preheat your oven, gather your ingredients, and treat yourself and your loved ones to a slice (or two) of this sweet, creamy, golden perfection. Your next masterpiece is just a swirl away with this irresistible Salted Caramel Cheesecake.