Easy Starbucks Cake Pop Recipe: Easy Homemade Treats
Cake pops have become a beloved treat, combining the joy of cake and the convenience of a bite-sized snack. Popularized by Starbucks, cake pops are small, round pieces of cake coated in a sweet candy shell and served on a stick. They’re perfect for parties, afternoon snacks, or anytime you crave a little indulgence. The Starbucks cake pop recipe brings this delightful treat into your home kitchen, allowing you to enjoy the same delicious flavors without the coffee shop price tag.
What makes Starbucks cake pops so special is their moist texture, creamy frosting binding the cake crumbs together, and the smooth, glossy chocolate coating. These treats are both fun to make and satisfying to eat. Whether you’re a fan of classic chocolate, vanilla, or more adventurous flavors, cake pops can be customized endlessly. Plus, they’re great for gifting or as party favors since they are portable and visually appealing.
In this blog post, you’ll learn everything you need to know to create Starbucks-style cake pops from scratch. We’ll cover all the necessary ingredients, detailed step-by-step instructions, storage tips, common mistakes to avoid, and expert tricks to ensure your cake pops turn out perfect every time. By the end, you’ll be equipped to make bakery-quality cake pops that will wow your friends and family.
From mixing the cake batter to shaping the pops and decorating them beautifully, this recipe demystifies the process while maintaining the quality and taste Starbucks is known for. Whether you’re baking for a special occasion or just because, homemade cake pops are a delightful way to treat yourself and others.
What You’ll Need
Creating Starbucks-style cake pops at home requires a handful of essential ingredients. Choosing quality components and having them ready will make the process smoother and the results more delicious.
Cake Ingredients
- All-purpose flour: 1 ¾ cups (220 grams), sifted
- Granulated sugar: 1 ¼ cups (250 grams)
- Baking powder: 1 ½ teaspoons, for rise and lightness
- Salt: ½ teaspoon, to balance sweetness
- Unsalted butter: ½ cup (113 grams), softened, for moistness and richness
- Large eggs: 2, at room temperature for better texture
- Vanilla extract: 2 teaspoons for classic flavor
- Whole milk: ¾ cup (180 ml), adds moisture and tenderness
Frosting Ingredients (to bind the cake crumbs)
- Cream cheese: 4 ounces (115 grams), softened
- Unsalted butter: ¼ cup (57 grams), softened
- Powdered sugar: 1 cup (120 grams), sifted for smoothness
- Vanilla extract: 1 teaspoon
Coating and Decoration
- Candy melts or white chocolate chips: 12 ounces (340 grams), for dipping and coating
- Lollipop sticks: 20-25, to hold the cake pops
- Sprinkles, crushed nuts, or colored sugar (optional), for decoration
Tools Needed
- Large mixing bowls
- Electric mixer or stand mixer
- Baking pans (8×8 inch or similar)
- Cooling racks
- Microwave-safe bowls for melting candy melts
- Styrofoam block or cake pop stand for drying
- Parchment paper or silicone mats
By gathering these ingredients and tools ahead of time, you’ll ensure a seamless baking and assembly experience. Using room-temperature dairy ingredients helps with smooth mixing and better texture. Choosing good-quality candy melts or chocolate will enhance the look and taste of your cake pops.
How to Make Starbucks Cake Pops (Including Full Measurements)
Making Starbucks-style cake pops at home involves a few key steps: baking the cake, preparing the frosting, combining them to form cake balls, coating them, and decorating. Follow these detailed instructions to create perfect cake pops that look and taste just like the ones from your favorite coffee shop.
Step 1: Bake the Cake
- Preheat your oven to 350°F (175°C). Grease and flour an 8×8-inch baking pan or line it with parchment paper.
- In a large bowl, whisk together the all-purpose flour, baking powder, and salt. Set aside.
- In another bowl, cream the softened butter and granulated sugar using an electric mixer until light and fluffy, about 3-4 minutes.
- Add the eggs one at a time, beating well after each addition, then mix in the vanilla extract.
- Gradually add the dry ingredients alternately with the whole milk, starting and ending with the dry ingredients. Mix just until combined—avoid overmixing to keep the cake tender.
- Pour the batter into the prepared pan and smooth the top evenly.
- Bake for 30-35 minutes or until a toothpick inserted in the center comes out clean.
- Remove from the oven and allow the cake to cool completely in the pan on a wire rack.
Step 2: Prepare the Frosting
- In a medium bowl, beat the softened cream cheese and butter together until smooth and creamy.
- Gradually add the powdered sugar and vanilla extract, mixing on low speed until fully combined.
- Set the frosting aside.
Step 3: Form the Cake Balls
- Once the cake is completely cooled, crumble it into a large mixing bowl until you have fine crumbs.
- Add about ¾ of the prepared frosting to the cake crumbs. Mix gently but thoroughly until the mixture holds together when pressed. Add more frosting if needed, but avoid making the mixture too wet.
- Scoop about 1 ½ tablespoons of the mixture and roll it into a smooth ball using your hands.
- Place the formed cake balls on a parchment-lined baking sheet.
- Refrigerate the cake balls for at least 1 hour or freeze for 15-20 minutes to firm up before dipping.
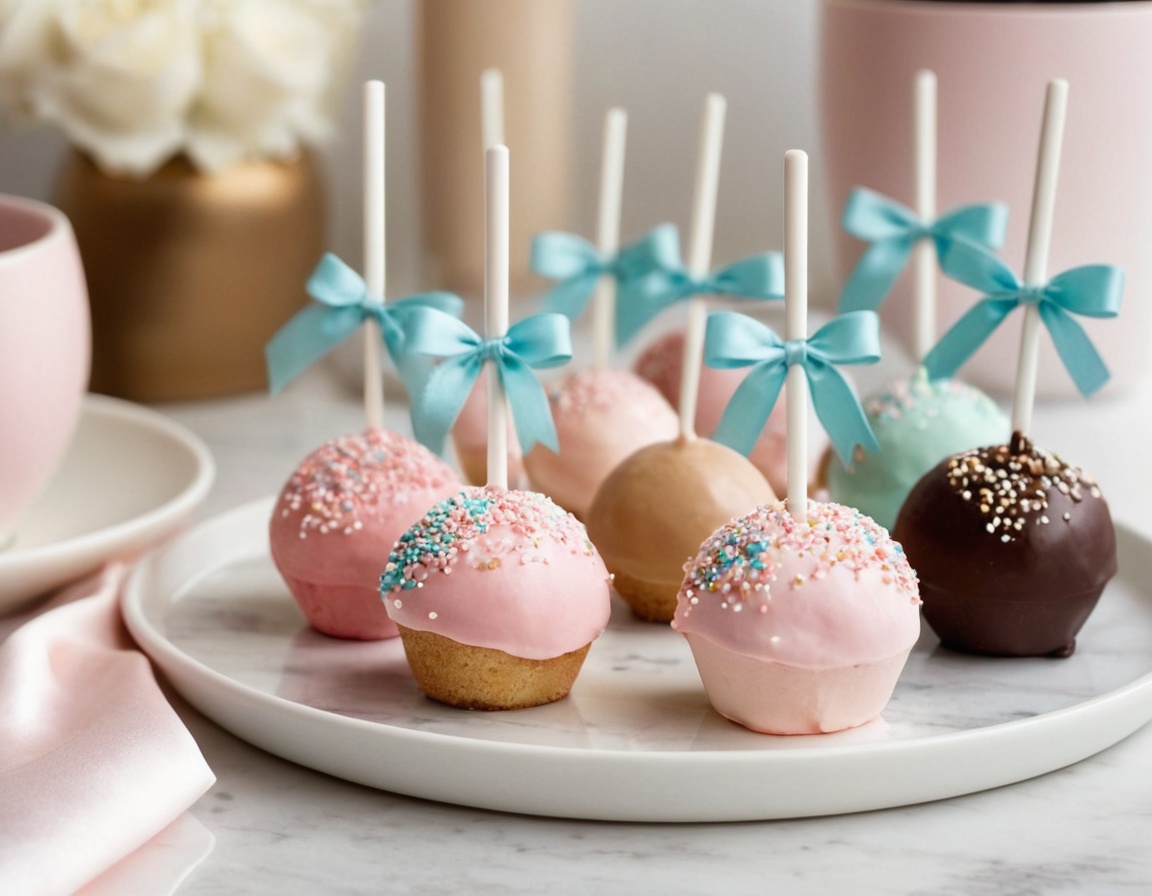
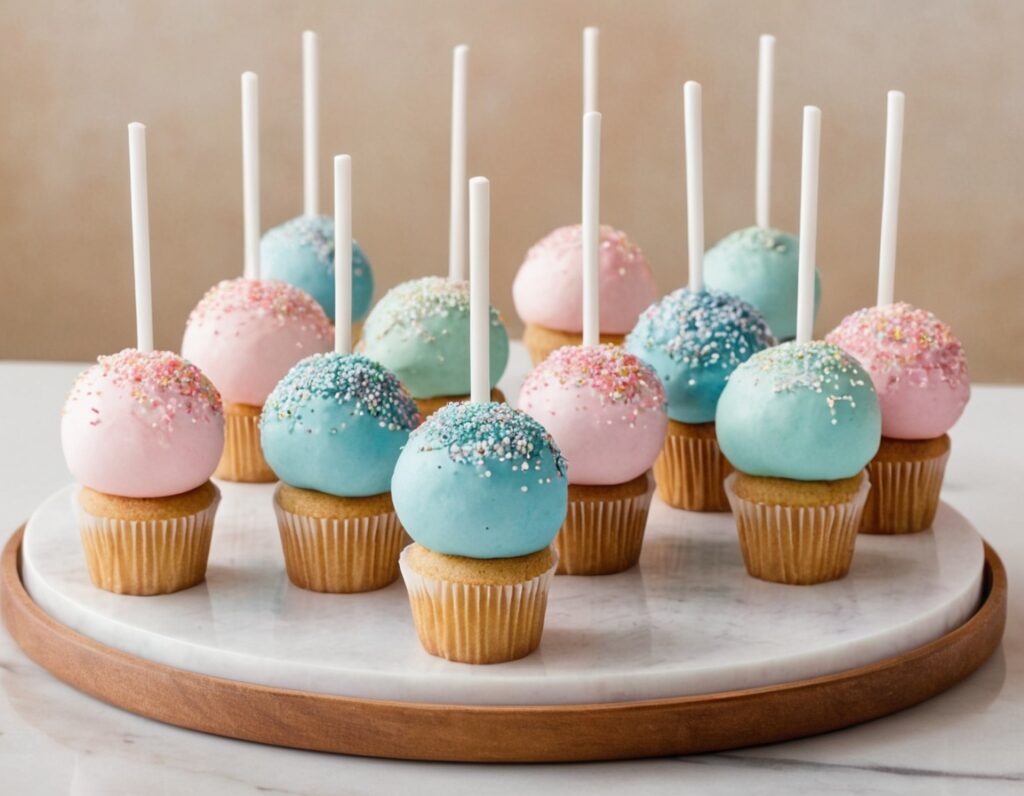
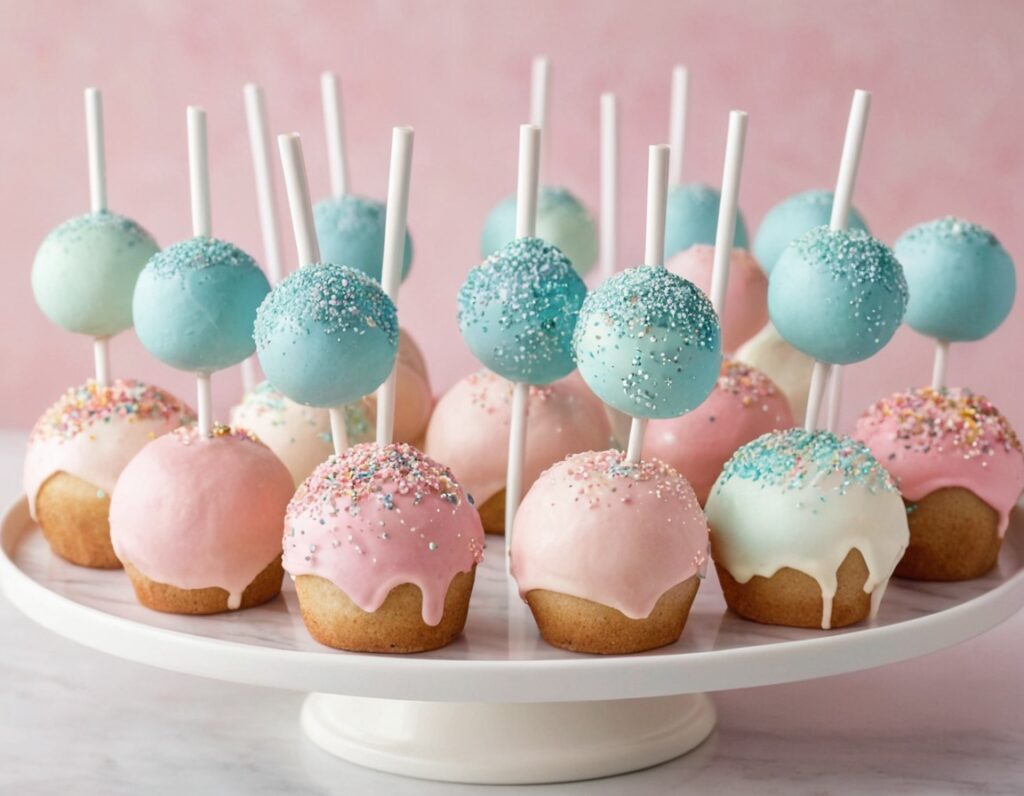
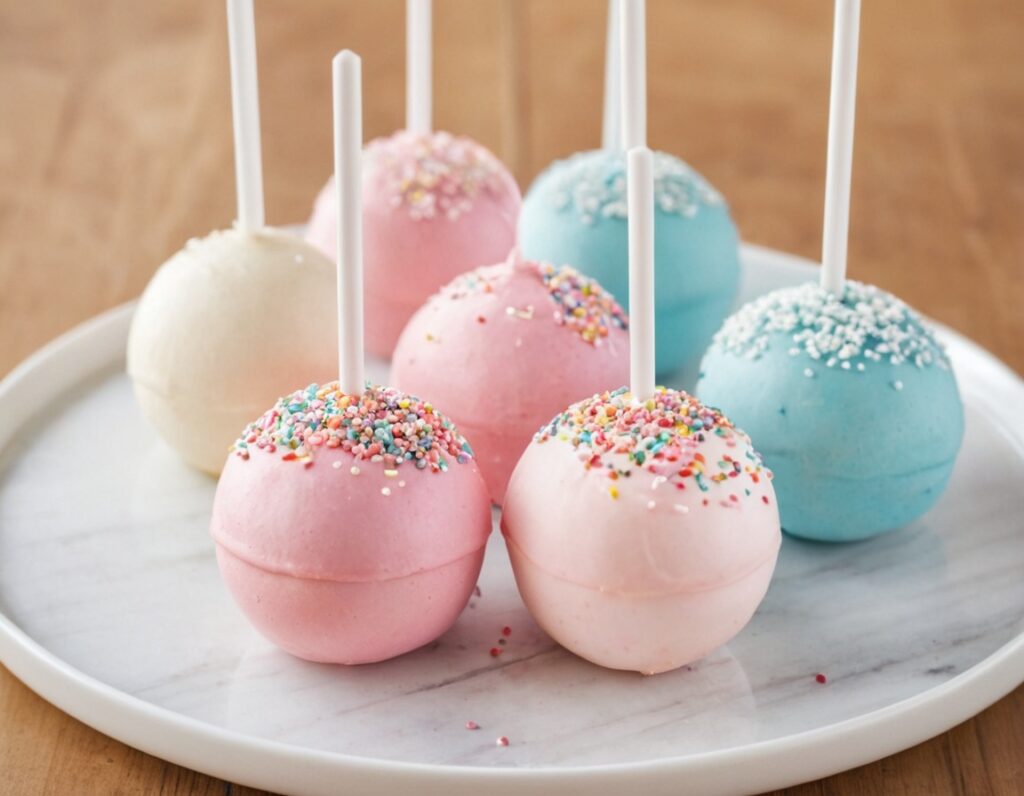
Step 4: Dip and Decorate
- Melt the candy melts or white chocolate chips in a microwave-safe bowl in 30-second intervals, stirring in between until smooth.
- Dip one lollipop stick about halfway into the melted chocolate, then insert it into a cake ball about halfway through. This helps secure the stick.
- Dip the cake ball into the melted chocolate, covering it completely. Gently tap off excess coating.
- While the coating is still wet, decorate with sprinkles, crushed nuts, or colored sugar as desired.
- Insert the cake pop stick into a Styrofoam block or cake pop stand to dry and set.
- Repeat with the remaining cake balls.
Once fully set, your Starbucks-style cake pops are ready to enjoy!
Serving and Storage Tips
Serving cake pops is all about presentation and timing to ensure they taste fresh and look beautiful. Here’s how to serve and store your homemade Starbucks cake pops for the best experience.
Serving Tips
- Presentation: Arrange cake pops in a decorative stand or insert the sticks into a foam block covered with decorative paper or fabric to create an appealing display. You can also place them upright in a pretty vase filled with candies or beads.
- Temperature: Cake pops are best served at room temperature. If refrigerated, allow them to sit out for 10-15 minutes before serving to soften the frosting and enhance flavor.
- Portioning: Since cake pops are bite-sized, they’re perfect for portion control, allowing guests to enjoy a sweet treat without feeling overly full.
- Occasions: Cake pops make excellent party favors, holiday treats, or gifts. Customize colors and decorations to fit themes like birthdays, weddings, or seasonal celebrations.
Storage Tips
- Short-term storage: Keep cake pops in an airtight container at room temperature for up to 2 days. Make sure the container is wide enough so the cake pops don’t touch and lose their shape or decorations.
- Refrigeration: For longer freshness (up to 5 days), store cake pops in the refrigerator in an airtight container. Be aware that refrigeration can sometimes cause condensation when brought back to room temperature, potentially affecting the coating.
- Freezing: Cake pops freeze well for up to 1 month. Wrap each cake pop individually in plastic wrap, then place them in an airtight container or freezer bag. To thaw, move them to the refrigerator overnight before bringing them to room temperature.
- Avoid moisture: Keep cake pops away from humidity and direct sunlight to maintain their crisp coating and prevent melting or sweating.
Following these tips ensures your cake pops remain moist, flavorful, and visually appealing whether you’re serving them immediately or preparing ahead for an event.
Mistakes to Avoid When Making Starbucks Cake Pops
Making cake pops can be a fun and rewarding experience, but there are several common pitfalls that can affect the texture, appearance, and overall success of your cake pops. Knowing what to avoid will help you achieve the perfect results and make the process smoother and more enjoyable.
Using Too Much Frosting
One of the most frequent mistakes is adding too much frosting to the cake crumbs. The frosting acts as a binder to hold the crumbs together, but too much can make the mixture overly soft and sticky. This will make rolling the cake balls difficult and can cause them to fall apart during dipping. Start with about ¾ of your frosting, and only add more if necessary, just enough so the mixture holds together when pressed gently.
Not Chilling the Cake Balls Properly
Skipping or shortening the chilling time for the cake balls can cause a mess during dipping. Cake balls that aren’t firm enough will crumble or fall off the sticks when dipped in the melted candy coating. Chill the cake balls in the refrigerator for at least an hour or freeze for 15-20 minutes before dipping to ensure they are firm and easier to handle.
Overheating the Candy Melts
Candy melts are sensitive and can seize or become grainy if overheated. Always melt candy melts in short intervals (20-30 seconds), stirring well between each session to prevent burning. Avoid adding water to thin the candy melts, as even a small amount of moisture can cause the chocolate to seize. If the coating gets too thick, you can add a tiny bit of vegetable oil or shortening to loosen it.
Dipping Technique Mistakes
Dipping cake pops evenly is an art. Avoid dipping too quickly or at the wrong angle, which can cause the cake pop to fall off the stick or the coating to be uneven. Dip the pop straight down and lift it out slowly while gently tapping the stick on the bowl’s edge to remove excess coating. Let the excess drip off before standing the cake pop upright to dry.
Storing Improperly
Improper storage can ruin your cake pops’ texture and appearance. Avoid stacking cake pops or placing them too close together in storage containers, which can cause decorations to smudge or coating to stick. Use airtight containers, and keep cake pops in a cool, dry place away from heat and humidity.
By avoiding these common mistakes, you’ll be able to create cake pops that look professional, taste delicious, and hold together perfectly.
Tips and Tricks for Perfect Starbucks Cake Pops
Mastering cake pops is easier with a few helpful tips and tricks. These insights from experienced bakers will save you time and improve your results.
Use a Cake Mix for Convenience
If you’re short on time, a high-quality boxed cake mix works well. Simply bake according to package instructions and proceed with the recipe. This shortcut doesn’t sacrifice flavor and is especially useful for beginners.
Use a Cookie Scoop for Uniform Cake Balls
Using a small cookie scoop or melon baller ensures all your cake balls are the same size, which helps them bake and set evenly. Uniform sizing also makes your cake pops look professional and consistent.
Don’t Skip the Stick Dip
Dipping the lollipop stick into melted chocolate before inserting it into the cake ball acts like glue, helping the stick stay firmly in place. This small step reduces the chance of the cake ball sliding off during dipping or drying.
Keep Candy Melts Warm
Candy melts can thicken quickly as you work. Keep the bowl warm by placing it over a pot of gently simmering water (double boiler) or warming it briefly in the microwave as needed. This helps maintain a smooth coating for dipping.
Decorate Quickly
Work swiftly when adding sprinkles or decorations to ensure they stick before the coating hardens. Have your decorations ready nearby to streamline the process.
Practice Makes Perfect
Don’t be discouraged if your first batch isn’t flawless. Cake pops can take a little practice to perfect, especially the dipping technique. Each batch will improve your skills and confidence.
Store Pops Upright
Use a Styrofoam block or specialized cake pop stand to hold the pops upright while drying. This prevents them from touching surfaces and keeps the coating smooth and even.
With these tips and tricks, your homemade Starbucks cake pops will look stunning and taste incredible, impressing everyone who tries them.
Suggestions for Variations and Customizations
One of the best things about cake pops is how versatile they are. You can easily customize your Starbucks cake pops recipe to fit any occasion, preference, or dietary need. Here are some popular ideas to inspire your creativity and help you make these treats your own.
Flavor Variations
While the classic vanilla or chocolate cake pops are delicious, you can experiment with a variety of cake flavors. For example, try red velvet cake for a rich, slightly tangy taste, or lemon cake for a refreshing twist. Spice cake or pumpkin cake pops are perfect for fall celebrations. Simply bake your chosen cake flavor, crumble, and combine with the cream cheese frosting as usual.
Frosting Alternatives
If you prefer, you can swap out the cream cheese frosting for buttercream, chocolate ganache, or even a dairy-free frosting to accommodate allergies or vegan diets. Adjust the amount you use to ensure the cake balls hold together without becoming too moist.
Coating Options
Instead of candy melts or white chocolate, consider using dark chocolate or milk chocolate coatings. You can also tint white chocolate melts with food coloring to create vibrant, colorful cake pops perfect for holidays like Christmas, Halloween, or Valentine’s Day.
Decorations and Toppings
Get creative with decorations! Use crushed nuts, shredded coconut, mini chocolate chips, edible glitter, or themed sprinkles. You can pipe designs on the hardened coating with contrasting melted chocolate or edible markers to personalize each pop.
Dietary Modifications
To make gluten-free cake pops, use gluten-free flour blends for the cake base. For dairy-free or vegan options, use plant-based butter substitutes, dairy-free cream cheese, and vegan-friendly frosting and coatings. This flexibility ensures everyone can enjoy your delicious cake pops.
Themed Cake Pops
Customize cake pops for birthdays, weddings, baby showers, or holidays by matching colors, adding edible toppers, or shaping cake pops into fun forms like hearts or stars using silicone molds.
With so many options, the possibilities for your Starbucks cake pops are endless. Feel free to mix and match flavors, coatings, and decorations to create your signature treat!
FAQ About Starbucks Cake Pops
If you’re new to making cake pops or want to perfect your technique, these frequently asked questions will help answer common concerns and provide useful tips.
How long do cake pops last?
Properly stored, cake pops last about 2 days at room temperature and up to 5 days in the refrigerator. You can also freeze them for up to a month.
Can I make cake pops without cream cheese frosting?
Yes! You can use buttercream or ganache as a binder instead. Just make sure the mixture holds together well but isn’t too wet.
How do I prevent cake pops from falling off the stick?
Dip the stick in melted chocolate before inserting it into the cake ball. Also, chill the cake balls well before dipping.
Can I use store-bought cake?
Absolutely! Using a boxed cake mix or leftover cake works fine, especially if you want to save time.
What can I use instead of candy melts?
White chocolate, milk chocolate, or dark chocolate chips work well. Add a small amount of vegetable oil to thin the chocolate for dipping.
How do I fix cracked or uneven coating?
Make sure the cake balls are chilled enough, and the coating isn’t too thick or too hot. Dip slowly and tap off excess coating gently.
Can I prepare cake pops ahead of time?
Yes! You can make cake balls and freeze them, then dip and decorate later. Fully decorated cake pops can also be refrigerated until serving.
Conclusion
Making Starbucks-style cake pops at home is a delightful and rewarding baking project that yields charming, bite-sized treats perfect for any occasion. With just a few simple ingredients and some basic techniques, you can recreate these iconic sweets in your own kitchen, customizing flavors, coatings, and decorations to suit your tastes and celebrations.
Throughout this guide, we covered everything from the essential ingredients and step-by-step preparation to storage tips, common pitfalls, and handy tricks that ensure your cake pops turn out beautifully every time. Remember, patience and practice are key — mastering the art of dipping and decorating takes a bit of time, but the results are absolutely worth it.
Whether you stick to the classic vanilla or chocolate base, experiment with fun flavor twists, or craft colorful, themed designs, cake pops are versatile treats that bring joy to gatherings, gifts, and everyday indulgences alike. They’re also a wonderful way to get creative in the kitchen with friends and family, making baking both fun and delicious.
By following the tips and suggestions shared here, you can confidently prepare cake pops that look professionally made, taste moist and flavorful, and impress anyone lucky enough to try them. Plus, with the option to store or freeze your cake pops, you can plan ahead for events or enjoy them at your leisure.
So, whether you’re celebrating a special occasion, looking for a fun baking project, or just craving a sweet treat, this Starbucks cake pop recipe is your go-to guide. Gather your ingredients, set aside some time, and dive into the joyful process of making these delectable little desserts that bring smiles with every bite.
Happy baking and enjoy your homemade Starbucks cake pops!